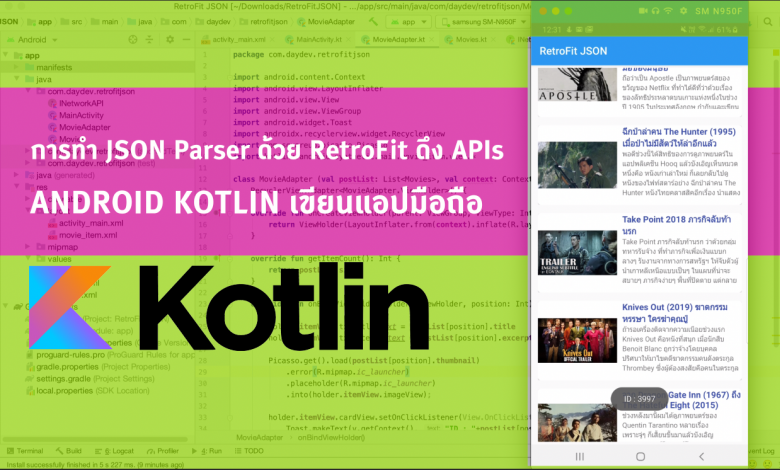
บทเรียนการทำ JSON Parser ด้วยภาษา Kotlin บนแอปพลิเคชัน Android อย่างง่ายสำหรับมือใหม่ด้วย RetroFit2 ของ Square
ถ้าพูดด้ยเรื่องของการทำ JSON Parser ก็จะมีในใจอยู่ 2 ตัวคือ Volley และ RetroFit เจ้าของเดียวกับ Picasso อยู่ที่ว่าชอบตัวไหนอย่าง Volley นั้น Sync Gradle แค่ 1 บรรทัดส่วน RetroFit2 ก็จะ sync หลายบรรทัดหน่อย ตัวอย่างนี้เลยจะลองมาดูที่ RetroFit2 ก่อน
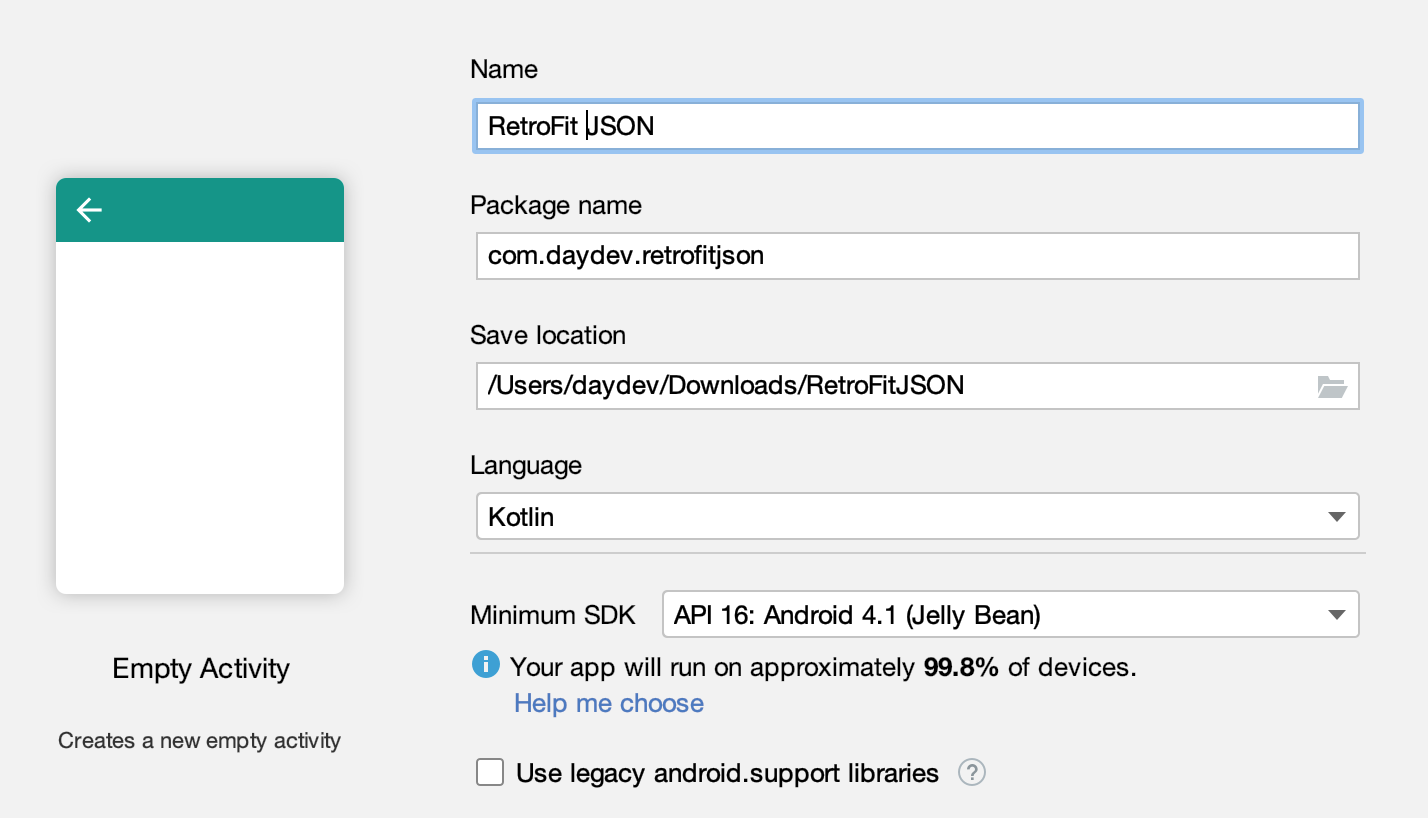
เปิด New Project ขึ้นมาเลยครับตั้งชื่อไรก็ได้, ใช้ Template Activity เป็น Empty Activity ได้เลย ระหว่างนี้เรามาดู JSON ของเราหน่อยดีกว่า ผมได้ทำ API ง่ายๆ รีวิวหนังไว้ให้แล้วที่ URL: https://antchatbot.firebaseio.com/movies.json
ซึ่ง Format JSON จะเป็นดังนี้
[
{
"id": 4053,
"title": "The Great Escape (1963) แหกค่ายมฤตยู การก่อกวนศัตรูถือเป็นภารกิจสำคัญ",
"permalink": "http://www.lovedesigner.net/the-great-escape-1963/",
"content": "นับว่าเป็นหลังที่ได้ดูมาไม่ต่ำกว่า 4-5 รอบ แต่เพิ่งหยิบมาพูดถึงคือรอบที่ 5 สำหรับ The Great Escape แหกค่ายมฤตยู ว่าด้วยเรื่องของการแหกค่ายนาซีของเหล่าทหารฝ่านพันธมิตร<span id=\"more-4053\"></span>\r\n\r\n<span style=\"color: #ff0000;\"><strong><span style=\"text-decoration: underline;\">มีเปิดเผยเนื้อหา:</span> </strong></span>เอาจริงๆ The Great Escape นี่สร้างขึ้นจากข้อมูลเรื่องจริง ดัดแปลงเหตุการณ์เพิ่มอรรถรสของภาพยนตร์เข้าไป พูดถึงการหลบหนีของทหารอังกฤษออกจากค่ายกักกันนาซี Stalag Luft III เมื่อเดือนเมษายน 1944 การหลบหนีถือว่าเป็นอะไรที่น่าเหลือเชื่อของแผนการหลบหนี 76 คนในซึ่งเรื่องจริงหนีได้สำเร็จ 50 คนมี 3 คนได้กลับบ้านบางส่วนถูกส่งกลับไปค่ายใหม่ อีก 23 คนถูกยิงทิ้ง\r\n\r\n<img class=\"aligncenter size-full wp-image-4060\" src=\"http://www.lovedesigner.net/wp-content/uploads/2020/05/1_1GLe9oAXnV3NxK50ga_56A.png\"; alt=\"\" width=\"950\" height=\"347\" />\r\n\r\nThe Great Escape โปรยทั้งภาพเท่ๆ ของ Steve McQueen ในฉากขี่ มอเตอร์ไซค์กระโดดข้ามรั้วค่ายทหาร ซึ่งฉากที่ว่านั้นปรากฏก็แทบจะท้ายเรื่องแล้ว แต่ยอมรับว่า ฉายา The Cooler King ที่หนังยกให้ตัวเอกคนนี้ และ The King of Cool ที่วงการยกให้แก่ Steve McQueen นั้นคือเรื่องจริง อยากจะบอกได้ว่า \"แม่งเอ๊ย...ปู่แม่งเท่จริงๆ\"\r\n\r\n<img class=\"aligncenter size-full wp-image-4063\" src=\"http://www.lovedesigner.net/wp-content/uploads/2020/05/great_escape.jpg\"; alt=\"\" width=\"1920\" height=\"822\" />\r\n\r\nค่ายกักกันเชลย Stalag Luft III นับว่าเป็นค่ายที่นาซีได้เลือก กำลังพล และกฏต่างๆ ไว้จองจำเหล่าเชลยที่ขึ้นชื่อว่าเป็นตัวแสบแห่งการหลบหนี ผู้คุมใหญ่ของค่ายนำโดย Von Luger (Hannes Messemer) ฉายา 'The Kommandant' ซึ่งเปิดฉากโดยการนำเชลยที่จับได้จากที่ต่าง ๆ โดย กลุ่มแกสตาโป และ หน่วย S.S.\r\n\r\n<img class=\"aligncenter size-full wp-image-4061\" src=\"http://www.lovedesigner.net/wp-content/uploads/2020/05/tumblr_m6r7dgbDUo1rqxy97o1_1280.jpg\"; alt=\"\" width=\"831\" height=\"504\" />\r\n\r\n<img class=\"aligncenter size-full wp-image-4057\" src=\"http://www.lovedesigner.net/wp-content/uploads/2020/05/3ee267e94a74a74dda7032850c602f0f.jpg\"; alt=\"\" width=\"1261\" height=\"537\" />\r\n\r\nเชลยฝ่ายพันธมิตรได้ถูกนำมาขังรวมกัน หลายคน มีประวัติการหลบหนีมากมายหลายครั้ง เช่น Ives 'The Mole' (Angus Lennie), ตัวเอกของเรื่อง Hilts 'The Cooler King' (Steve McQueen) หรือ Hendley 'The Scrounger' (James Garner), Danny 'Tunnel King' (Charles Bronson สมัยไม่มีหนวด) และตัวละครหลากฉายาที่เยอะแต่เราก็จะจำได้หมด แค่จำชื่อไม่ได้ ซ้ำค่ายนี้ยังมีระดับผู้การอย่าง Ramsey 'The SBO' (James Donald) และ ผู้การ Bartlett 'Big X' (Richard Attenborough) ที่ได้รับความเคารพจากทหารฝ่ายพันธมิตร ซ้ำเชลยศึกทั้งหมดที่ว่ามาต่างก็มีลูกเล่นแพรวพราวมีความสามารถ ที่หลากหลายแลฉลาดเป็นกรด\r\n\r\n<img class=\"aligncenter size-full wp-image-4062\" src=\"http://www.lovedesigner.net/wp-content/uploads/2020/05/1188640100.jpg\"; alt=\"\" width=\"1088\" height=\"462\" />\r\n\r\nข้อมูลของ Stalag Luft III นั้นน่าสนใจที่เยอรมันเชื่อว่า Stalag Luft III สามารถที่จะควบคุมเหล่าเชลยศึกจอมหลบหนีเหล่านี้ได้ด้วยแผนที่รัดกุม และกฏที่เด็ดขาด แต่แล้วก็พลาดท่าให้กับแผนการของผู้การ Bartlett ที่นำพาเชลยศึกร่วมมือกันขุดอุโมงค์ลับในการหลบหนี และหลบหนีออกไปได้ในเดือน มีนาคม ค.ศ. 1944 (พ.ศ.2487) เป็นเวลา 1 ปี โดยมีผู้หลบหนีจำนวน 76 คน สามารถหลบหนีออกมาได้ในที่สุด แม้ว่าหลายคนถูกจับได้ระหว่างหลบหนี และอีกมากมายหลายคนที่ถูกยิงทิ้งอย่างไร้ความปราณีจากเยอรมันก็ตาม\r\n\r\n<img class=\"aligncenter size-full wp-image-4056\" src=\"http://www.lovedesigner.net/wp-content/uploads/2020/05/5d3e4025100a241b451066d3.jpeg\"; alt=\"\" width=\"750\" height=\"375\" />\r\n\r\nถ้า The Great Escape คือเรื่องราวของการหลบหนีตามชื่อเรื่อง แล้วถ้าในเมื่อตอนจบทหารส่วนใหญ่ถูกต้อนกลับมาค่ายอย่างตัวเอก ผู้กอง Hilts และ Hendley เองก็เป็นหนึ่งในกลุ่มคนที่ถูกจับกลับมา และตัวละครอื่นๆ ที่โดดเด่นอย่าง ผู้การ Bartlett ที่ดูจะเป็นตัวละครที่เด่นมากๆ และลูกน้องกลับถูกยิงตายเกลี้ยงในตอนท้าย มีหนีไปได้ก็ 2-3 คนที่รวม Danny ไอ้แผนการที่ว่านี้มันคือความล้มเหลวนะ แล้วมันจะบอกว่า เป็น The Great Escape ได้ยังไง?! ในมุมมองของผม ไม่ได้หลงประเด็นอะไรครับ The Great Escape นั้นมันบอกเราได้แล้วในบทสนทนาระหว่างผู้การ Ramsey ผู้นำทหารฝ่ายพันธมิตรที่เป็นเชลยศึก กับผู้การ Von Luger ผู้บัญชาการค่าย Stalag Luft III ได้กล่าวไว้ว่า...\r\n\r\n<strong>\"การหลบหนีเป็นหน้าที่และภาระกิจหลักของเชลยศึก เป็นการสร้างภาระหนักหนาอย่างหนึ่งให้กับศัตรู ที่จะต้องใช้กำลังพลจำนวนมากในการเฝ้าระวังควบคุม ภารกิจสำคัญของเชลยศึกคือการก่อกวนศัตรูให้มากที่สุด\"</strong>\r\n\r\nและประโยคนี้ก็เกิดขึ้นอีกครั้งหลังจากที่ ผู้กอง Hilts และ Hendley กลับมาตอนท้ายอีกครั้ง ซึ่งเราก็จะเห็นความต่างที่ว่า Hilts ยังคงเยือกเย็นแล้วหาวิธีก่อกวนศัตรูต่อไป แต่สำหรับ Hendley นั้นเริ่มจะสงสัยกับภารกิจแห่งความสูญเสีย\r\n\r\nแผนการที่หลบหนีออกมา หรือความพยายามของ Hilts และ Ives หลากหลายครั้งถูกจับใหม่ แล้วหนีอีก แม้กระทั่งคำสั่งของผู้การ Bartlett ให้ Hilts หลบหนีออกไปเพื่อสำรวจเส้นทาง แล้วแกล้งโดนจับเข้ามาใหม่ เพื่อมาวางแผนลำเลียงคน เพื่อเป็นการสำรวจลู่ทางภายนอกค่ายเพื่อเป็นเส้นทางหลบหนี Bartlett และเมื่อถูกจับมา ก็จะโดนลงโทษด้วยการถูกขังเดี่ยวเสมอแม้แต่ตอนจบเรื่องจนได้รับฉายา The Cooler King ไปจนถึงการปั่นประสาทของเหล่านักหลบหนีตัวแสบ อุโมงค์ลำเลียงพลของผู้การ Bartlett นับเป็นสร้างภาระให้กับเหล่าทหารเยอรมันตามเจตนารมณ์ที่กล่าวไว้โดยผู้กอง Ramsey ข้างต้นที่เหลือก็อยู่ที่มุมมองของทหาร\r\n\r\n<img class=\"aligncenter size-full wp-image-4059\" src=\"http://www.lovedesigner.net/wp-content/uploads/2020/05/Steve-McQueen.jpg\"; alt=\"\" width=\"1200\" height=\"900\" />\r\n\r\nฉากเด็ดของหนังเรื่องนี้ ฉากการก่อกวนเพื่อเบี่ยงเบนความสนใจของ Hilts ตัวเองกำลังจะหนีข้ามพรมแดนของเยอรมันได้แล้ว แต่เพื่อช่วยเพื่อนจึงเลือกเบี่ยงเบนความสนใจ ด้วยฉากขับรถมอร์เตอร์ไซด์ ซิ่งผาดโผนเพื่อสร้างความก่อกวนพวกทหารเยอรมันให้มาไล่ล่าตัวเอง แล้วกลุ่มที่ไล่ล่าก็ S.S. และ กลุ่มแกสตาโป ซึ่งถ้ามาดูยุคนี้ก็คงแสนธรรมดา ตามกาลเวลาแต่ถ้ามองไปที่ยุคนั้น ฉากเหล่านี้คือการสร้างความตื่นเต้นให้กับคนดูได้สุดๆ และเท่โคตรๆ\r\n\r\n<img class=\"aligncenter size-full wp-image-4055\" src=\"http://www.lovedesigner.net/wp-content/uploads/2020/05/3be90735a2ce10f6ec23f575be8ba035.jpg\"; alt=\"\" width=\"620\" height=\"413\" />\r\n\r\n<strong>ภารกิจสำคัญของเชลยศึกคือการก่อกวนศัตรูให้มากที่สุด</strong>\r\n\r\nบทสรุปเราจะเห็นว่า แม้เชลยศึกส่วนใหญ่จะถูกยิงทิ้ง และสร้างความสูญเสียแก่คนที่ถูกจับกลับมาแต่ บทสนทนาของ Von Luger ที่ถูกปลดย้ายเพราะไม่มีศักยภาพพอจะคุมเชลยได้บอกกับ Hilts ในตอนท้ายที่ว่า Hilts จะคงจะได้เห็นกำแพงเบอร์ลินก่อนเขาคงจะจริงเป็นการบอกให้คนดูรู้ว่าจริงแล้วมันจบแบบ Happy Ending นะ\r\n\r\n<img class=\"aligncenter wp-image-4058\" src=\"http://www.lovedesigner.net/wp-content/uploads/2020/05/image.jpg\"; alt=\"\" width=\"362\" height=\"497\" />\r\n\r\nตัวหนังเป็นภาพยนตรืคลาสสิค หรือหนังเก่า ดังนั้นลดอคติแล้วดูนะครับ ค่อนข้างสนุก ไม่เครียด บางฉากขำด้วยด้วยจัดเข้าหมวด Comedy ได้สบาย และอย่างที่บอก ปู่ Steve McQueen นี่แม่งเท่จริงๆ ไอดอลเลย\r\n<blockquote><strong>9.5/10 ดูซะ</strong></blockquote>",
"excerpt": "นับว่าเป็นหลังที่ได้ดูมาไม่ต่ำกว่า 4-5 รอบ แต่เพิ่งหยิบมาพูดถึงคือรอบที่ 5 สำหรับ The Great Escape แหกค่ายมฤตยู ว่าด้วยเรื่องของการแหกค่ายนาซีของเหล่าทหารฝ่านพันธมิตร มีเปิดเผยเนื้อหา: เอาจริงๆ The Great Escape นี่สร้างขึ้นจากข้อมูลเรื่องจริง ดัดแปลงเหตุการณ์เพิ่มอรรถรสของภาพยนตร์เข้าไป พูดถึงการหลบหนีของทหารอังกฤษออกจากค่ายกักกันนาซี Stalag Luft III เมื่อเดือนเมษายน 1944 การหลบหนีถือว่าเป็นอะไรที่น่าเหลือเชื่อของแผนการหลบหนี 76 คนในซึ่งเรื่องจริงหนีได้สำเร็จ 50 คนมี 3 คนได้กลับบ้านบางส่วนถูกส่งกลับไปค่ายใหม่ อีก 23 คนถูกยิงทิ้ง The Great Escape โปรยทั้งภาพเท่ๆ ของ Steve McQueen ในฉากขี่ มอเตอร์ไซค์กระโดดข้ามรั้วค่ายทหาร ซึ่งฉากที่ว่านั้นปรากฏก็แทบจะท้ายเรื่องแล้ว แต่ยอมรับว่า ฉายา The Cooler King ที่หนังยกให้ตัวเอกคนนี้ และ The King of Cool &hellip;",
"date": "2020-05-01 18:53:09",
"author": "บัญญพนต์ พูลสวัสดิ์",
"thumbnail": "http://www.lovedesigner.net/wp-content/uploads/2020/05/covertge.png",
"categories": [
"Action",
"Comedy",
"Latest"
],
"tags": [
"steve mcqeen",
"The Great Escape"
]
}
]
เราจะทำ List บน RecyclerView กันโดยใช้ Key เท่าที่จำเป็นคือ id, title, thumbnail และ excerpt ครับผม
เอาล่ะเปิด Project Solution หลังจากนั้นให้ทำการเลือก Module Gradle ครับ
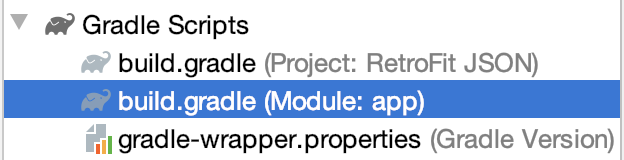
ทำการ Sync Gradle ดังนี้:
implementation 'com.squareup.retrofit2:retrofit:2.4.0'
implementation 'com.squareup.retrofit2:converter-gson:2.4.0'
implementation 'com.squareup.retrofit2:adapter-rxjava2:2.4.0'
implementation 'io.reactivex.rxjava2:rxandroid:2.0.1'
implementation 'com.squareup.retrofit2:converter-gson:2.1.0'
implementation 'com.squareup.picasso:picasso:2.71828'
ไหนๆ ก็เผื่อ ใช้ RecyclerView และ CardView แล้วก็ทำการ Sync Gradle เผื่อไปเลยไม่ต้องไปดาวน์โหลดบนหน้า Layout หรอกเสียเวลา
implementation 'androidx.recyclerview:recyclerview:1.1.0'
implementation 'androidx.cardview:cardview:1.0.0'
โอเคครับเมื่อ sync gradle เสร็จแล้วให้เราไปสร้าง Model กันหน่อย

โดยคลิกเลือก New Kotlin Class ขึ้นมาชื่อว่า: Movies จะได้ไฟล์ Movies.kt

ให้เรากำหนด Data ของมันเลยครับ ตามนี้:
import com.google.gson.annotations.SerializedName

class Movies (
    @SerializedName("id") val id: Int,
    @SerializedName("thumbnail") val thumbnail: String,
    @SerializedName("title") val title: String,
    @SerializedName("excerpt") val excerpt: String
)
ดัง Key ตามที่เราเลือกไว้เลยครับ, ต่อมาให้เราสร้าง Kotlin Class/File อีกรอบแต่เลือกเป็น Interface นะครับตั้งชื่อว่า INetworkAPI

ใส่ Code ของ Interface ดังนี้:
package com.daydev.retrofitjson

import io.reactivex.Observable
import retrofit2.http.GET

interface INetworkAPI {

    @GET("movies.json")
    fun getAllPosts(): Observable<List<Movies>>
}
@GET นั้นจินตนาการว่ามันคือ API Method เรียกแต่ละ JSON หรือแต่ละชุดเช่น https://api.com เราต้องการ
- เรียก https://api.com/users เราก็ใส่แค่ “/users”
- หรือ https://api.com/posts ก็เลือก “/posts”
ตัวอย่างที่เราจะทำคือ: https://antchatbot.firebaseio.com/movies.json เราก็จะเลือกแค่ “movies.json” เพื่อที่จะได้เรียก url แค่ “https://antchatbot.firebaseio.com/” ในหน้า MainActivity.kt นั่นเองครับ
ทีนี้อย่างที่เคยบอกว่า RecyclerView นั้นต้องใช้ Adapter ในการแปลงข้อมูล JSON มาเป็น Objects ให้ทำการสร้าง Class ใหม่ชื่อว่า MovieAdapter
import android.content.Context
import android.view.LayoutInflater
import android.view.View
import android.view.ViewGroup
import android.widget.Toast
import androidx.recyclerview.widget.RecyclerView
import com.squareup.picasso.Picasso
import kotlinx.android.synthetic.main.movie_item.view.*

class MovieAdapter (val postList: List<Movies>, val context: Context?) :
    RecyclerView.Adapter<MovieAdapter.ViewHolder>() {

    override fun onCreateViewHolder(parent: ViewGroup, viewType: Int): ViewHolder {
        return ViewHolder(LayoutInflater.from(context).inflate(R.layout.movie_item, parent, false))
    }

    override fun getItemCount(): Int {
        return postList.size
    }

    override fun onBindViewHolder(holder: ViewHolder, position: Int) {

        holder.itemView.txtTitle.text = postList[position].title
        holder.itemView.txtExcerpt.text = postList[position].excerpt

        Picasso.get().load(postList[position].thumbnail)
            .error(R.mipmap.ic_launcher)
            .placeholder(R.mipmap.ic_launcher)
            .into(holder.itemView.imageView);

        holder.itemView.cardView.setOnClickListener(View.OnClickListener { v ->
            Toast.makeText(v.getContext(), "ID : "+postList[position].id, Toast.LENGTH_SHORT).show();
        })
    }
    class ViewHolder(view: View) : RecyclerView.ViewHolder(view)
}
ผมทำ Toast เวลาแตะที่ CardView จะเห็นว่ามี Alert บอกว่า id ของบทความคืออะไร
holder.itemView.cardView.setOnClickListener(View.OnClickListener { v -> Toast.makeText(v.getContext(), "ID : "+postList[position].id, Toast.LENGTH_SHORT).show(); })
ส่วนของ ImageView นั้นเราใช้ Cache Handle จาก Picasso เจ้าเก่าครับ
Picasso.get().load(postList[position].thumbnail)
.error(R.mipmap.ic_launcher)
.placeholder(R.mipmap.ic_launcher)
.into(holder.itemView.imageView);
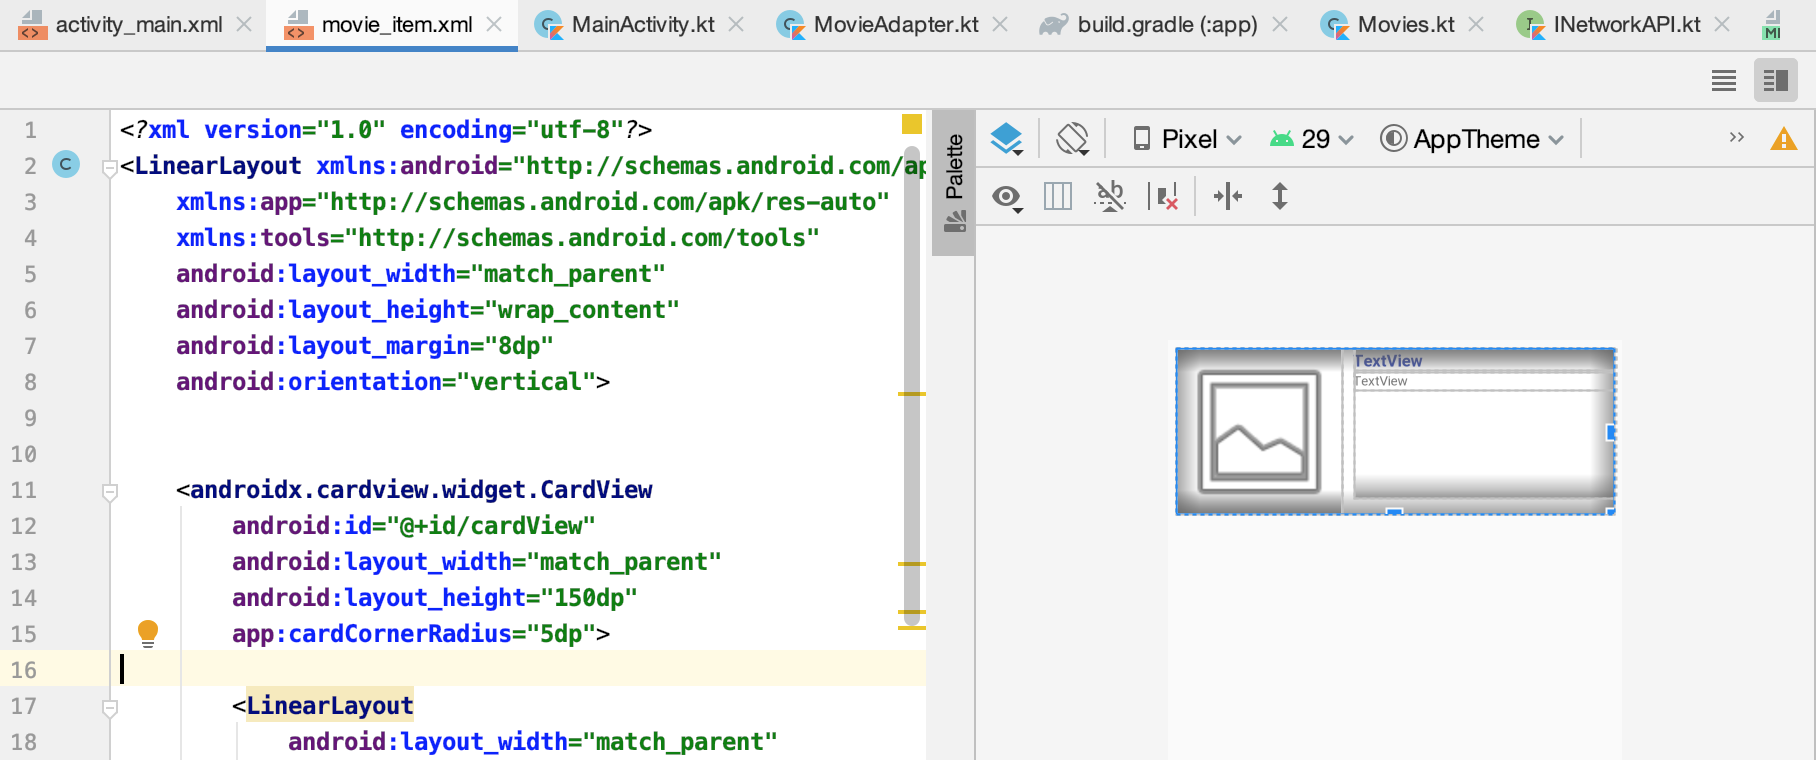
ใน Code นั้นจะมีสีแดงมากมายนั่นคือ Layout ครับให้สร้าง Layout Resource File ใหม่ขึ้นมาคือ movie_item.xml ใส่ XML ดังนี้:
<?xml version="1.0" encoding="utf-8"?>
<LinearLayout xmlns:android="http://schemas.android.com/apk/res/android"
    xmlns:app="http://schemas.android.com/apk/res-auto"
    xmlns:tools="http://schemas.android.com/tools"
    android:layout_width="match_parent"
    android:layout_height="wrap_content"
    android:layout_margin="8dp"
    android:orientation="vertical">


    <androidx.cardview.widget.CardView
        android:id="@+id/cardView"
        android:layout_width="match_parent"
        android:layout_height="150dp"
        app:cardCornerRadius="5dp">

        <LinearLayout
            android:layout_width="match_parent"
            android:layout_height="match_parent"
            android:orientation="horizontal">

            <LinearLayout
                android:layout_width="299dp"
                android:layout_height="match_parent"
                android:layout_weight="1"
                android:orientation="vertical">

                <ImageView
                    android:id="@+id/imageView"
                    android:layout_width="match_parent"
                    android:layout_height="match_parent"
                    android:layout_weight="1"
                    android:scaleType="fitCenter"
                    tools:srcCompat="@android:drawable/ic_menu_gallery" />

            </LinearLayout>

            <LinearLayout
                android:layout_width="match_parent"
                android:layout_height="135dp"
                android:layout_marginLeft="10dp"
                android:layout_weight="1"
                android:orientation="vertical">

                <TextView
                    android:id="@+id/txtTitle"
                    android:layout_width="match_parent"
                    android:layout_height="wrap_content"
                    android:text="TextView"
                    android:textColor="@color/colorPrimaryDark"
                    android:textSize="15sp"
                    android:textStyle="bold" />

                <TextView
                    android:id="@+id/txtExcerpt"
                    android:layout_width="match_parent"
                    android:layout_height="wrap_content"
                    android:text="TextView"
                    android:textSize="12sp" />

            </LinearLayout>
        </LinearLayout>
    </androidx.cardview.widget.CardView>
</LinearLayout>
ต่อมาให้เราไปแก้ไข activity_main ครับให้สร้าง RecyclerView ลากเข้าไป
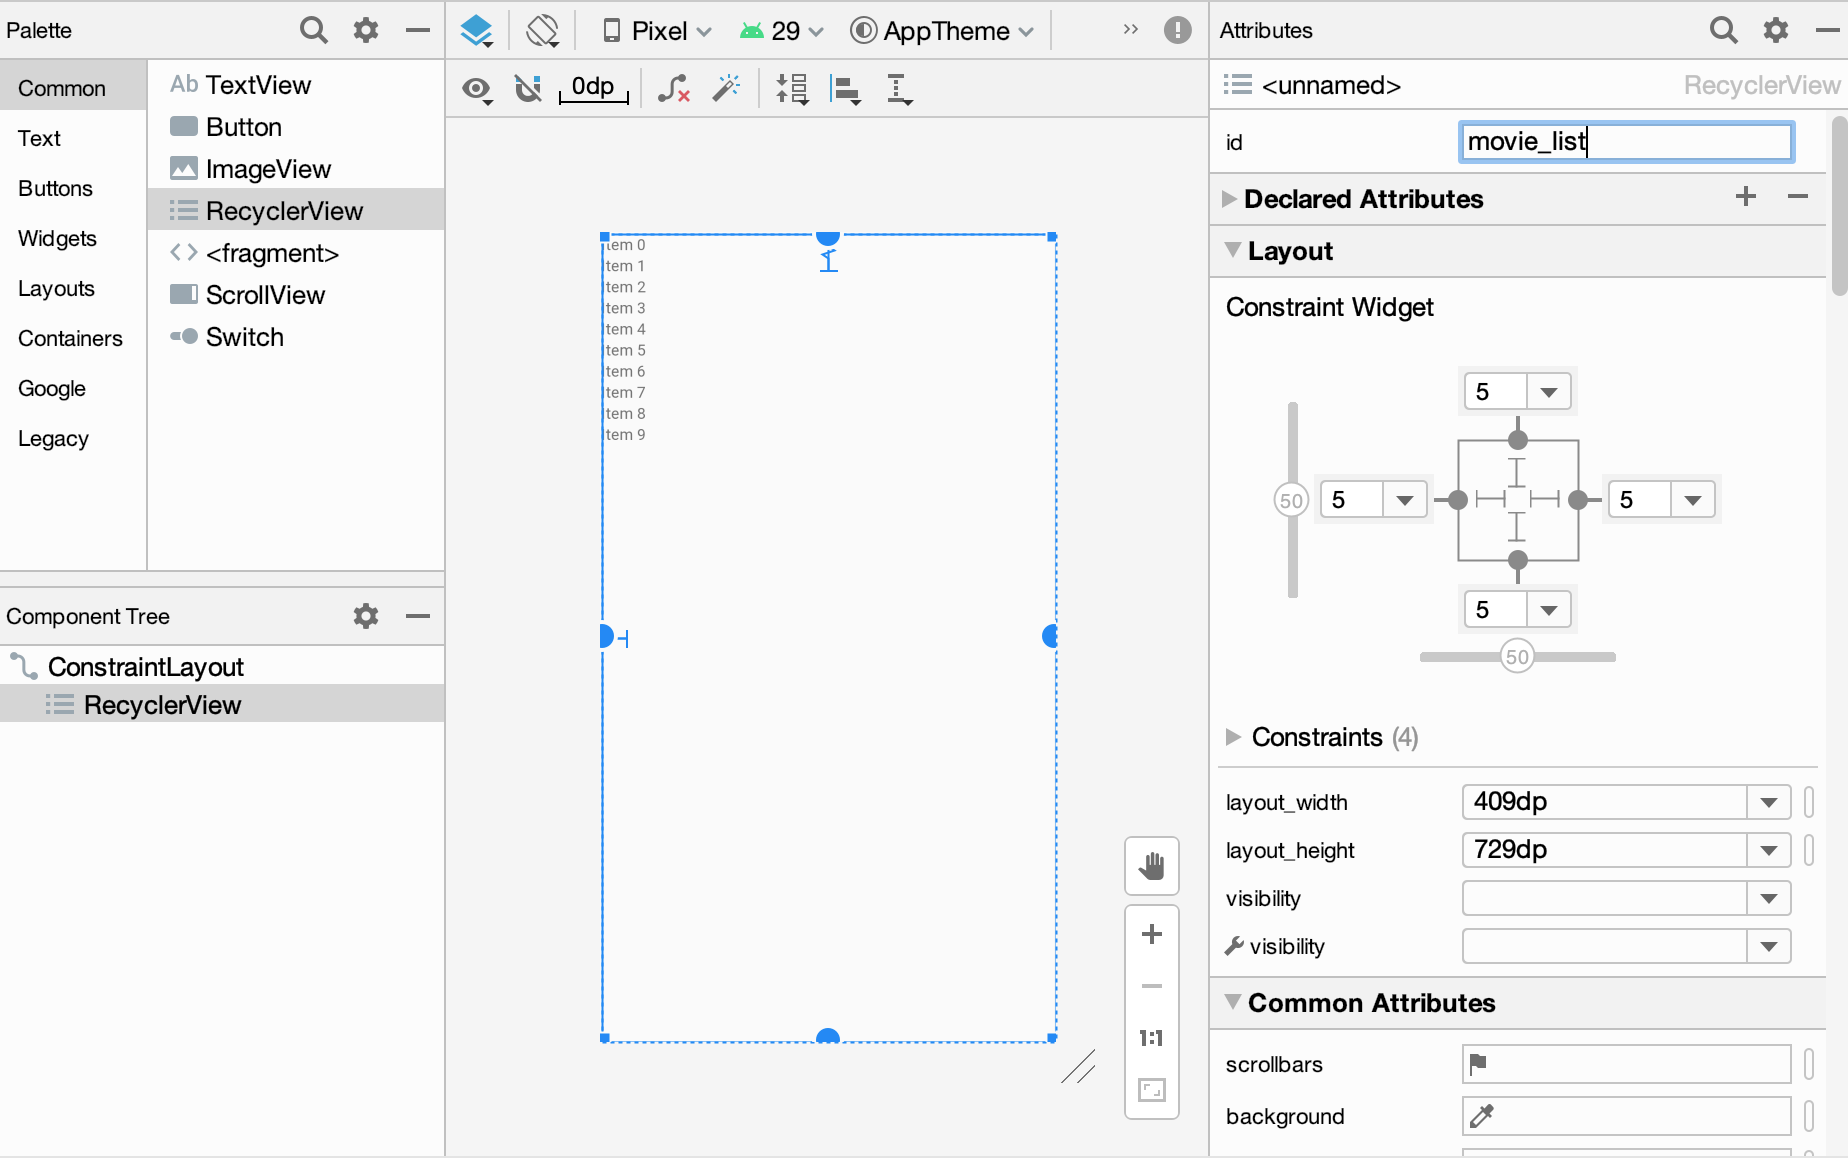
ตั้งชื่อว่า movie_list มี XML ดังนี้:
<?xml version="1.0" encoding="utf-8"?>
<androidx.constraintlayout.widget.ConstraintLayout xmlns:android="http://schemas.android.com/apk/res/android"
    xmlns:app="http://schemas.android.com/apk/res-auto"
    xmlns:tools="http://schemas.android.com/tools"
    android:layout_width="match_parent"
    android:layout_height="match_parent"
    tools:context=".MainActivity">

    <androidx.recyclerview.widget.RecyclerView
        android:id="@+id/movie_list"
        android:layout_width="0dp"
        android:layout_height="0dp"
        android:layout_marginStart="5dp"
        android:layout_marginLeft="5dp"
        android:layout_marginTop="5dp"
        android:layout_marginEnd="5dp"
        android:layout_marginRight="5dp"
        android:layout_marginBottom="5dp"
        app:layout_constraintBottom_toBottomOf="parent"
        app:layout_constraintEnd_toEndOf="parent"
        app:layout_constraintStart_toStartOf="parent"
        app:layout_constraintTop_toTopOf="parent" />
</androidx.constraintlayout.widget.ConstraintLayout>
เปิด Class ของ MainActivity ขึ้นมาประกาศตัวแปรตามนี้:
var recyclerView: RecyclerView? = null
ที่ OnCreate() ให้ใส่คำสั่งต่อไปนี้ครับ
recyclerView = findViewById(R.id.movie_list) as RecyclerView
recyclerView!!.layoutManager =  LinearLayoutManager(this);
val url = "https://antchatbot.firebaseio.com/"
url จะไปทำงานร่วมกับ Interface ชื่อ INetworkAPI ที่เรียก GET(“movie.json”) นั่นเอง, มาดูส่วนของ RetroFit กันหน่อย
val retrofit = Retrofit.Builder().addConverterFactory(
                GsonConverterFactory.create(
                GsonBuilder().create()))
            .addCallAdapterFactory(RxJava2CallAdapterFactory.create())
            .baseUrl(url).build()

        val postsApi = retrofit.create(INetworkAPI::class.java)
        val response = postsApi.getAllPosts()
        response.observeOn(AndroidSchedulers.mainThread()).subscribeOn(IoScheduler()).subscribe {
            recyclerView!!.adapter = MovieAdapter(it, this)
        }
นี่คือภาพรวมของ MainActivity.kt ครับ:
import androidx.appcompat.app.AppCompatActivity
import android.os.Bundle
import androidx.recyclerview.widget.LinearLayoutManager
import androidx.recyclerview.widget.RecyclerView
import com.google.gson.GsonBuilder
import io.reactivex.android.schedulers.AndroidSchedulers
import io.reactivex.internal.schedulers.IoScheduler
import retrofit2.Retrofit
import retrofit2.adapter.rxjava2.RxJava2CallAdapterFactory
import retrofit2.converter.gson.GsonConverterFactory

class MainActivity : AppCompatActivity() {
    var recyclerView: RecyclerView? = null
    override fun onCreate(savedInstanceState: Bundle?) {
        super.onCreate(savedInstanceState)
        setContentView(R.layout.activity_main)
        recyclerView = findViewById(R.id.movie_list) as RecyclerView
        recyclerView!!.layoutManager =  LinearLayoutManager(this);
        val url = "https://antchatbot.firebaseio.com/"
        val retrofit = Retrofit.Builder().addConverterFactory(
                GsonConverterFactory.create(
                GsonBuilder().create()))
            .addCallAdapterFactory(RxJava2CallAdapterFactory.create())
            .baseUrl(url).build()

        val postsApi = retrofit.create(INetworkAPI::class.java)
        val response = postsApi.getAllPosts()
        response.observeOn(AndroidSchedulers.mainThread()).subscribeOn(IoScheduler()).subscribe {
            recyclerView!!.adapter = MovieAdapter(it, this)
        }
    }
}
ไปที่ AndroidManiFest.xml ไปเปิด Permission ของ INTERNET
<uses-permission android:name="android.permission.INTERNET"/>
เสียบสาย USB แล้วลองทดสอบแอปของเราดูครับ:
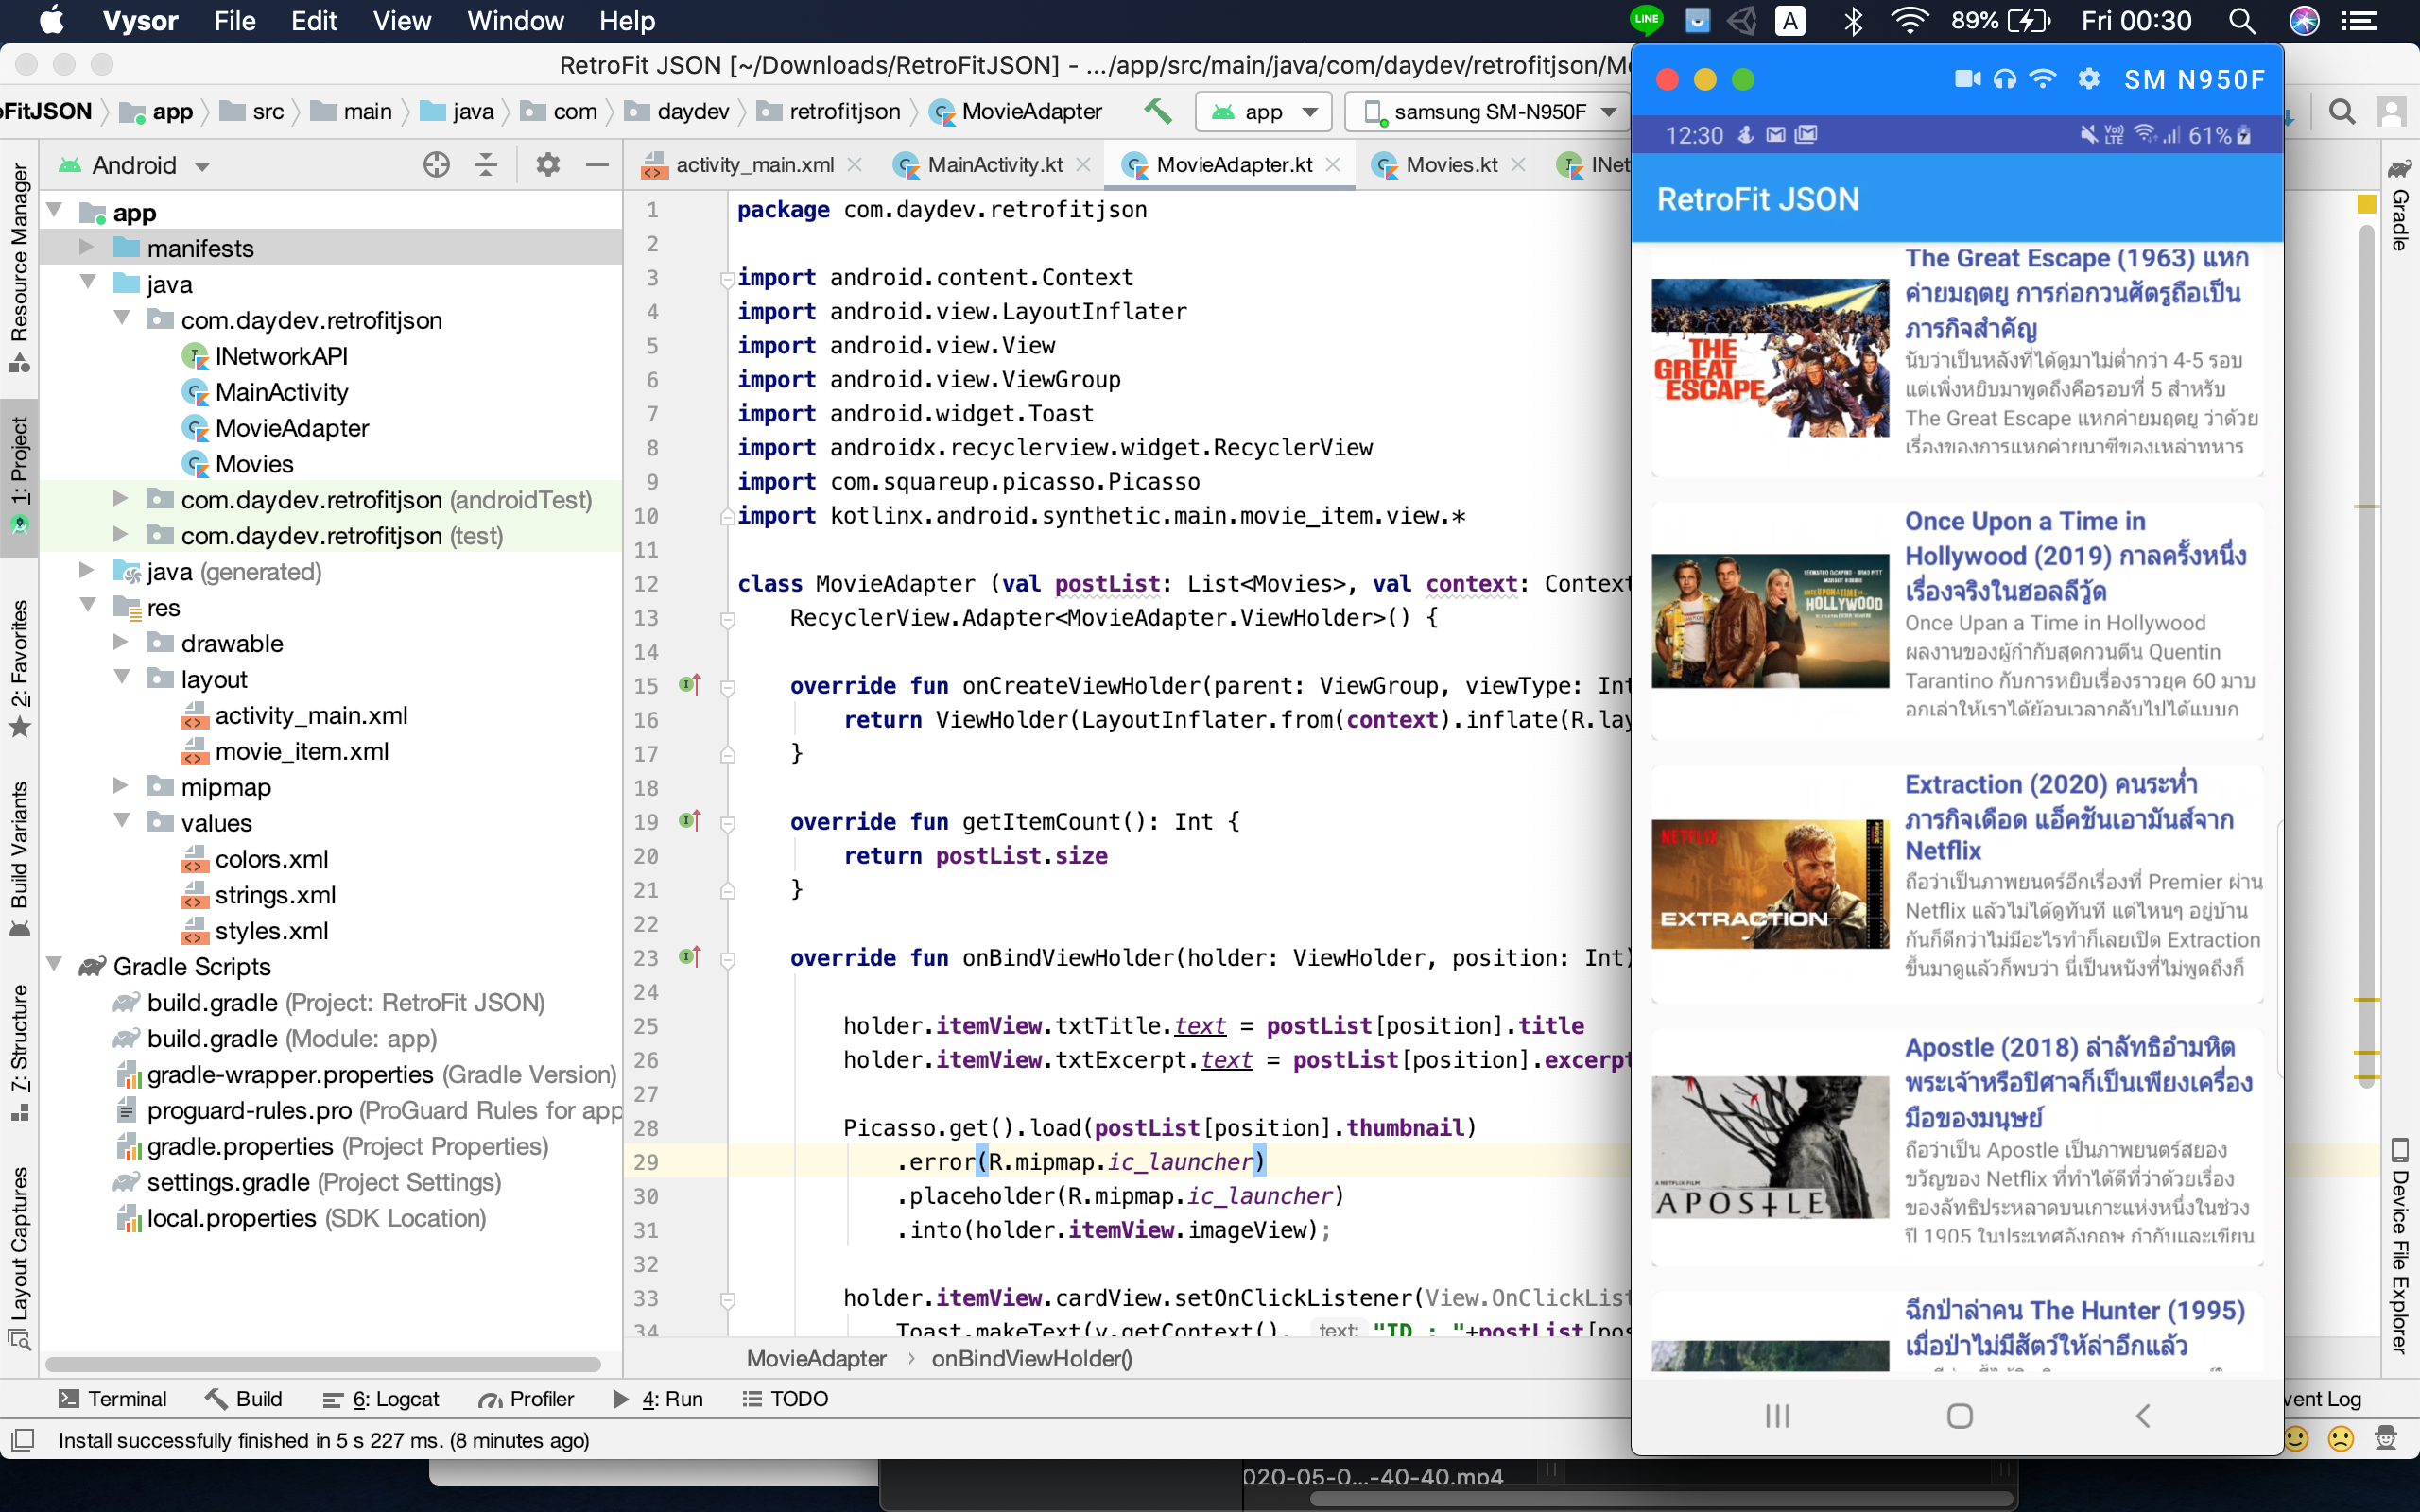
ลองแตะที่ CardViewดูหน่อย:
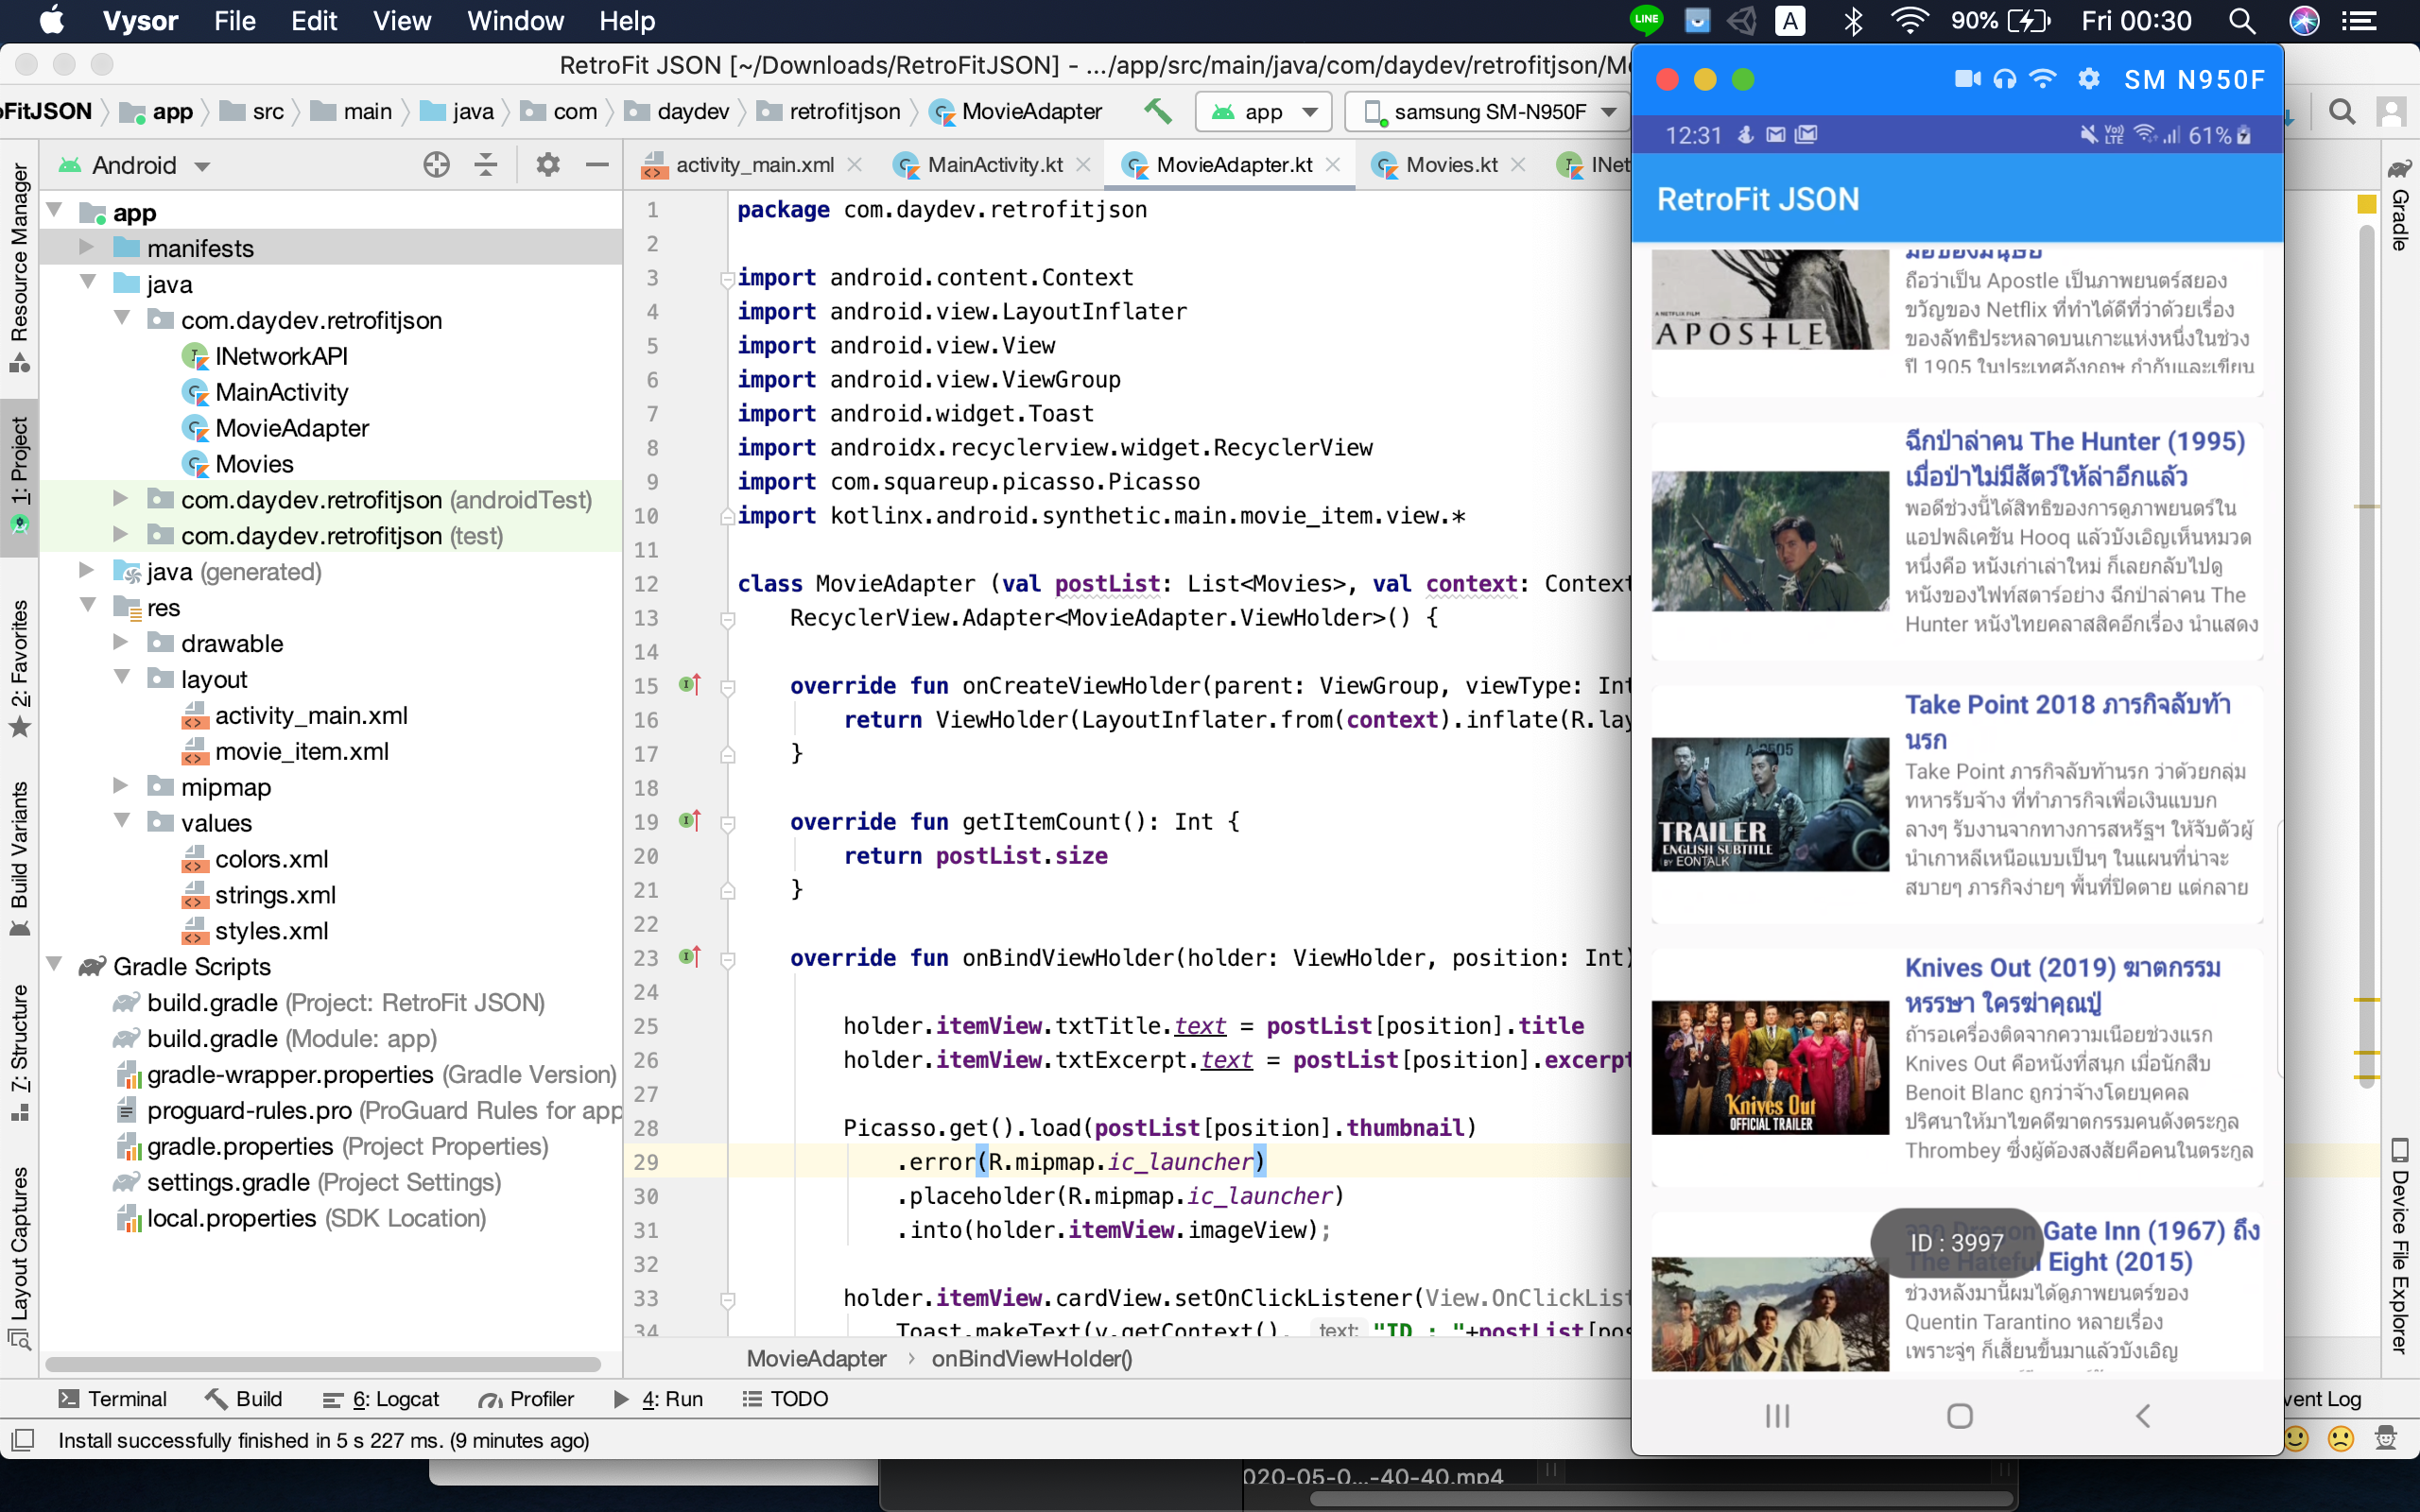
มี Toast เด้งขึ้นมา แสดง id ของ API
เขียน Code ง่ายขึ้นทันที สำหรับคนที่กำลังทำ JSON Parser ร่วมกับ API ครับ ลองทำกันดูนะครับ
ปล. การใช้ RetroFit เรียก API ต้องใช้ SSL (https://) นะครับ