เมื่อวันที่ 17 พค.ที่ผ่านมาในงาน Google I/O ทาง Jetbrain ผู้พัฒนา IDE เจ๋งๆได้เปิดตัว Class Support ด้วยภาษาใหม่คือ Kotlin เรามาเริ่มต้นเรียนรู้กันดีกว่า
สำหรับคนที่สนใจการพัฒนา แอพพลิเคชัน Android ด้วยภาษา Java สามารถทบทวนบทเรียนการพัฒนาได้ที่นี่: https://www.daydev.com/category/developer/android-developer
ภาษา Kotlin นั้นต้องมีการตั้งค่าผ่าน Android Studio เวอร์ชันล่าสุดครับ โครงสร้างภาษา Kotlin นั้นเหมือน Swift และ Python ที่รู้สึกว่าจะกลายเป็นมาตรฐานใหม่ของ Syntax ทั่วโลกไปเสียแล้วมั้ง? เพราะ ภาษา Go ก็คล้ายๆ กัน
เริ่มต้นพัฒนาแอพพลิเคชันด้วยภาษา Kotlin;
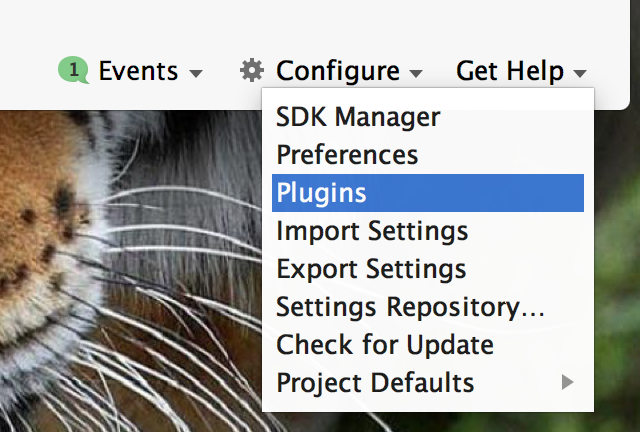
เราจำเป็นต้องตั้งค่าการพัฒนาโดยการไปปลุกเจ้า Kotlin ให้ตื่นจากการหลับไหลก่อน ให้เปิด Android Studio ขึ้นมาไปที่เมนู ด้านขวาล่างเลือก Configure -> Plugins
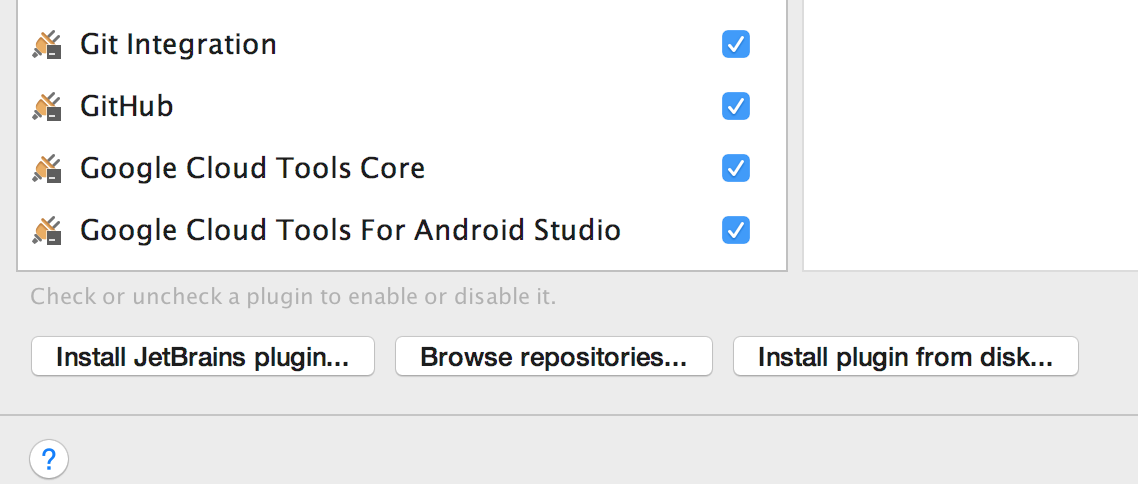
เมื่อเข้าไปที่หน้า Plugin แล้วให้เลือก Browse repositories บริเวณปุ่มตรงกลางด้านล่างหน้าต่าง
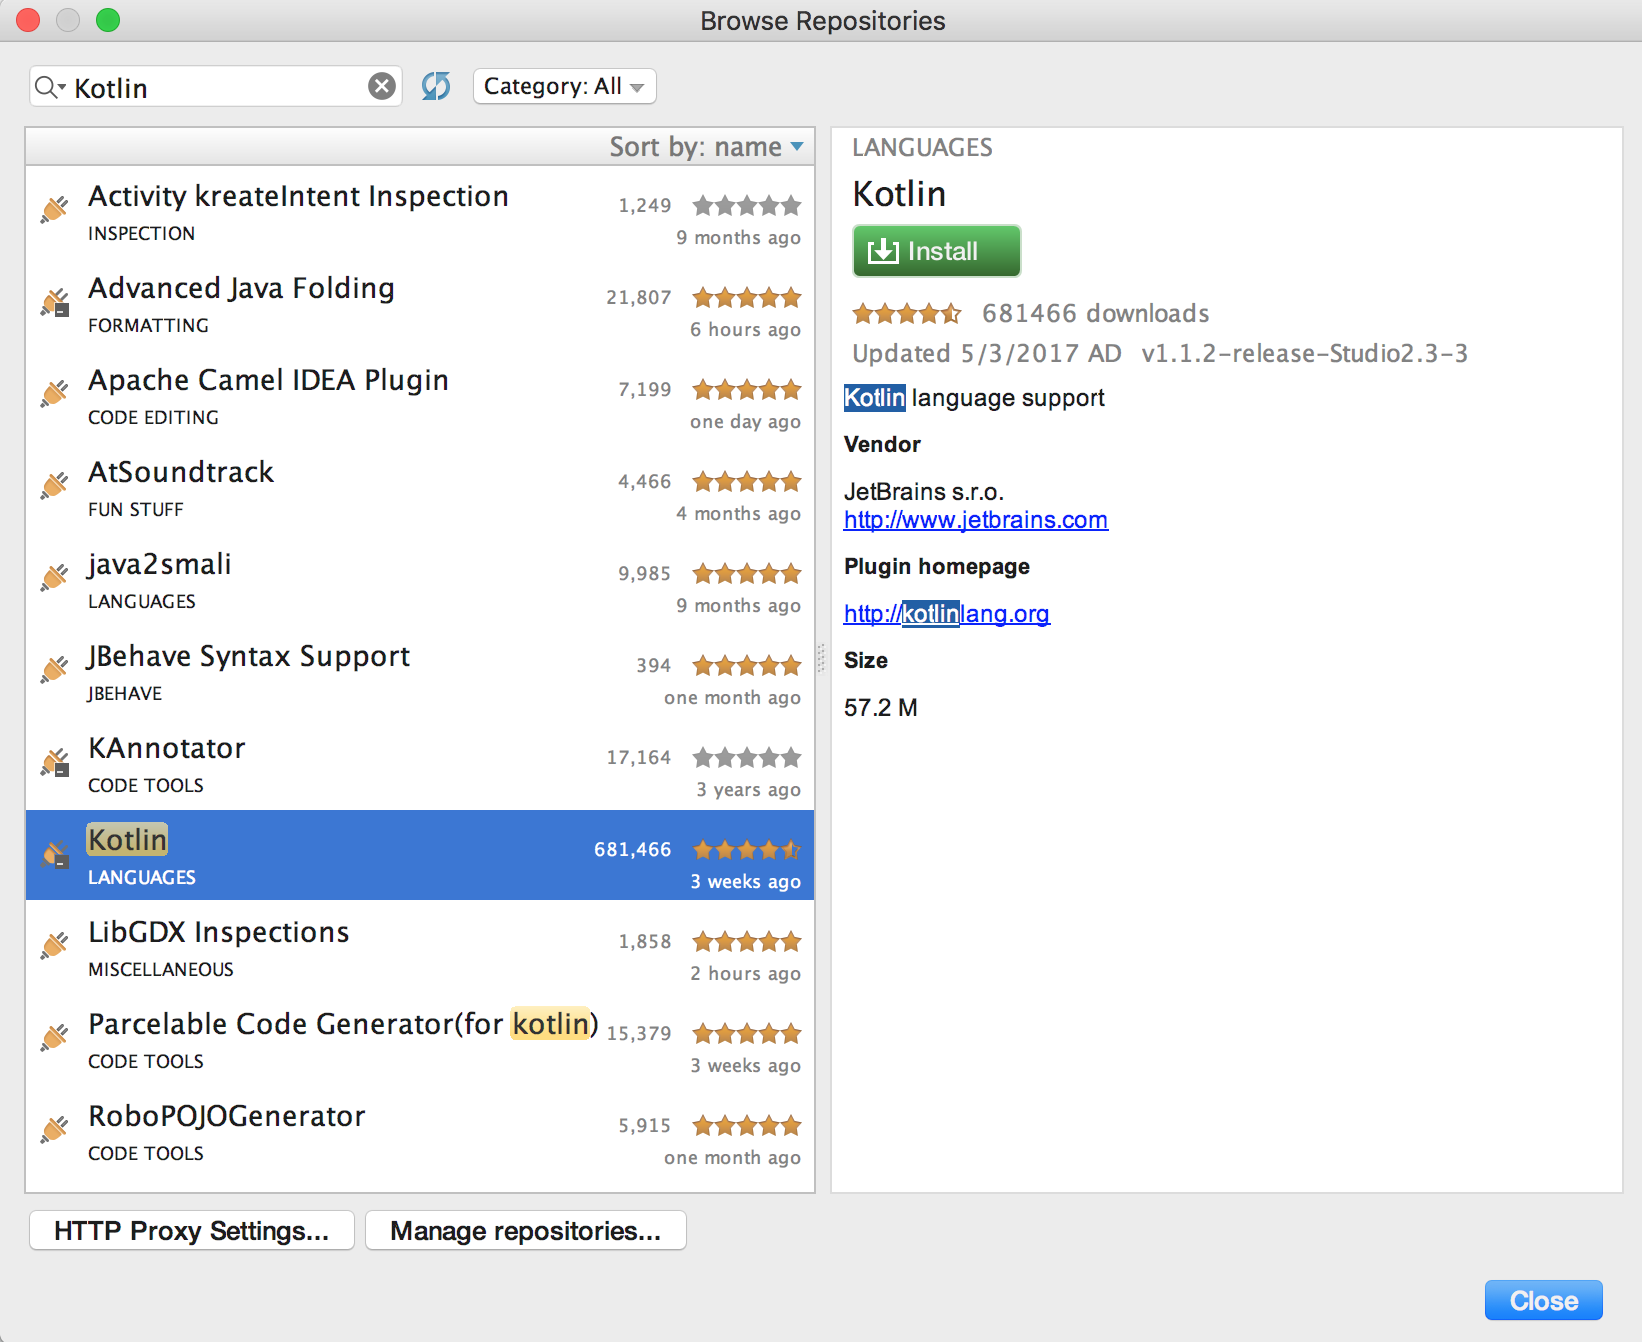
ทำการค้นหา Kotlin ให้เรากด Install แล้ว restart โปรแกรม Android Studio ใหม่เสีย
ระบบจะทำการ Restart

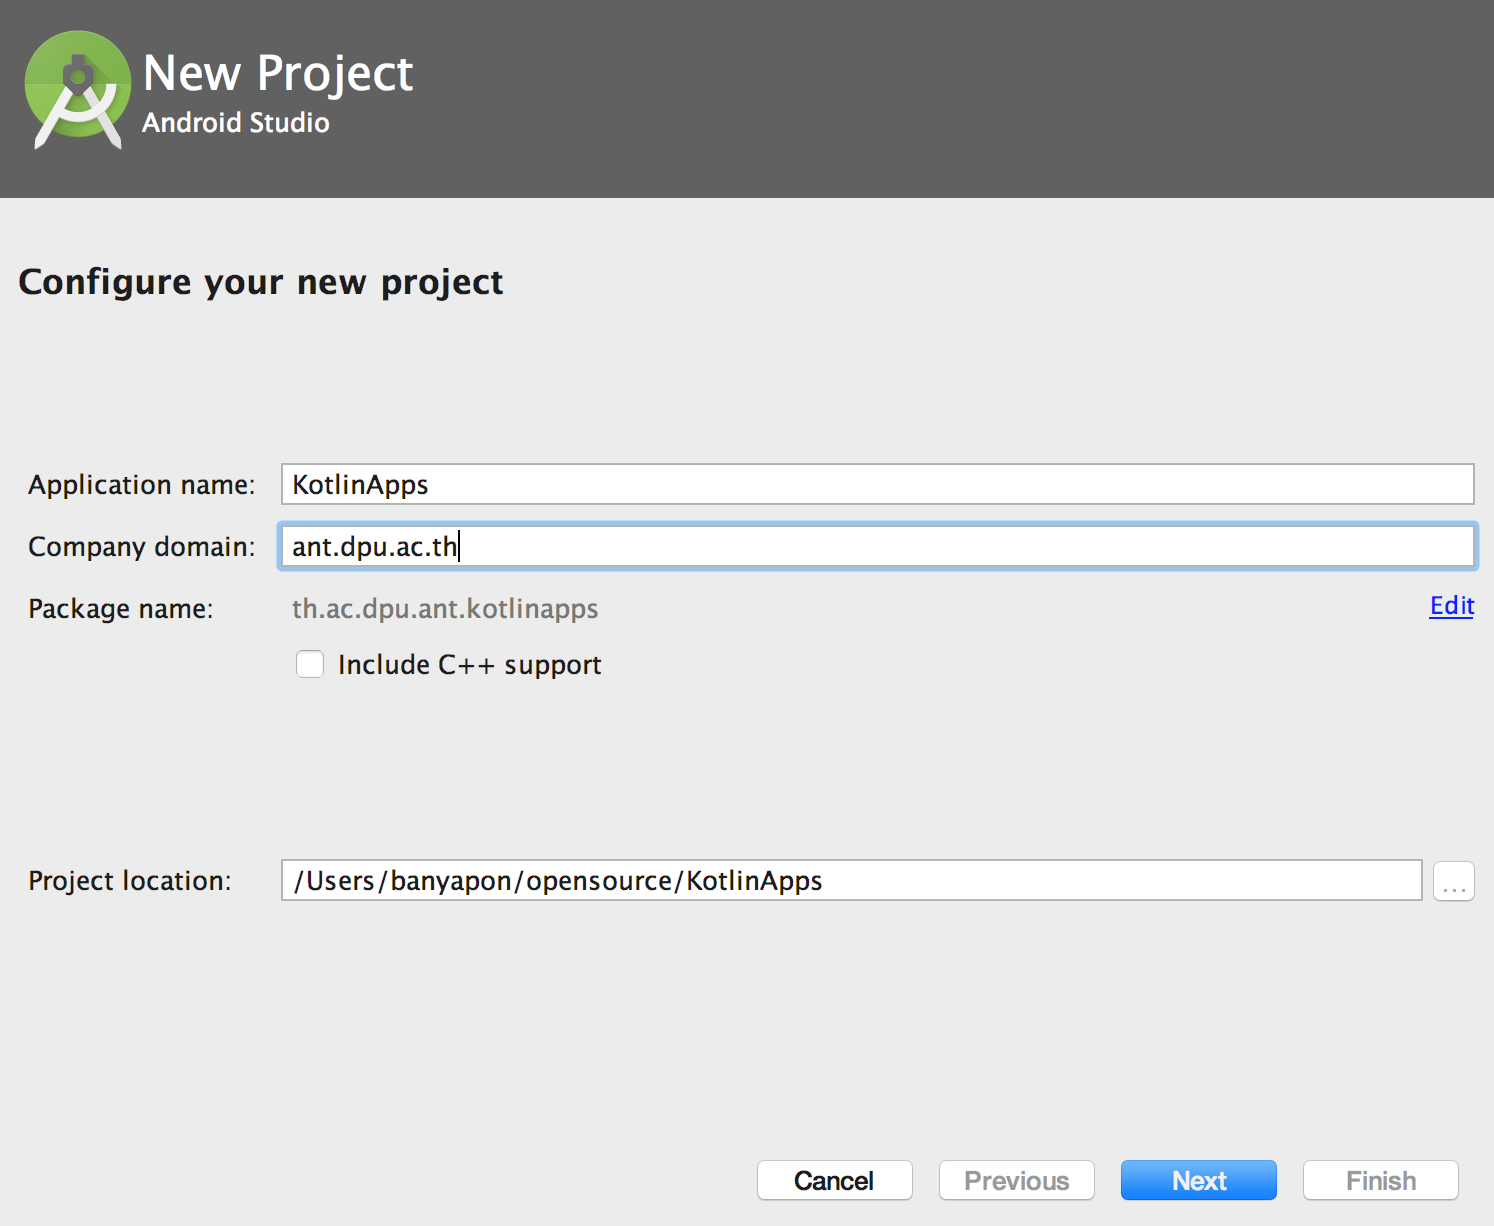
สร้างโปรเจ็ค Basic Activity ขึ้นมาตามปกติครับ
เมื่อพร้อมเขียนโปรแกรมเราจะได้ MainActivity ของเราเป็น Java อยู่ให้ไปที่ Tool Bar เลือก Code-> Convert Java File to Kotlin File เสีย หรือกด CTRL + ALT + SHIFT + K
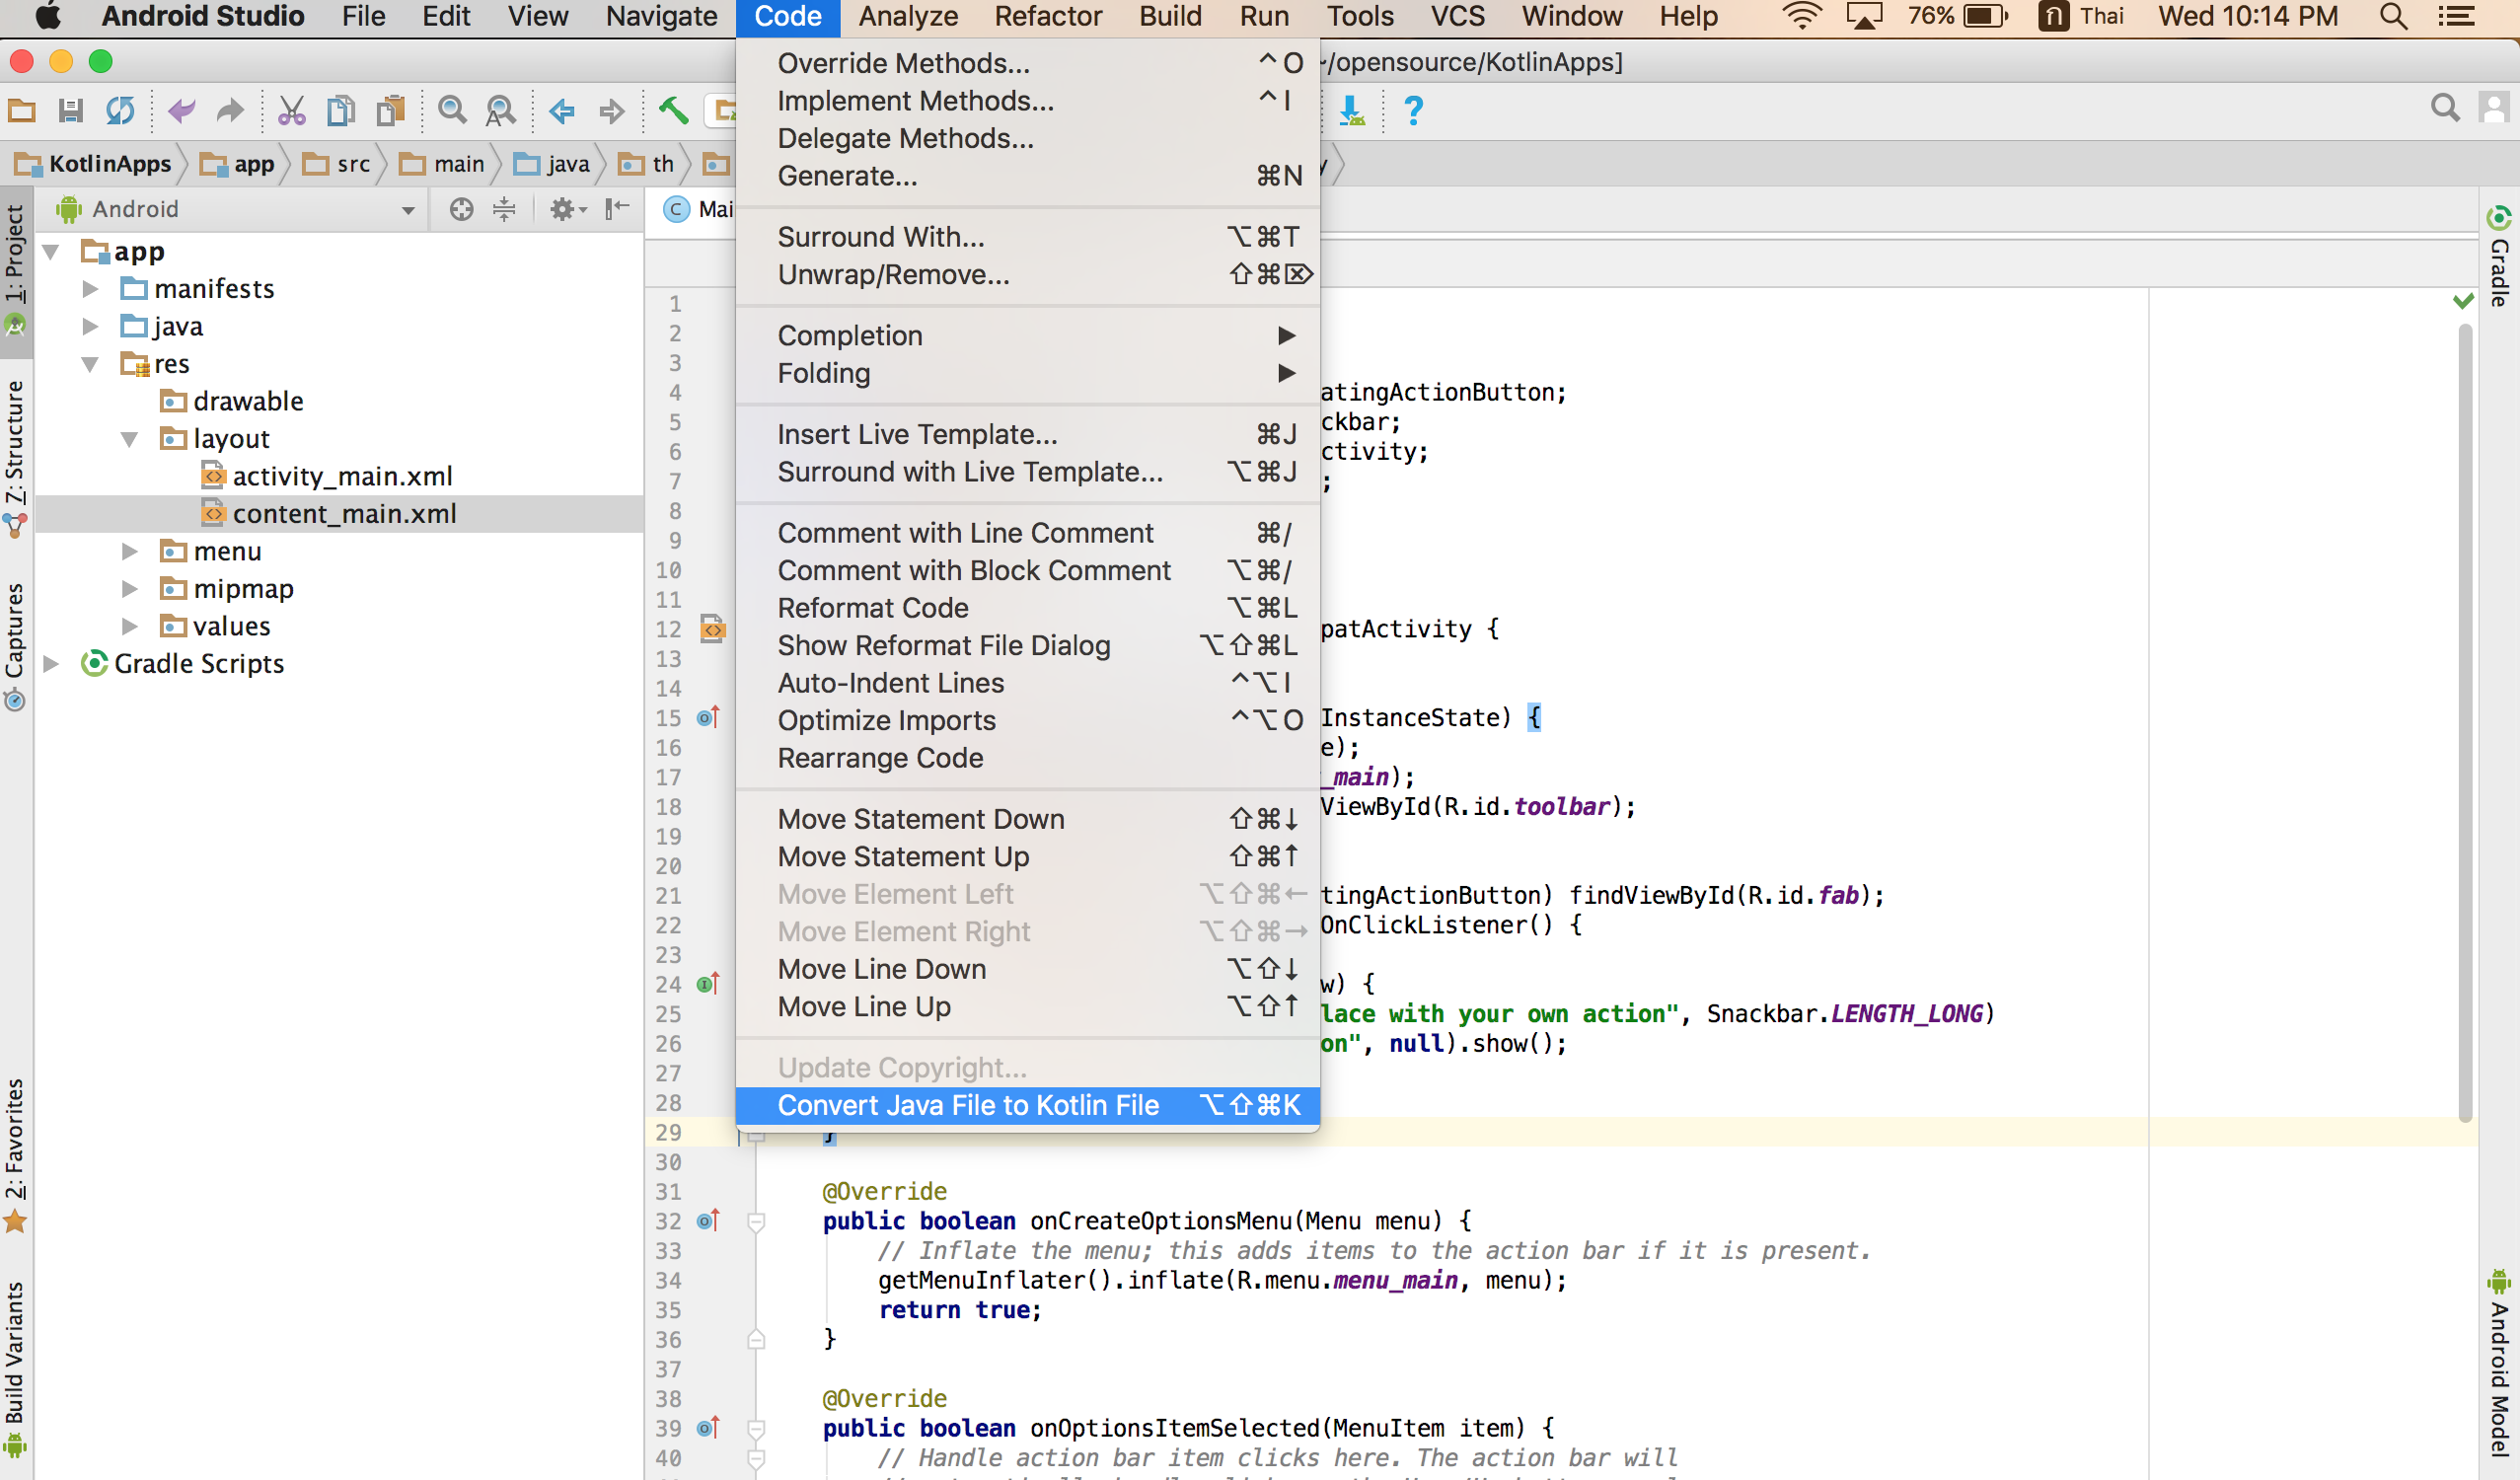
ระบบจะใช้เวลาแปลง Syntax ของเราจาก Java เดิมไปเป็นไฟล์นามสกุล .kt ซึ่ง MainActivity.kt ของเราจะเป็นดังนี้
package th.ac.dpu.ant.kotlinapps

import android.os.Bundle
import android.support.design.widget.FloatingActionButton
import android.support.design.widget.Snackbar
import android.support.v7.app.AppCompatActivity
import android.support.v7.widget.Toolbar
import android.view.View
import android.view.Menu
import android.view.MenuItem
import android.widget.TextView
import org.w3c.dom.Text

class MainActivity : AppCompatActivity() {

    override fun onCreate(savedInstanceState: Bundle?) {
        super.onCreate(savedInstanceState)
        setContentView(R.layout.activity_main)
        val toolbar = findViewById(R.id.toolbar) as Toolbar
        setSupportActionBar(toolbar)
        val fab = findViewById(R.id.fab) as FloatingActionButton
        fab.setOnClickListener { view ->
            Snackbar.make(view, "Replace with your own action", Snackbar.LENGTH_LONG)
                    .setAction("Action", null).show()
        }
    }
}
ดู Syntax คล้าย Python + Swift ครับ ลดรูปแบบการประกาศ final และ new ไปเยอะ ให้เรากดที่ หน้าจอ Editor ตรง Code ส่วนว่างๆ ตรงไหนก็ได้ ให้กดปุ่ม Shift 2 ครั้งครับ
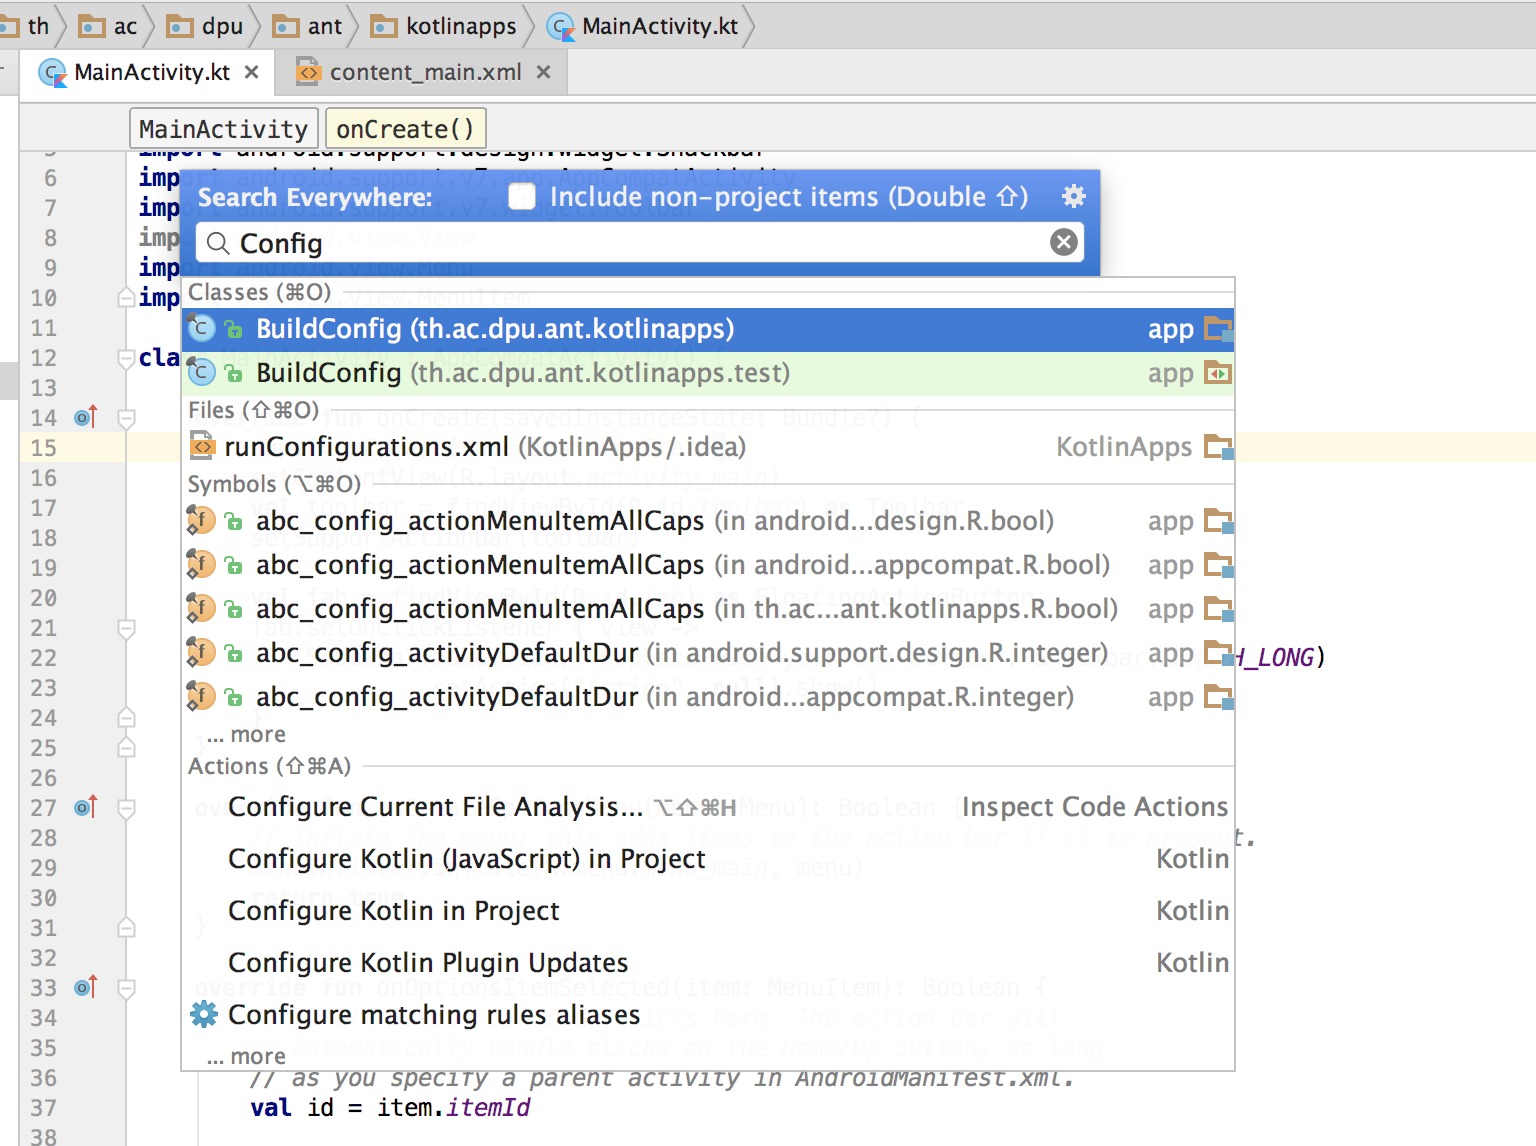
ไปที่ Actions เลือก Configure Kotlin in Project ครับ
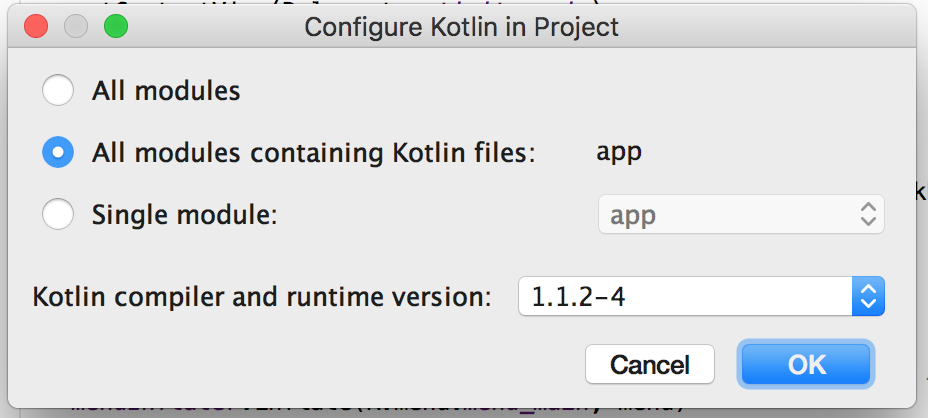
กดปุ่ม OK หลังจากนั้นระบบจะเปิดไฟล์ app ส่วนของ Gradle ขึ้นมาให้, ให้เราเพิ่มบรรทัดนี้ลงไปใน Gradle ส่วนของ app module ครับ ใน dependencies ครับ
apply plugin: 'kotlin-android-extensions'
ดังนั้นไฟล์ build.gradle(Module: app) จะเป็นดังนี้ครับ
apply plugin: 'com.android.application'
apply plugin: 'kotlin-android'

android {
    compileSdkVersion 25
    buildToolsVersion "25.0.2"
    defaultConfig {
        applicationId "th.ac.dpu.ant.kotlinapps"
        minSdkVersion 15
        targetSdkVersion 25
        versionCode 1
        versionName "1.0"
        testInstrumentationRunner "android.support.test.runner.AndroidJUnitRunner"
    }
    buildTypes {
        release {
            minifyEnabled false
            proguardFiles getDefaultProguardFile('proguard-android.txt'), 'proguard-rules.pro'
        }
    }
}

dependencies {
    compile fileTree(dir: 'libs', include: ['*.jar'])
    androidTestCompile('com.android.support.test.espresso:espresso-core:2.2.2', {
        exclude group: 'com.android.support', module: 'support-annotations'
    })
    compile 'com.android.support:appcompat-v7:25.3.1'
    compile 'com.android.support.constraint:constraint-layout:1.0.0-beta4'
    compile 'com.android.support:design:25.3.1'
    testCompile 'junit:junit:4.12'
    compile "org.jetbrains.kotlin:kotlin-stdlib-jre7:$kotlin_version"
    apply plugin: 'kotlin-android-extensions'
}
repositories {
    mavenCentral()
}
หลังจากนั้นทำการ Sync ตัว Gradle แล้วไปเขียนโปรแกรมกัน ให้เราไปเพิ่ม ID ให้กับ TextView ในหน้า content_main.xml ก่อนครับ
<?xml version="1.0" encoding="utf-8"?>
<android.support.constraint.ConstraintLayout xmlns:android="http://schemas.android.com/apk/res/android"
    xmlns:app="http://schemas.android.com/apk/res-auto"
    xmlns:tools="http://schemas.android.com/tools"
    android:layout_width="match_parent"
    android:layout_height="match_parent"
    app:layout_behavior="@string/appbar_scrolling_view_behavior"
    tools:context="th.ac.dpu.ant.kotlinapps.MainActivity"
    tools:showIn="@layout/activity_main">

    <TextView
        android:layout_width="wrap_content"
        android:layout_height="wrap_content"
        android:text="Hello World!"
        android:id="@+id/helloText"
        app:layout_constraintBottom_toBottomOf="parent"
        app:layout_constraintLeft_toLeftOf="parent"
        app:layout_constraintRight_toRightOf="parent"
        app:layout_constraintTop_toTopOf="parent" />

</android.support.constraint.ConstraintLayout>
เวลาประกาศ Widget บน MainActivity.kt ก็เป็นดังนี้;
val helloText = findViewById(R.id.helloText) as TextView
หลังจากนั้นให้เราไปเพิ่ม Action ใน Floating Action Button ตามนี้
val fab = findViewById(R.id.fab) as FloatingActionButton
        fab.setOnClickListener { view ->
            Snackbar.make(view, "Replace with your own action", Snackbar.LENGTH_LONG)
                    .setAction("Action", null).show()
            helloText.text = "Kotlin Start!"
        }
ทดสอบซะ
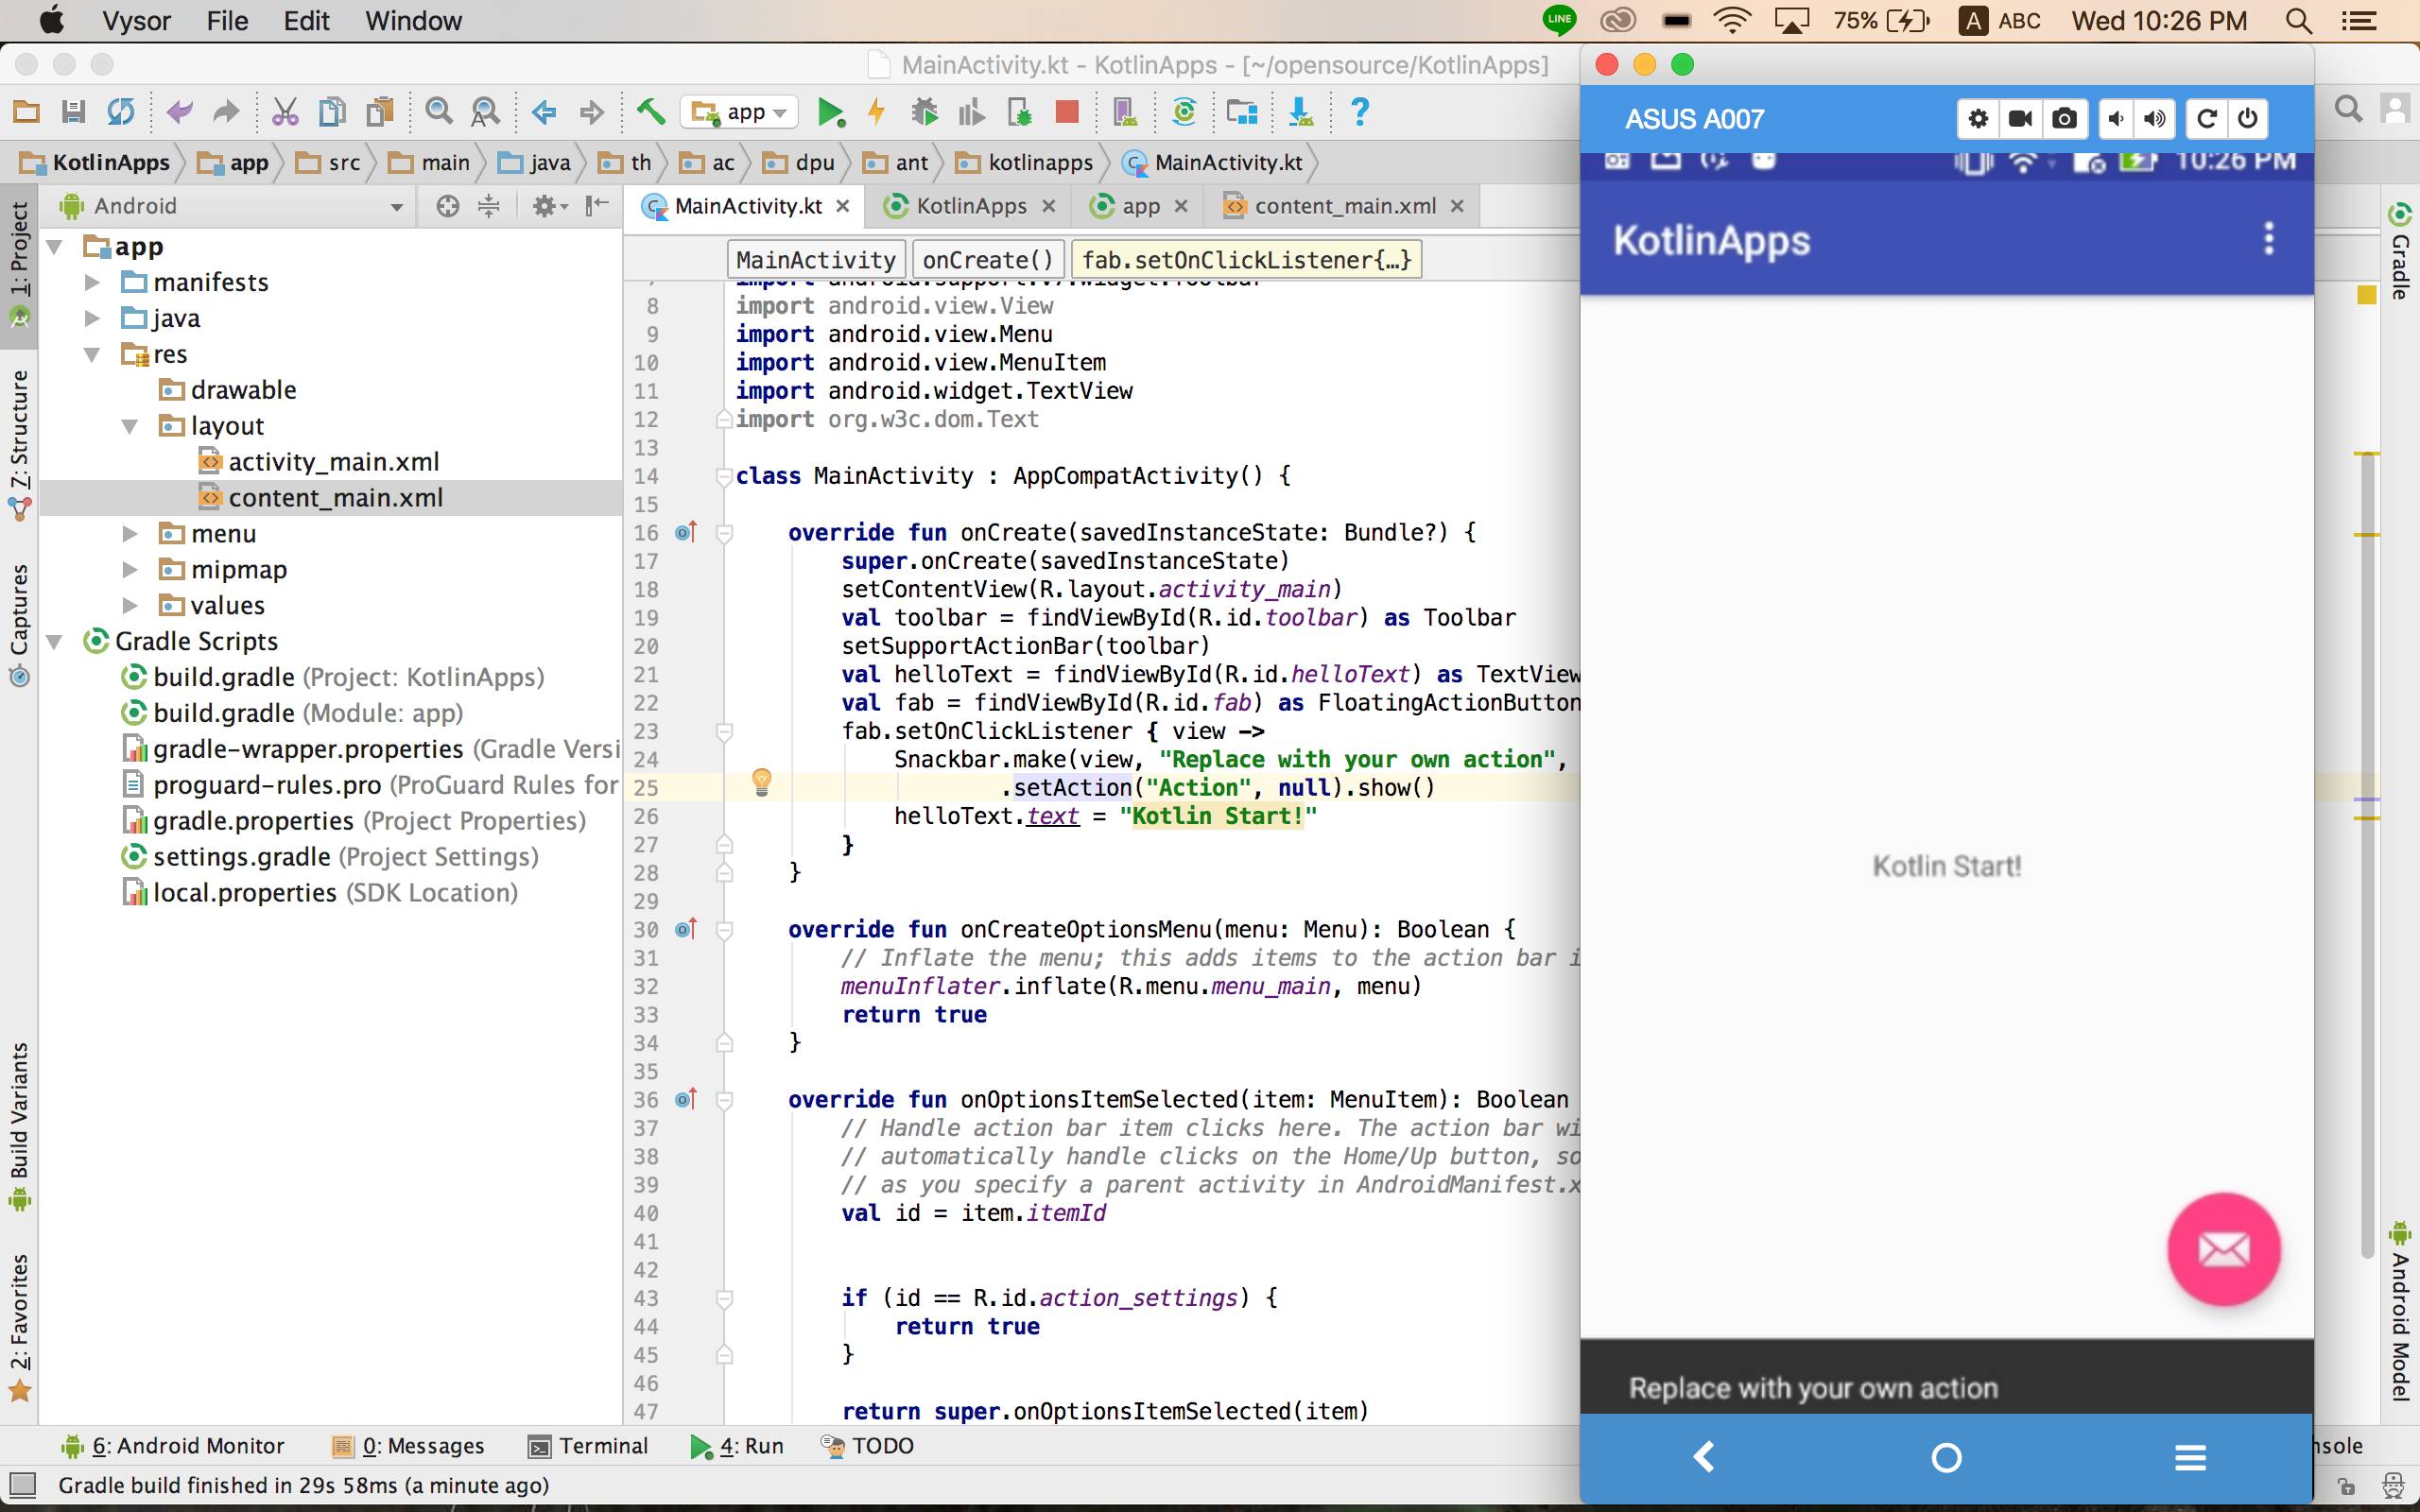
แตะเจ้าปุ่มสีชมพูดูสักนิด TextView จะเปลี่ยนเป็น Kotlin Start!, เรามาดู Action เบื้องต้นกับ Button Widget กันหน่อยครับ;
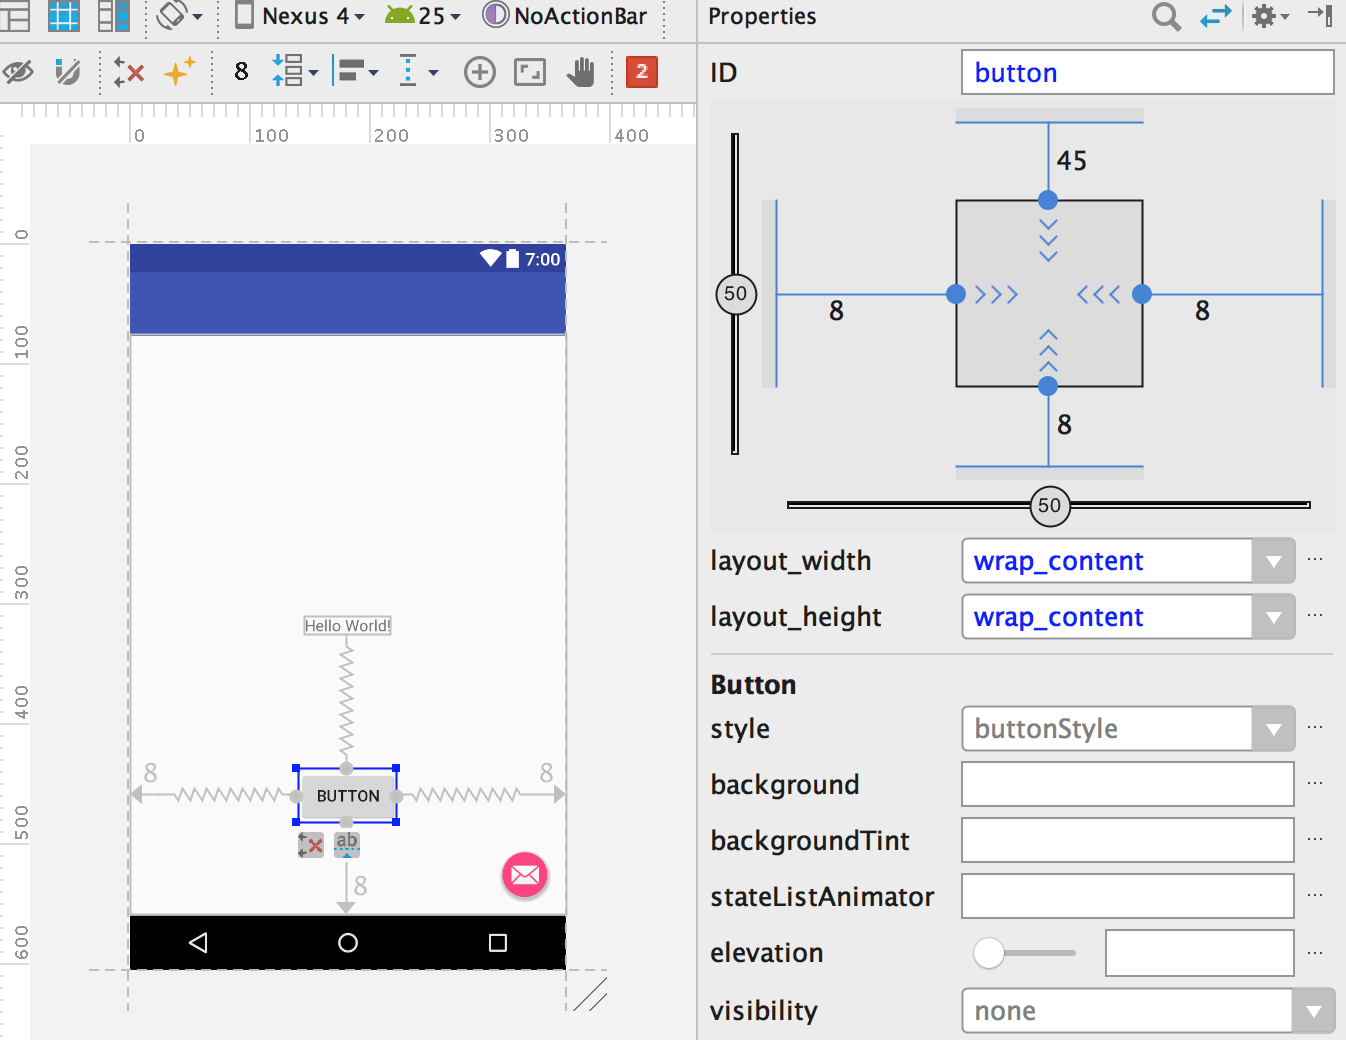
พอจัดผูกเรียบร้อยก็ตั้ง ID ว่า btnAction ครับ ไฟล์ content_activity.xml จะเป็นดังนี้:
<?xml version="1.0" encoding="utf-8"?>
<android.support.constraint.ConstraintLayout xmlns:android="http://schemas.android.com/apk/res/android"
    xmlns:app="http://schemas.android.com/apk/res-auto"
    xmlns:tools="http://schemas.android.com/tools"
    android:layout_width="match_parent"
    android:layout_height="match_parent"
    app:layout_behavior="@string/appbar_scrolling_view_behavior"
    tools:context="th.ac.dpu.ant.kotlinapps.MainActivity"
    tools:showIn="@layout/activity_main">

    <TextView
        android:layout_width="wrap_content"
        android:layout_height="wrap_content"
        android:text="Hello World!"
        android:id="@+id/helloText"
        app:layout_constraintBottom_toBottomOf="parent"
        app:layout_constraintLeft_toLeftOf="parent"
        app:layout_constraintRight_toRightOf="parent"
        app:layout_constraintTop_toTopOf="parent" />

    <Button
        android:id="@+id/btnAction"
        android:layout_width="wrap_content"
        android:layout_height="wrap_content"
        android:layout_marginBottom="8dp"
        android:layout_marginLeft="8dp"
        android:layout_marginRight="8dp"
        android:layout_marginTop="45dp"
        android:text="Button"
        app:layout_constraintBottom_toBottomOf="parent"
        app:layout_constraintLeft_toLeftOf="parent"
        app:layout_constraintRight_toRightOf="parent"
        app:layout_constraintTop_toBottomOf="@+id/helloText" />

</android.support.constraint.ConstraintLayout>
ส่วน MainActivity.kt นั้นก็ทำการเขียนคำสั่งของปุ่มดังนี้ครับ;
package th.ac.dpu.ant.kotlinapps

import android.os.Bundle
import android.support.design.widget.FloatingActionButton
import android.support.design.widget.Snackbar
import android.support.v7.app.AppCompatActivity
import android.support.v7.widget.Toolbar
import android.view.View
import android.view.Menu
import android.view.MenuItem
import android.widget.Button
import android.widget.TextView
import org.w3c.dom.Text

class MainActivity : AppCompatActivity() {

    override fun onCreate(savedInstanceState: Bundle?) {
        super.onCreate(savedInstanceState)
        setContentView(R.layout.activity_main)
        val toolbar = findViewById(R.id.toolbar) as Toolbar
        setSupportActionBar(toolbar)
        val helloText = findViewById(R.id.helloText) as TextView
        val btnAction = findViewById(R.id.btnAction) as Button
        val fab = findViewById(R.id.fab) as FloatingActionButton
        fab.setOnClickListener { view ->
            Snackbar.make(view, "Replace with your own action", Snackbar.LENGTH_LONG)
                    .setAction("Action", null).show()
            helloText.text = "Kotlin Start!"
        }
        btnAction.setOnClickListener(object : View.OnClickListener {
            override fun onClick(v: View?) {
                helloText.text = "Button Click!"
            }
        })
    }

    override fun onCreateOptionsMenu(menu: Menu): Boolean {
        // Inflate the menu; this adds items to the action bar if it is present.
        menuInflater.inflate(R.menu.menu_main, menu)
        return true
    }

    override fun onOptionsItemSelected(item: MenuItem): Boolean {
        // Handle action bar item clicks here. The action bar will
        // automatically handle clicks on the Home/Up button, so long
        // as you specify a parent activity in AndroidManifest.xml.
        val id = item.itemId


        if (id == R.id.action_settings) {
            return true
        }

        return super.onOptionsItemSelected(item)
    }
}
การประกาศ Widget Button คือ
val btnAction = findViewById(R.id.btnAction) as Button
ส่วนการทำงานก็คือ
btnAction.setOnClickListener(object : View.OnClickListener {
   override fun onClick(v: View?) {
     helloText.text = "Button Click!"
   }
})
รอช้าทำไมรีบทดสอบดีกว่า!

จะเห็นว่าการเขียนโปรกรมในปัจจุบันเริ่มมี Syntax ที่เอื้อต่อการทำความเข้าใจและลดขั้นตอนการจัดการชุดคำสั่งแล้วครับ ก็เอาเป็นว่าเป็นอีกภาษาหนึ่งที่น่าสนใจแล้วกัน ลองทำกันดูครับ

