
ซีรีย์การพัฒนาเกม VR ผ่าน WebXR ด้วย A-Frame กับการเขียน Javascript ในการทำ Spawn วัตถุในเกมให้ปรากฏออกมา
ศึกษาบทเรียนก่อนหน้าได้ที่:
- WebXR กับ A-frame ตอนที่ 1 จำลอง WebXR API Emulator และสร้างฉาก VR
- WebXR กับ A-frame ตอนที่ 2 ทดสอบ VR Controller กับ Hand Controller Component
จากบทเรียนก่อนเราสามารถทดสอบ ผ่าน WebXR API Emulator ได้ตามตัวอย่าง
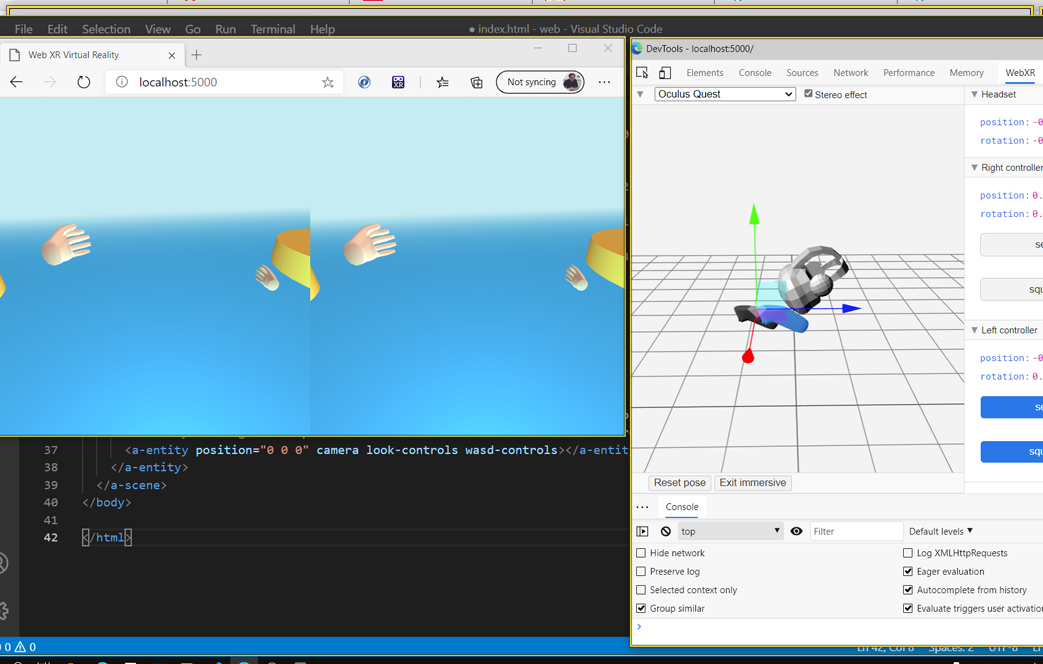
ทีนี้เราจะทำ Game Object ที่เป็นอุปสรรคให้สุ่มวิ่งเข้าหาผู้เล่น โดยแบ่งออกเป็น 3 เลน คือ ซ้าย กลาง ขวา (left-center-right) ผ่านการ Spawn เจ้า A-Frame จำเป็นต้องเขียนควบคุมด้วย Javascript ดังนั้นสิ่งที่เราจะสร้างเพิ่มใน index.html คือ
<a-sphere id="monster-center" scale="0.2 0.2 0.2" position="0 1.3 -7" animation="property: position; to: 0 1.3 3; dur: 5000; easing: linear; loop: true" color="#ffffff"></a-sphere>
<a-sphere id="monster-left" scale="0.2 0.2 0.2" position="-2 1.3 -7" animation="property: position; to: -2 1.3 3; dur: 5000; easing: linear; loop: true" color="#ffffff"></a-sphere>
<a-sphere id="monster-right" scale="0.2 0.2 0.2" position="2 1.3 -7" animation="property: position; to: 2 1.3 3; dur: 5000; easing: linear; loop: true" color="#ffffff"></a-sphere>
เพิ่มเข้าไปใน <a-scene> ส่วนของ <a-entity id=”tree-container”>
เราจะมี id คือ monster-left,monster-center และ monster-right โดยมี animation บังคับคือ position เดิมของตัวกลาง 0, 1.3, -7 จะมีการ animation แบบ linear วิ่งเป็นเชิงเส้นตรง ความเร็ว 5 ,000 หรือ 5 วินาที ไป 0,1.3,3 นั่นคือแกน z จาก -7 ไกลตัวเข้าหากล้องที่ระยะ 3 แล้วทำให้เป็น loop วนไปเรื่อยๆ ทั้งสามตัวต่างแค่ position ของแกน x ตัวเดียว
เขียนโปรแกรมควบคุมหน่อยล่ะกันให้เราสร้างไฟล์ game.js ขึ้นมาเป็น Javascript แทรกใน <head> ของ index.html ดังนี้
<script src="game.js"></script>
เข้าไปแก้ไขไฟล์ game.js
var numMonster = 0;
var treeContainer;
var monsterLeft;
var monsterCenter;
var monsterRight;
ประกาศตัวแปรรับค่าจำนวน Monster ที่เราจะสร้างชื่อ numMonster เริ่มต้นเป็น 0 รับ id ของ <a-entity> คือ id treeContainer จาก index.html เก็บลงตัวแปรชื่อเดียวกัน
หลังจากนั้นประกาศตัวแปรสำหรับไป getElementById ของ Javascript ชื่อ monsterLeft, monsterCenter และ monsterRight หลังจากนั้นสร้างฟังก์ชัน initMonster() ขึ้นมาเริ่มต้นรับค่าเวลาเริ่มโหลดหน้าเว็บไซต์
function initMonster() {
    monsterLeft = document.getElementById('monster-left');
    monsterCenter = document.getElementById('monster-center');
    monsterRight = document.getElementById('monster-right');

    treeContainer = document.getElementById('tree-container');
    templates = [monsterLeft, monsterCenter, monsterRight];

    removeGameObject(monsterLeft);
    removeGameObject(monsterCenter);
    removeGameObject(monsterRight);
}
monsterLeft,Center,Right ก็ไป document.getElementById ตามชื่อใน index.html ได้เลยเช่นกัน treeContainer ด้วย สร้าง templates ขึ้นมาเก็บ Array ของตำแหน่ง monsterLeft,monsterCenter และ monsterRight
ประกาศฟังก์ชัน removeGameObject() ขึ้นมาเพื่อเคลียร์ค่าของ Monster แต่ละตัว ดังนั้นถ้าเสร็จตรงนี้เราจะไปสร้าง ฟังก์ชันใหม่ชื่อ removeGameObject()
function removeGameObject(obj) {
    obj.parentNode.removeChild(obj);
}
ทำหน้าที่ removeChild ค่าที่รับมาคือตัวแปร obj ที่รับมาจาก initMonster()
สร้างฟังก์ชันขึ้นมา 2 ตัวคือ addMonster() ไว้รับค่า 0,1,2 (0 คือซ้าย , 1 คือ กลาง, 2 คือขวา) บน <a-scene> และ addMonsterTo() คือตำแหน่งที่อ้างอิงตัวแปร template ที่เราประกาศไว้ใน initMonster()
function addMonster(index) {
    numMonster += 1;
    index.id = 'monster-' + numMonster;
    treeContainer.appendChild(index);
}

function addMonsterTo(position_index) {
    var template = templates[position_index];
    addMonster(template.cloneNode(true));
}
addMonster() จะทำหน้าที่ cloneNode(true) คือ Clone ตัว node Element ให้ปรากฏขึ้น
สุดท้ายใส่คำสั่ง onload เริ่มต้น
window.onload = function () {
    initMonster();
}
ดังนั้นไฟล์ game.js จะเป็นดังนี้:
var numMonster = 0;
var treeContainer;
var monsterLeft;
var monsterCenter;
var monsterRight;

function initMonster() {
    monsterLeft = document.getElementById('monster-left');
    monsterCenter = document.getElementById('monster-center');
    monsterRight = document.getElementById('monster-right');

    treeContainer = document.getElementById('tree-container');
    templates = [monsterLeft, monsterCenter, monsterRight];

    removeGameObject(monsterLeft);
    removeGameObject(monsterCenter);
    removeGameObject(monsterRight);
}

function removeGameObject(obj) {
    obj.parentNode.removeChild(obj);
}

function addMonster(index) {
    numMonster += 1;
    index.id = 'monster-' + numMonster;
    treeContainer.appendChild(index);
}

function addMonsterTo(position_index) {
    var template = templates[position_index];
    addMonster(template.cloneNode(true));
}

window.onload = function () {
    initMonster();
}
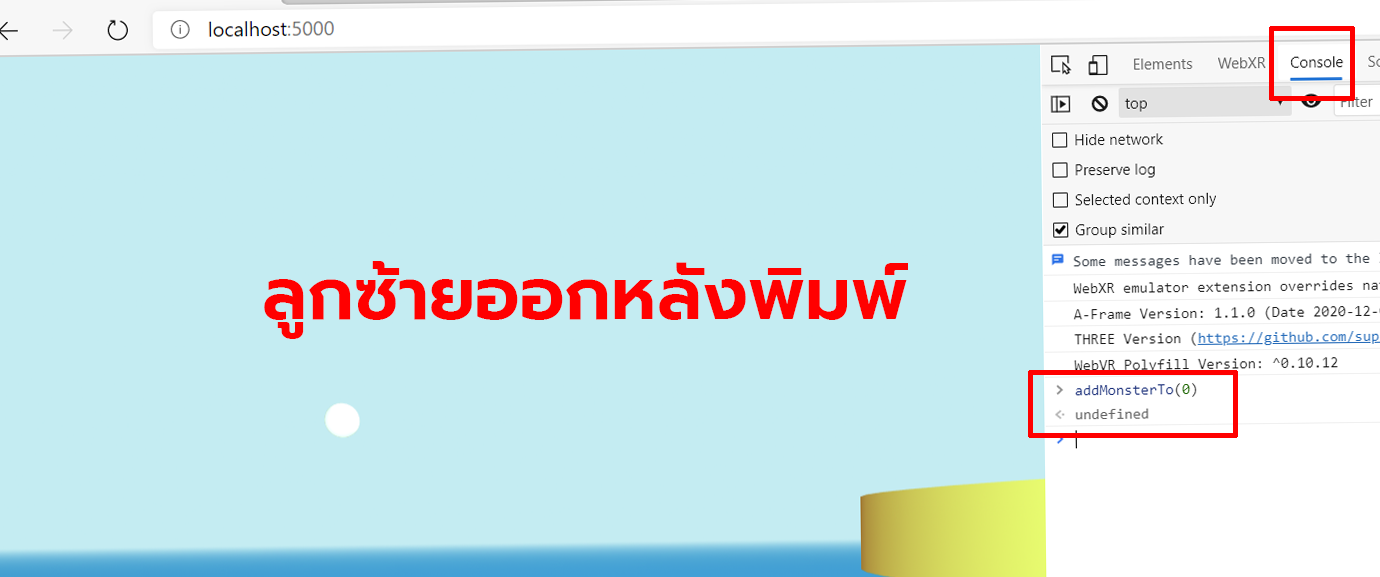
ทดสอบโดยการ พิมพ์ บน console ของ Browser ตรงๆไปเลยว่า addMonsterTo(1) หรือ (0) หรือ (2) เพื่อทดสอบ
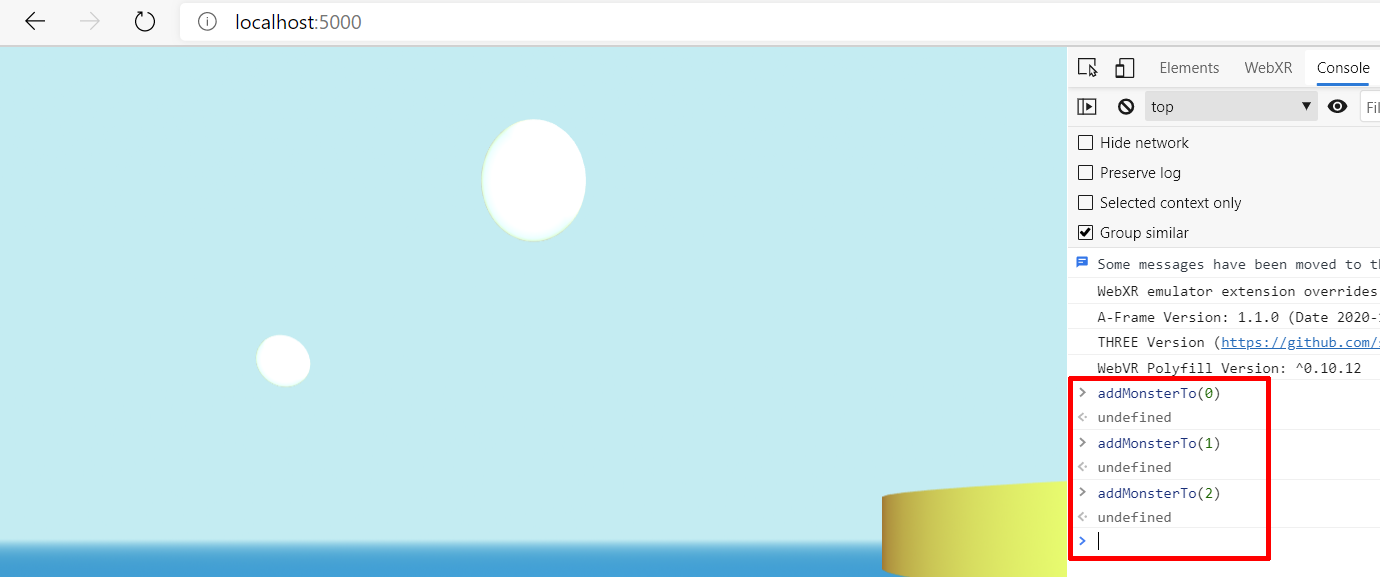
เรียบร้อยครับ ตัวอย่างของการทดสอบ Spawn ตัว GameObject ใน WebXR ง่ายๆ รอบทที่ 4 ได้เลย!