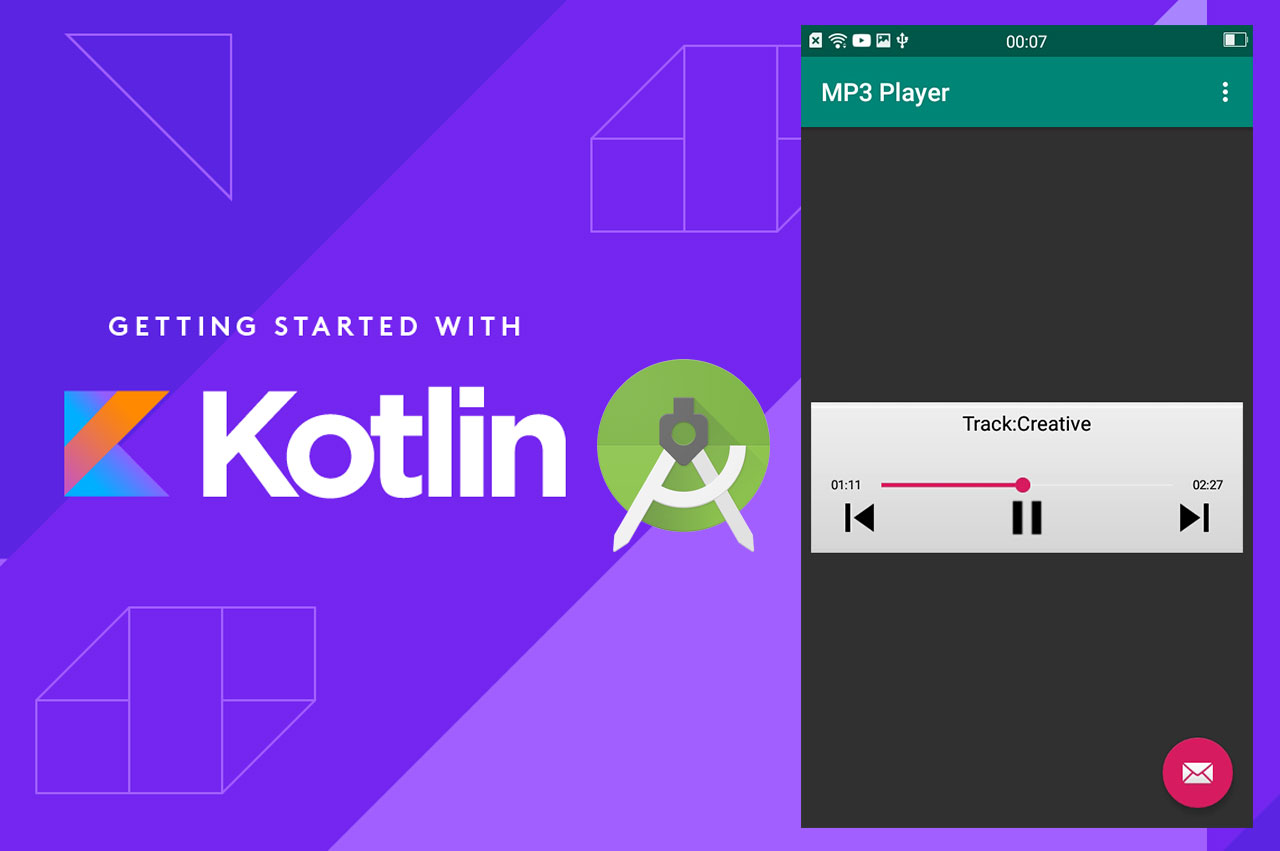
ปกติเวลาเราจะพัฒนาแอปพลิเคชัน Android ฟังเพลงด้วย Audio Player เราจะต้องเขียน MediaPlayer มาคุม ทำ SeekView รอบนี้เรามาลดขั้นตอนนั้นกันด้วย JCplayer
สำหรับใครมีโจทย์ทำ Playlists ฟังเพลงผ่าน Audio Player ทำ Media Controller ออกแบบปุ่มสำหรับฟังเพลงเราต้องไปทำขั้นตอนต่อไปนี้ที่ก็เยอะ และเหนื่อยพอประมาณ แต่มัน Customize ได้สวยๆ จาก Tutorial พวกนี้:
- https://www.sitepoint.com/a-step-by-step-guide-to-building-an-android-audio-player-app/
- https://www.sitepoint.com/develop-music-streaming-android-app/
- https://www.thaicreate.com/mobile/android-play-mediaplayer.html (ไทย ใช้ได้อยู่)
แต่สำหรับสายขี้เกียจอย่างผม ก็ต้องหา Library มาทำ Media Controller ง่ายๆ ทำกัน
ตัวที่ผมจะลองใช้ก็น่าจะเป็นตัวนี้: https://github.com/jeancsanchez/JcPlayer
มาเริ่มต้นกันดีกว่า สร้าง New Project ขึ้นมาเป็น Kotlin ครับ

สร้างเป็น Basic Activity ขึ้นมาตั้งชื่อว่าอะไรก็ได้

เมื่อ Project พร้อมก็ทำการคลิกที่ Project Gradle
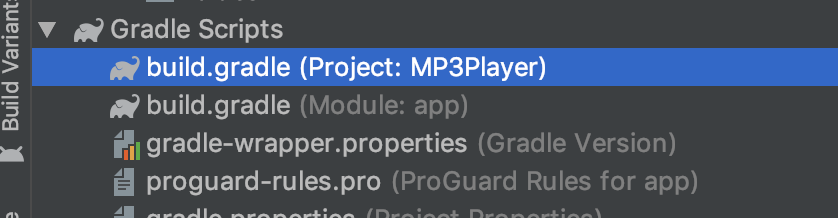
เพิ่มส่วนนี้เข้าไป:
maven { url "http://dl.bintray.com/jeancsanchez/maven" }
เพิ่มเข้าไปที่ allprojects->repositories
allprojects {
    repositories {
        google()
        jcenter()
        maven { url  "http://dl.bintray.com/jeancsanchez/maven" }
 }
}
อย่างเพิ่ง Syn ตัว Gradle นะครับไปที่ module.gradle

implementation 'io.github.jeancsanchez.jcplayer:jcplayer:2.6.0-alpha'
ใส่ใน dependencies
dependencies {
    implementation fileTree(dir: 'libs', include: ['*.jar'])
    implementation"org.jetbrains.kotlin:kotlin-stdlib-jdk7:$kotlin_version"
    implementation 'com.android.support:appcompat-v7:28.0.0'
    implementation 'com.android.support.constraint:constraint-layout:1.1.3'
    implementation 'com.android.support:design:28.0.0'
    implementation 'io.github.jeancsanchez.jcplayer:jcplayer:2.6.0-alpha'
    testImplementation 'junit:junit:4.12'
    androidTestImplementation 'com.android.support.test:runner:1.0.2'
    androidTestImplementation 'com.android.support.test.espresso:espresso-core:3.0.2'
}
ทำการ sync Gradle ให้เรียบร้อยไปที่ content_activity.xml ใส่ Layout ของ jCPlayer ดังนี้:
<?xml version="1.0" encoding="utf-8"?>
<android.support.constraint.ConstraintLayout
        xmlns:android="http://schemas.android.com/apk/res/android"
        xmlns:tools="http://schemas.android.com/tools"
        xmlns:app="http://schemas.android.com/apk/res-auto"
        android:layout_width="match_parent"
        android:layout_height="match_parent"
        app:layout_behavior="@string/appbar_scrolling_view_behavior"
        tools:showIn="@layout/activity_main"
        tools:context=".MainActivity">

    <com.example.jean.jcplayer.JcPlayerView
            android:id="@+id/jcplayer"
            android:layout_width="match_parent"
            android:layout_height="wrap_content" android:layout_marginTop="8dp"
            app:layout_constraintTop_toTopOf="parent" app:layout_constraintStart_toStartOf="parent"
            android:layout_marginLeft="8dp" android:layout_marginStart="8dp" app:layout_constraintEnd_toEndOf="parent"
            android:layout_marginEnd="8dp" android:layout_marginRight="8dp" android:layout_marginBottom="8dp"
            app:layout_constraintBottom_toBottomOf="parent">
    </com.example.jean.jcplayer.JcPlayerView>

</android.support.constraint.ConstraintLayout>
จะได้หน้าจอดังนี้:

ต่อมาไปที่ MainActivity.kt ประกาศตัวแปรดังนี้:
 private lateinit var jcplayer: JcPlayerView
 private lateinit var txt_get_title: String
 private lateinit var txt_get_media: String
ต่อมาไปที่ OnCreate() ส่วนนี้ โดยไปดึง Mp3 ที่ Link: http://bensound.com/bensound-music/bensound-creativeminds.mp3
jcplayer = findViewById(R.id.jcplayer)
        txt_get_title = "Creative"
        txt_get_media = "http://bensound.com/bensound-music/bensound-creativeminds.mp3"
        val jcAudios = ArrayList<JcAudio>()
        jcAudios.add(JcAudio.createFromURL("Track:"+txt_get_title, "" + txt_get_media))
        jcplayer.initPlaylist(jcAudios)
        jcplayer.createNotification()
ดังนั้นไฟล์ MainActivity.kt จะเป็นดังนี้:
package me.nomad.mp3player

import android.os.Bundle
import android.support.design.widget.Snackbar
import android.support.v7.app.AppCompatActivity;
import android.view.Menu
import android.view.MenuItem
import com.example.jean.jcplayer.JcAudio
import com.example.jean.jcplayer.JcPlayerView

import kotlinx.android.synthetic.main.activity_main.*
import java.util.ArrayList

class MainActivity : AppCompatActivity() {

    private lateinit var jcplayer: JcPlayerView
    private lateinit var txt_get_title: String
    private lateinit var txt_get_media: String

    override fun onCreate(savedInstanceState: Bundle?) {
        super.onCreate(savedInstanceState)
        setContentView(R.layout.activity_main)
        setSupportActionBar(toolbar)

        fab.setOnClickListener { view ->
            Snackbar.make(view, "Replace with your own action", Snackbar.LENGTH_LONG)
                .setAction("Action", null).show()
        }
        txt_get_title = "Creative"
        txt_get_media = "http://bensound.com/bensound-music/bensound-creativeminds.mp3"
        jcplayer = findViewById(R.id.jcplayer)
        val jcAudios = ArrayList<JcAudio>()
        jcAudios.add(JcAudio.createFromURL("Track:"+txt_get_title, "" + txt_get_media))
        jcplayer.initPlaylist(jcAudios)
        jcplayer.createNotification()
    }

    override fun onCreateOptionsMenu(menu: Menu): Boolean {
        // Inflate the menu; this adds items to the action bar if it is present.
        menuInflater.inflate(R.menu.menu_main, menu)
        return true
    }

    override fun onOptionsItemSelected(item: MenuItem): Boolean {
        // Handle action bar item clicks here. The action bar will
        // automatically handle clicks on the Home/Up button, so long
        // as you specify a parent activity in AndroidManifest.xml.
        return when (item.itemId) {
            R.id.action_settings -> true
            else -> super.onOptionsItemSelected(item)
        }
    }
}
ไปที่ AndroidManifest.xml
<uses-permission android:name="android.permission.INTERNET" />
<uses-permission android:name="android.permission.WAKE_LOCK" />
<permission android:name="android.permission.MEDIA_CONTENT_CONTROL" />

จะเห็นว่าถ้าเราต้องการประหยัดเวลาในการทำ Audio Player แบบไม่ต้องโมเอง ใช้ Library ที่มีอยู่แล้วก็ลองตัวนี้ดูครับ