

บทเรียนการทำ ML โดยใช้ Computer Vision หรือ OpenCV มาใช้ร่วมกับ Python และ Face Recognition แบบ Real-Time
บทเรียนก่อนหน้า:
- การประมวลผลรู้จำใบหน้า Face Recognition ด้วย Python
- การดึงและจำแนกใบหน้า Pull Face ด้วย Python และ Face Recognition
- Face Recognition การเปรียบเทียบใบหน้าจากรูปภาพด้วย Python
จากบทเรียนก่อน Face Recognition การเปรียบเทียบใบหน้าจากรูปภาพด้วย Python เราจะเห็นว่าการทำ Database เปรียบเทียบใบหน้านั้นสามารถเรียกใช้งานได้ง่ายผ่าน Face Recognition ได้เลยตรงๆ เพื่อที่จะได้เอาไปประมวลผลร่วมกับ AI หรือ ML (Machine Learning) มาประมวลผล ทีนี้เราจะลองประมวลผลแบบ Real-Time ผ่าน กล้อง Web Cam บ้าง โดยเราจะดึงข้อมูลด้วย OpenCV
เปิด Terminal ขึ้นมาหน่อย เรียกใช้งาน Library เข้าไปเพื่อเปิดใช้งาน QT ผ่าน Visual Studio Code ได้
$ pip3 install opencv-python-headless
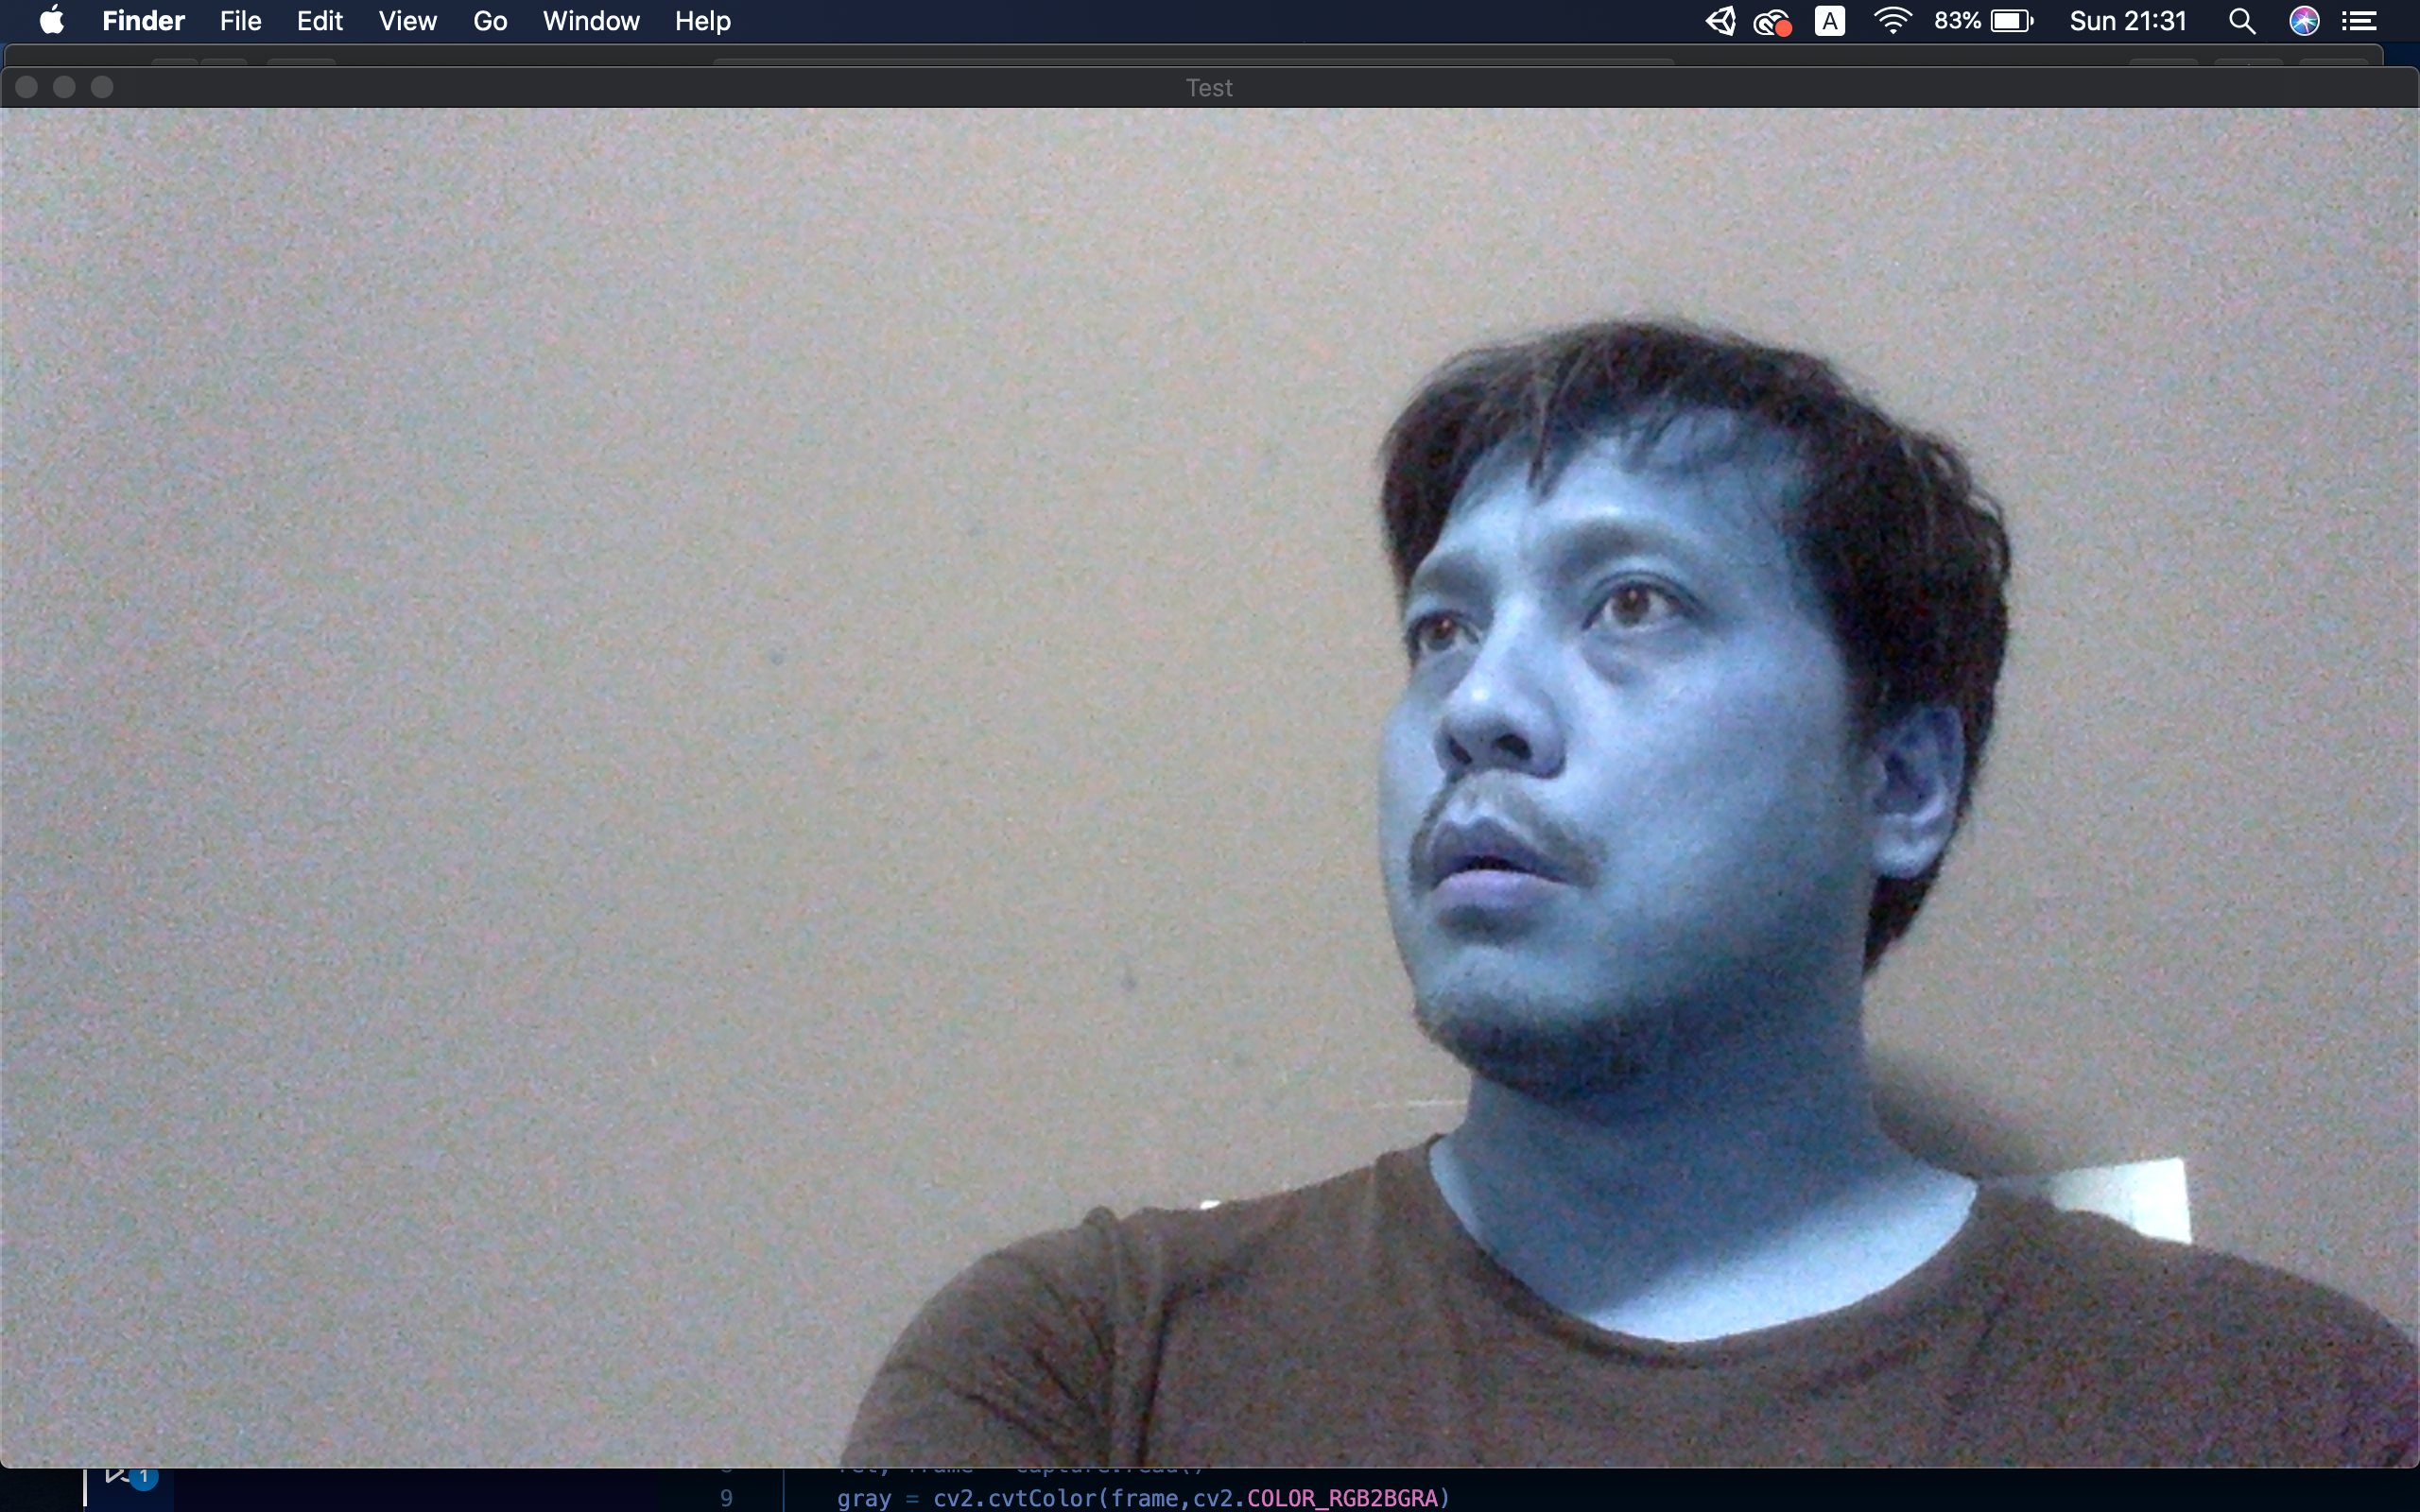
ติดตั้งเสร็จเรามาทดสอบ OpenCV ก่อนว่ากล้องเราทำงานได้จริงหรือไม่ ให้พิมพ์คำสั่งต่อไปนี้ในไฟล์ใหม่ของ Python อาจจะชื่อ cvtest.py
import numpy as np
import cv2

capture = cv2.VideoCapture(0)
ret, frame = capture.read()

while(True):
    ret, frame = capture.read()
    gray = cv2.cvtColor(frame,cv2.COLOR_RGB2BGRA)
    cv2.imshow('Test', gray)
    if cv2.waitKey(1) & 0xFF == ord('q'):
        break

capture.release()
cv2.destroyAllWindows()
ทดสอบโดยการกด Debug หรือ F5 สักหน่อยว่ามันทำงานได้จริงไหม
เอาล่ะเรามาดูสิว่า ฐานข้อมูลภาพ banyapon.jpg จะใช้ได้จริงไหม และแม่นยำหรือเปล่า

ประกาศ Face Recognition และ OpenCV ก่อนเลย
import face_recognition
import cv2
บังคับเปิด Web Cam ให้ทำงานทันที
videoCapture = cv2.VideoCapture(0)
ประกาศตัวแปรเก็บภาพ Database และเข้ารหัสรูปภาพต้นฉบับไว้เปรียบเทียบ
database_image = face_recognition.load_image_file("banyapon.jpg")
data_base_encoding = face_recognition.face_encodings(database_image)[0]
ทำการใส่ข้อมูลของชื่อบุคคลในภาพเข้าไป โดยกำหนดจำนวน array ให้พอดีกับรูปภาพอย่างในตัวอย่างคือ มีแค่ภาพเดียว และคนเดียว คือภาพผม ดังนั้นกำหนดชื่อว่า BANYAPON ไปเลย เก็บลงตัวแปร 2 ชุดคือ person_face_encodings กรณีมีหลายใบหน้าก็ใช้ภาพหลายๆ ภาพใส่รหัสยัดตัวแปรไปเรื่อยๆ data_base_encoding1,data_base_encoding2 ไปถึง data_base_encoding100 ก็ว่าไป และก็ยัดชื่อจำนวนใบหน้าให้พอดีกับคน person_face_names เป็น String Array
person_face_encodings = [data_base_encoding]
person_face_names = ["BANYAPON"]
ประกาศตัวแปร เริ่มต้นสำหรับทำงานประมวลผล Process ทีละ Frame โดยหลักการคือ frameProcess จะมาคอยเช็คว่า ประมวลผลแบบ Frame เว้น Frame เพื่อลดเวลาประมวลผล
data_locations = []
data_encodings = []
data_names = []
frameProcess = True
ทำการ Resizing Frame เพื่อความเร็วในการประมวลผล โดยใช้คำสั่งต่อไปนี้:
while True:
    ret, frame = videoCapture.read()
    resizing = cv2.resize(frame, (0, 0), fx=0.25, fy=0.25)
    rgb_resizing = resizing[:, :, ::-1]
ตามที่บอกว่าถ้า frameProcess จะถูกประมวลผลแบบ Frame เว้น Frame ดังนั้นเราจะเช็ค ถ้า Frame ไหนโดนประมวลผลจะเข้าเงื่อนไขคำสั่งนี้:
if frameProcess:
        data_locations = face_recognition.face_locations(rgb_resizing)
        data_encodings = face_recognition.face_encodings(rgb_resizing, data_locations)
        data_names = []
        for dc in data_encodings:
            matches = face_recognition.compare_faces(person_face_encodings, dc)
            name = "UNKNOWN"
            if True in matches:
                first_match_index = matches.index(True)
                name = person_face_names[first_match_index]

            data_names.append(name)
ระบบจะเข้าไปวนดูข้อมูล data_encoding ว่ามีการเข้ารหัสใบหน้าไว้ไหม ถ้าไม่มี หรือจำไม่ได้มันจะขึ้นว่า UNKNOWN
ถ้าเจอข้อมูลก็ตีตารางสีเขียวให้เรียบร้อย พร้อมทั้งเขียนชื่อคนใน array เข้าไปเลย
frameProcess = not frameProcess
    for (top, right, bottom, left), name in zip(data_locations, data_names):
        top *= 4
        right *= 4
        bottom *= 4
        left *= 4
        cv2.rectangle(frame, (left, top), (right, bottom), (0, 255, 0), 2)
        cv2.rectangle(frame, (left, bottom - 35), (right, bottom), (0, 255, 0), cv2.FILLED)
        font = cv2.FONT_HERSHEY_DUPLEX
        cv2.putText(frame, name, (left + 6, bottom - 6), font, 1.0, (255, 255, 255), 1)
สุดท้ายคือเรื่องของการแสดงผล โปรแกรม Python ให้เรียกหน้าต่างผลลัพธ์ โดยให้เรากด x เพื่อออกจากโปรแกรม
if cv2.waitKey(1) & 0xFF == ord('x'):
        break
videoCapture.release()
cv2.destroyAllWindows()
ภาพรวม Code จะเป็นดังนี้:
import face_recognition
import cv2

videoCapture = cv2.VideoCapture(0)
database_image = face_recognition.load_image_file("banyapon.jpg")
data_base_encoding = face_recognition.face_encodings(database_image)[0]

person_face_encodings = [data_base_encoding]
person_face_names = ["BANYAPON"]

data_locations = []
data_encodings = []
data_names = []
frameProcess = True

while True:
    ret, frame = videoCapture.read()
    resizing = cv2.resize(frame, (0, 0), fx=0.25, fy=0.25)
    rgb_resizing = resizing[:, :, ::-1]

    if frameProcess:
        data_locations = face_recognition.face_locations(rgb_resizing)
        data_encodings = face_recognition.face_encodings(rgb_resizing, data_locations)
        data_names = []
        for dc in data_encodings:
            matches = face_recognition.compare_faces(person_face_encodings, dc)
            name = "UNKNOWN"
            if True in matches:
                first_match_index = matches.index(True)
                name = person_face_names[first_match_index]

            data_names.append(name)

    frameProcess = not frameProcess
    for (top, right, bottom, left), name in zip(data_locations, data_names):
        top *= 4
        right *= 4
        bottom *= 4
        left *= 4
        cv2.rectangle(frame, (left, top), (right, bottom), (0, 255, 0), 2)
        cv2.rectangle(frame, (left, bottom - 35), (right, bottom), (0, 255, 0), cv2.FILLED)
        font = cv2.FONT_HERSHEY_DUPLEX
        cv2.putText(frame, name, (left + 6, bottom - 6), font, 1.0, (255, 255, 255), 1)
    cv2.imshow('Video', frame)
    if cv2.waitKey(1) & 0xFF == ord('x'):
        break
videoCapture.release()
cv2.destroyAllWindows()
ทดสอบโดยการกด Debug ให้เรียบร้อย:

พยายามเทสโดยการเปลี่ยนอารมณ์ใบหน้าให้แตกต่างด้วยนะครับ
ดังนั้นถ้าเรามี ภาพ และรายชื่อของ คนสัก 3 คนก็แค่ไปเพิ่ม
person_face_encodings = [data_base_encoding,data_base_encoding2,data_base_encoding3]
person_face_names = ["BANYAPON","NOMAD","PANYA"]
ก็ทำระบบเช็คชื่อเด็กเดินเข้าโรงเรียนเหมือนในคลิปดังๆ ที่แชร์กันว่อนๆ ได้แล้ว


2 Comments