เกมแบบหลายผู้เล่นในระบบเครือข่ายหรือ Multiplayer Game บน Unity 3D นั้นมี Asset Store มากมายให้เลือกใช้แต่ในบทเรียนนี้เราจะมาเรียนรู้เรื่องของ Network Manager กันก่อน
ในบทเรียนนี้จะเริ่มต้นโดยการเรียกใช้ Network Manager ให้รู้ก่อนว่าเราสามารถทำอะไรกับมันได้บ้าง โดย Flow หลักของเกมที่เราจะพัฒนาจะมีการทำงานต่อไปนี้
- ผู้เล่นที่เป็น Host หรือ Server จะทำการ Create สนามรบหรือฉากพร้อมตัวละครออกมาวิ่งในฉาก
- ผู้เล่นที่ต้องการเข้าไปเล่นด้วยกันจะทำการค้นหา Host หรือ Server ที่ Create ไว้แล้วเพื่อ Join Server
- การควบคุมจะเป็นปุ่ม WASD และ Mouse คลิกเพื่อโจมตีด้วยดาบ
- เป็นเกมมุมมองบุคคลที่ 3
- ข้อผิดพลาดที่ยังต้องแก้ไขคือ Network Camera ที่ยังไม่เรียบร้อยดีเท่าไร (กำลังหาวิธีแก้ไข)
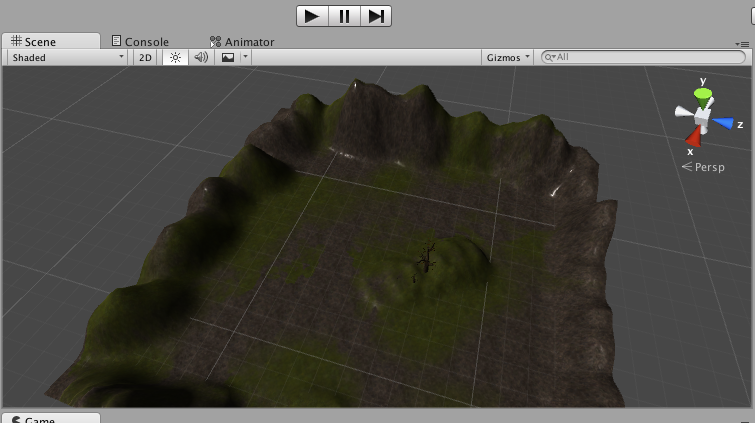
เอาลาะมาเตรียมความพร้อมกัน ในตัวอย่างนี้แนะนำให้ไปออกแบบ Terrian ของเกมให้เรียบร้อยด้วย Assets ที่มีในมือก่อนครับ
ตัวละครแนะนำให้ใช้ Mecanim และ Animator Controller ให้พร้อมโดยสร้าง State ของ Parameter เป็น Bool และ Trigger ต่อไปนี้
- (Bool) IsRunning – สำหรับตรวจสอบสถานะว่าวิ่งหรือหยุดวิ่ง
- (Bool) IsJumping – สำหรับตรวจสอบสถานะว่ากระโดด หรือ ไม่กระโดด
- (Bool) IsAttack – สำหรับตรวจสอบสถานะการโจมตี
- (Trigger) Death – เมื่อตายเท่านั้น
อ่านบทความการสร้างตัวละครได้ที่นี่
- เขียนเกม Unity การทำ Humanoid ให้กับ โมเดลตัวละคร 3 มิติ
- เขียนเกม 3 มิติด้วย Unity การใช้ Animator Controller
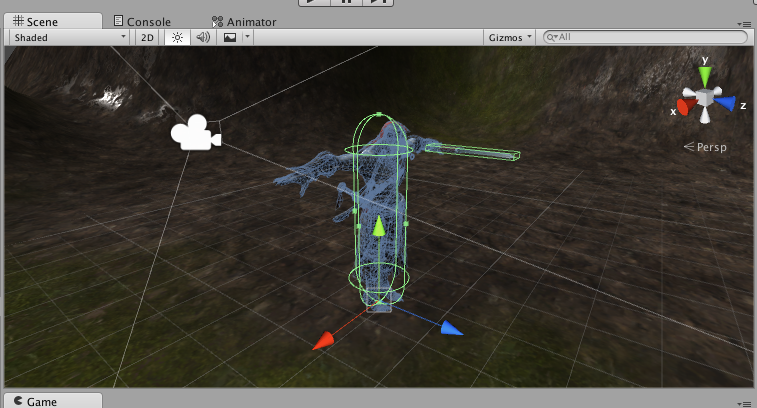
นำตัวละครลงไปใน Unity ทำการ rigged และสร้าง Animator Controller ให้เรียบร้อย พร้อมเพิ่ม Network View Component ลงไปในตัวละคร
นำตัวละครลงไปในเกม
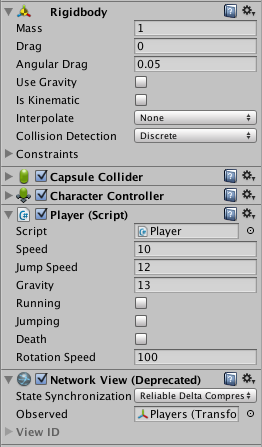
ตั้งค่า Rigidbody และ Physics และ Collider ให้เรียบร้อย พร้อมทั้งใส่ Network View Component ลงไป
เมื่อตั้งค่าตามตัวอย่างเป็นที่เรียบร้อย ให้เราสร้าง Game Objects ขึ้นมาเปล่าๆ หนึ่งตัว พร้อมกับเพิ่ม Script ภาษา C# ชื่อว่า NetworkManager.cs ขึ้นมาใส่ Code ต่อไปนี้
private const string typeName = "MultiPlayer";
private const string gameName = "Havoc";
public string stringToEdit = "Your Name";
private bool isRefreshingHostList = false;
private HostData[] hostList;

public GameObject PrefabsObjectsPlayer;
โดยเราตั้งชื่อห้องว่า Havoc เป็น default Name ไว้ก่อน พร้อมช่องกรอกชื่อของผู้เล่น(ยังไม่ได้ใช้งานอะไรตอนนี้) ตามด้วยสถานะของ isRefreshingHostList เป็น false เพื่อให้ Client ตรวจสอบว่ามี Server รันไว้อยู่หรือเปล่า โดยรายชื่อ Server ที่ Host สร้างไว้จะถูกเก็บใน Array ที่ชื่อว่า HostData
พร้อมกับประกาศ GameObject ว่า PrefabsObjectPlayer สำหรับ Clone ตัวผู้เล่นเมื่อมีสถานะการ Join เข้ามาใน Host ของเกมที่กำลังเล่นอยู่
void OnGUI()
    {
        if (!Network.isClient && !Network.isServer)
        {
            GUI.Box(new Rect(10,10,250,200), "Loader Menu");
            stringToEdit = GUI.TextField(new Rect(20,40,200,20), stringToEdit, 25);
            if (GUI.Button(new Rect(20,70,200,20), "Start Server"))
                StartServer();

            if (GUI.Button(new Rect(20,100,200,20), "Refresh Hosts"))
                RefreshHostList();

            if (hostList != null)
            {
                for (int i = 0; i < hostList.Length; i++)
                {
                    if (GUI.Button(new Rect(20, 130 + (150 * i), 200, 20), hostList[i].gameName))
                        JoinServer(hostList[i]);
                }
            }
        }
    }
สร้างหน้าจอ GUI ขึ้นมา โดยมีเงื่อนไขว่า ถ้ากด Start Server จะเรียกฟังก์ชันการสร้าง Server ดังนี้
private void StartServer()
    {
        Network.InitializeServer(5, 25000, !Network.HavePublicAddress());
        MasterServer.RegisterHost(typeName, gameName);
    }

    void OnServerInitialized()
    {
        CreatePlayer();
    }
เมื่อมีการสร้าง Start Server จะไปเรียกฟังก์ชัน CreatePlayer() ขึ้นมาเพื่อเป็นการ Clone ตัว Player
private void CreatePlayer()
    {
        Network.Instantiate(PrefabsObjectsPlayer, Vector3.up * 5, Quaternion.identity, 0);
    }
แต่ถ้าหากว่าเป็นเครื่องที่เป็น Client จะต้องกด RefreshHost ก่อนก็จะไปเรียกคำสั่งนี้แทน
 void Update()
    {
        if (isRefreshingHostList && MasterServer.PollHostList().Length > 0)
        {
            isRefreshingHostList = false;
            hostList = MasterServer.PollHostList();
        }
    }

    private void RefreshHostList()
    {
        if (!isRefreshingHostList)
        {
            isRefreshingHostList = true;
            MasterServer.RequestHostList(typeName);
        }
    }


    private void JoinServer(HostData hostData)
    {
        Network.Connect(hostData);
    }
ดังนั้นไฟล์ NetworkManager.cs จะเป็นแบบนี้
using UnityEngine;
using System.Collections;

public class NetworkManager : MonoBehaviour
{
    private const string typeName = "MultiPlayer";
    private const string gameName = "Havoc";
    public string stringToEdit = "Your Name";
    private bool isRefreshingHostList = false;
    private HostData[] hostList;

    public GameObject PrefabsObjectsPlayer;

    void OnGUI()
    {
        if (!Network.isClient && !Network.isServer)
        {
            GUI.Box(new Rect(10,10,250,200), "Loader Menu");
            stringToEdit = GUI.TextField(new Rect(20,40,200,20), stringToEdit, 25);
            if (GUI.Button(new Rect(20,70,200,20), "Start Server"))
                StartServer();

            if (GUI.Button(new Rect(20,100,200,20), "Refresh Hosts"))
                RefreshHostList();

            if (hostList != null)
            {
                for (int i = 0; i < hostList.Length; i++)
                {
                    if (GUI.Button(new Rect(20, 130 + (150 * i), 200, 20), hostList[i].gameName))
                        JoinServer(hostList[i]);
                }
            }
        }
    }

    private void StartServer()
    {
        Network.InitializeServer(5, 25000, !Network.HavePublicAddress());
        MasterServer.RegisterHost(typeName, gameName);
    }

    void OnServerInitialized()
    {
        CreatePlayer();
    }


    void Update()
    {
        if (isRefreshingHostList && MasterServer.PollHostList().Length > 0)
        {
            isRefreshingHostList = false;
            hostList = MasterServer.PollHostList();
        }
    }

    private void RefreshHostList()
    {
        if (!isRefreshingHostList)
        {
            isRefreshingHostList = true;
            MasterServer.RequestHostList(typeName);
        }
    }


    private void JoinServer(HostData hostData)
    {
        Network.Connect(hostData);
    }

    void OnConnectedToServer()
    {
        CreatePlayer();
    }


    private void CreatePlayer()
    {
        Network.Instantiate(PrefabsObjectsPlayer, Vector3.up * 5, Quaternion.identity, 0);
    }
}
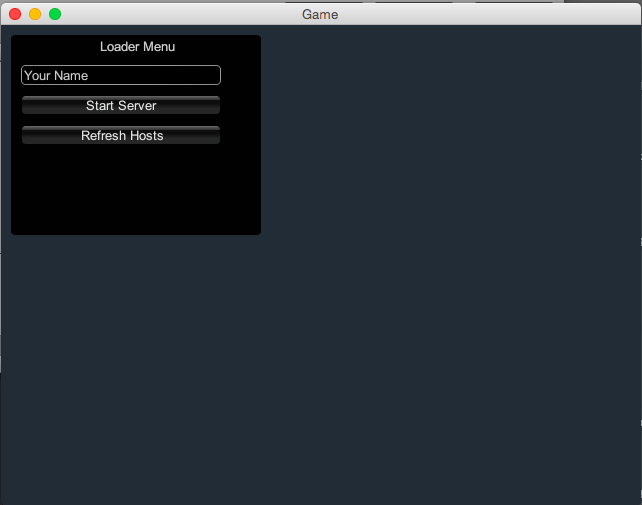
ทดสอบการเข้า StartServer()
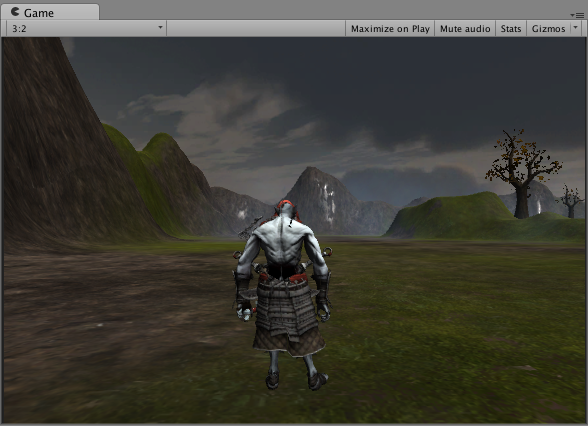
ตัวละครเข้าไปในเกม
ดังนั้นให้เราไปสร้างการควบคุมตัวละครที่ Player ในเกมของเรา โดยเพิ่มไฟล์ player.cs เข้าไป
private float lastSynchronizationTime = 0f;
    private float syncDelay = 0f;
    private float syncTime = 0f;
    private Vector3 syncStartPosition = Vector3.zero;
    private Vector3 syncEndPosition = Vector3.zero;
มีคำสั่งในการ Synchonizes ตัวละครในเกมให้ตรงกับส่วนของ Server Time เข้ามาก่อน เพื่อควบคุมโดย
 void OnSerializeNetworkView(BitStream stream, NetworkMessageInfo info)
    {
        Vector3 syncPosition = Vector3.zero;
        Vector3 syncVelocity = Vector3.zero;
        if (stream.isWriting)
        {
            syncPosition = GetComponent<Rigidbody>().position;
            stream.Serialize(ref syncPosition);

            syncPosition = GetComponent<Rigidbody>().velocity;
            stream.Serialize(ref syncVelocity);
        }
        else
        {
            stream.Serialize(ref syncPosition);
            stream.Serialize(ref syncVelocity);

            syncTime = 0f;
            syncDelay = Time.time - lastSynchronizationTime;
            lastSynchronizationTime = Time.time;

            syncEndPosition = syncPosition + syncVelocity * syncDelay;
            syncStartPosition = GetComponent<Rigidbody>().position;
        }
    }

    void Awake()
    {
        lastSynchronizationTime = Time.time;
    }

    void Update()
    {
        if (GetComponent<NetworkView>().isMine)
        {
            InputMovement();
        }
        else
        {
            SyncedMovement();
        }
    }

 private void SyncedMovement()
    {
        syncTime += Time.deltaTime;

        GetComponent<Rigidbody>().position = Vector3.Lerp(syncStartPosition, syncEndPosition, syncTime / syncDelay);
    }
ส่วนของการควบคุมจะทำงานที่ InputMovement() ให้ประกาศ Header ก่อน
Animator anim;
    public float speed = 10f;
    public float jumpSpeed = 12.0F;
    public float gravity = 13.0F;
    private Vector3 moveDirection = Vector3.zero;
    public bool Running = false;
    public bool Jumping = false;
    public bool Death = false;

    public float rotationSpeed = 100.0F;

    void Start(){
        anim = GetComponent <Animator> ();
        Time.timeScale = 1;
    }
ตามด้วย
private void InputMovement()
    {
        CharacterController controller = GetComponent<CharacterController>();
        if (controller.isGrounded) {
            moveDirection = new Vector3(Input.GetAxis("Horizontal"), 0, Input.GetAxis("Vertical"));
            moveDirection = transform.TransformDirection(moveDirection);
            moveDirection *= speed;

            if (Input.GetButton("Jump")){
                moveDirection.y = jumpSpeed;
                Jumping = true;
            }else{
                Jumping = false;
            }
            if (Input.GetKey((KeyCode.D))
                || Input.GetKey("right")
                || Input.GetKey((KeyCode.A))
                || Input.GetKey("left")
                || Input.GetKey((KeyCode.D))
                || Input.GetKey("up")
                || Input.GetKey((KeyCode.W))
                || Input.GetKey("down")
                || Input.GetKey((KeyCode.S))
                ){
                Running = true;

            }else{
                Running = false;
            }

            if(Running == true){
                //anim.SetTrigger("Running");
                anim.SetBool ("IsRunning", true);
            }else{
                anim.SetBool ("IsRunning", false);
            }

            if(Jumping == true){
                //anim.SetTrigger("Running");
                anim.SetBool ("IsJumping", true);
            }else{
                anim.SetBool ("IsJumping", false);
            }

        }

        //Attack
        if (Input.GetMouseButtonDown (0)) {
            anim.SetBool ("IsAttack", true);
            //Debug.Log ("Attack");
        } else {
            anim.SetBool ("IsAttack", false);
        }

        //Mouse movement
        float translation = Input.GetAxis("Vertical") * speed;
        float rotation = Input.GetAxis("Horizontal") * rotationSpeed;
        translation *= Time.deltaTime;
        rotation *= Time.deltaTime;
        transform.Translate(0, 0, translation);
        transform.Rotate(0, rotation, 0);


        moveDirection.y -= gravity * Time.deltaTime;
        controller.Move(moveDirection * Time.deltaTime);
    }
ภาพรวมของไฟล์ Player.cs จะเป็นดังนี้
using UnityEngine;
using System.Collections;

public class Player : MonoBehaviour
{

    private float lastSynchronizationTime = 0f;
    private float syncDelay = 0f;
    private float syncTime = 0f;
    private Vector3 syncStartPosition = Vector3.zero;
    private Vector3 syncEndPosition = Vector3.zero;

    Animator anim;
    public float speed = 10f;
    public float jumpSpeed = 12.0F;
    public float gravity = 13.0F;
    private Vector3 moveDirection = Vector3.zero;
    public bool Running = false;
    public bool Jumping = false;
    public bool Death = false;

    public float rotationSpeed = 100.0F;

    void Start(){
        anim = GetComponent <Animator> ();
        Time.timeScale = 1;
    }

    void OnSerializeNetworkView(BitStream stream, NetworkMessageInfo info)
    {
        Vector3 syncPosition = Vector3.zero;
        Vector3 syncVelocity = Vector3.zero;
        if (stream.isWriting)
        {
            syncPosition = GetComponent<Rigidbody>().position;
            stream.Serialize(ref syncPosition);

            syncPosition = GetComponent<Rigidbody>().velocity;
            stream.Serialize(ref syncVelocity);
        }
        else
        {
            stream.Serialize(ref syncPosition);
            stream.Serialize(ref syncVelocity);

            syncTime = 0f;
            syncDelay = Time.time - lastSynchronizationTime;
            lastSynchronizationTime = Time.time;

            syncEndPosition = syncPosition + syncVelocity * syncDelay;
            syncStartPosition = GetComponent<Rigidbody>().position;
        }
    }

    void Awake()
    {
        lastSynchronizationTime = Time.time;
    }

    void Update()
    {
        if (GetComponent<NetworkView>().isMine)
        {
            InputMovement();
        }
        else
        {
            SyncedMovement();
        }
    }


    private void InputMovement()
    {
        CharacterController controller = GetComponent<CharacterController>();
        if (controller.isGrounded) {
            moveDirection = new Vector3(Input.GetAxis("Horizontal"), 0, Input.GetAxis("Vertical"));
            moveDirection = transform.TransformDirection(moveDirection);
            moveDirection *= speed;

            if (Input.GetButton("Jump")){
                moveDirection.y = jumpSpeed;
                Jumping = true;
            }else{
                Jumping = false;
            }
            if (Input.GetKey((KeyCode.D))
                || Input.GetKey("right")
                || Input.GetKey((KeyCode.A))
                || Input.GetKey("left")
                || Input.GetKey((KeyCode.D))
                || Input.GetKey("up")
                || Input.GetKey((KeyCode.W))
                || Input.GetKey("down")
                || Input.GetKey((KeyCode.S))
                ){
                Running = true;

            }else{
                Running = false;
            }

            if(Running == true){
                //anim.SetTrigger("Running");
                anim.SetBool ("IsRunning", true);
            }else{
                anim.SetBool ("IsRunning", false);
            }

            if(Jumping == true){
                //anim.SetTrigger("Running");
                anim.SetBool ("IsJumping", true);
            }else{
                anim.SetBool ("IsJumping", false);
            }

        }

        //Attack
        if (Input.GetMouseButtonDown (0)) {
            anim.SetBool ("IsAttack", true);
            //Debug.Log ("Attack");
        } else {
            anim.SetBool ("IsAttack", false);
        }

        //Mouse movement
        float translation = Input.GetAxis("Vertical") * speed;
        float rotation = Input.GetAxis("Horizontal") * rotationSpeed;
        translation *= Time.deltaTime;
        rotation *= Time.deltaTime;
        transform.Translate(0, 0, translation);
        transform.Rotate(0, rotation, 0);


        moveDirection.y -= gravity * Time.deltaTime;
        controller.Move(moveDirection * Time.deltaTime);
    }

    private void SyncedMovement()
    {
        syncTime += Time.deltaTime;

        GetComponent<Rigidbody>().position = Vector3.Lerp(syncStartPosition, syncEndPosition, syncTime / syncDelay);
    }

}
เอาล่ะทำการ Clone Prefabs ของเจ้า Player ของเราซะ เมื่อ Clone เสร็จก็ลบต้นแบบมันทิ้งไปเลย
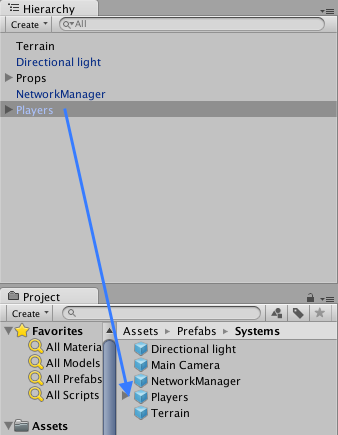
ไปที่ GameObject ตัว NetworkManager ครับให้ ลากเจ้า Prefabs ของ Player ไปวางที่ Prefabs Objects Player
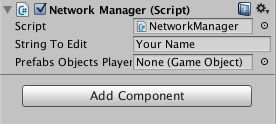
ดังภาพข้างล่าง

ทำการ Build Setting สร้าง EXE หรือ MAC โปรแกรม Exceute ตัว Client ขึ้นมา
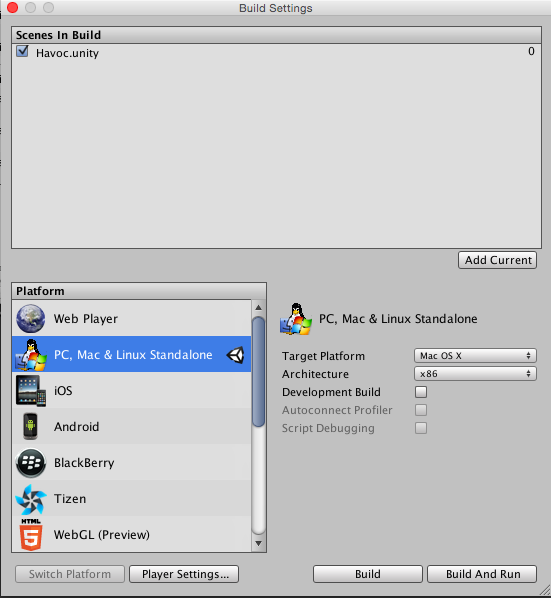
ทำการ Execute เกมเรามาตัวหนึ่ง
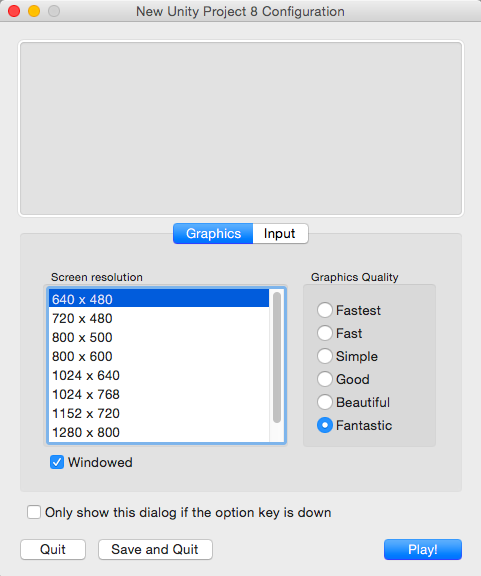
ทดสอบเกมของเรา
เปิดเกมขึ้นมาตัวจะเป็น Server หรือ Client ก็ได้สลับกันเล่นดู
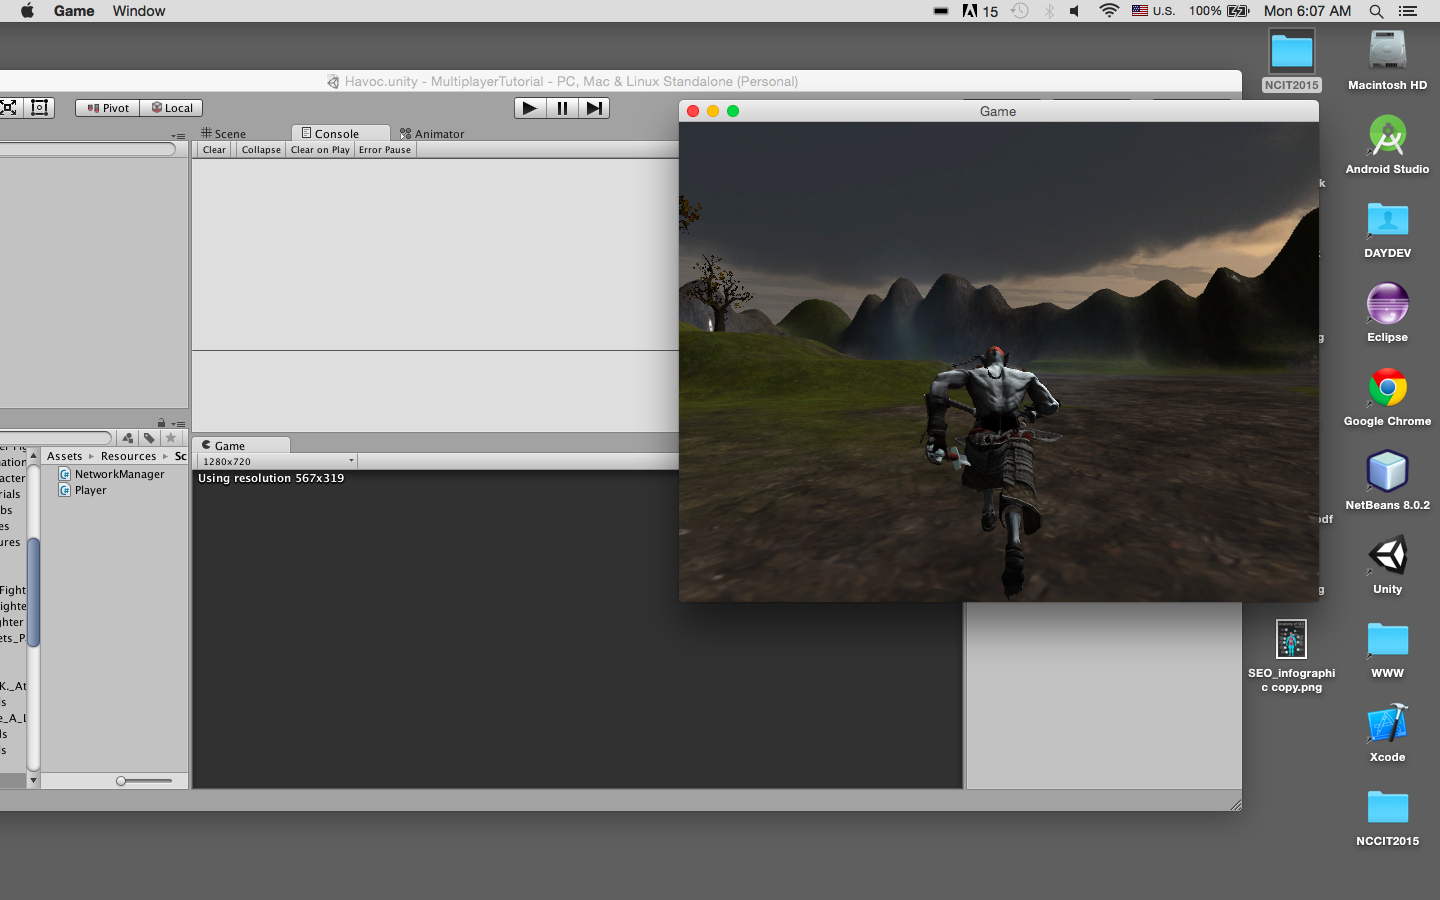
ทดสอบใหม่อีกครั้งให้สร้าง Server ขึ้นมาสัก 1 Host เพื่อทดสอบ Multiplayer
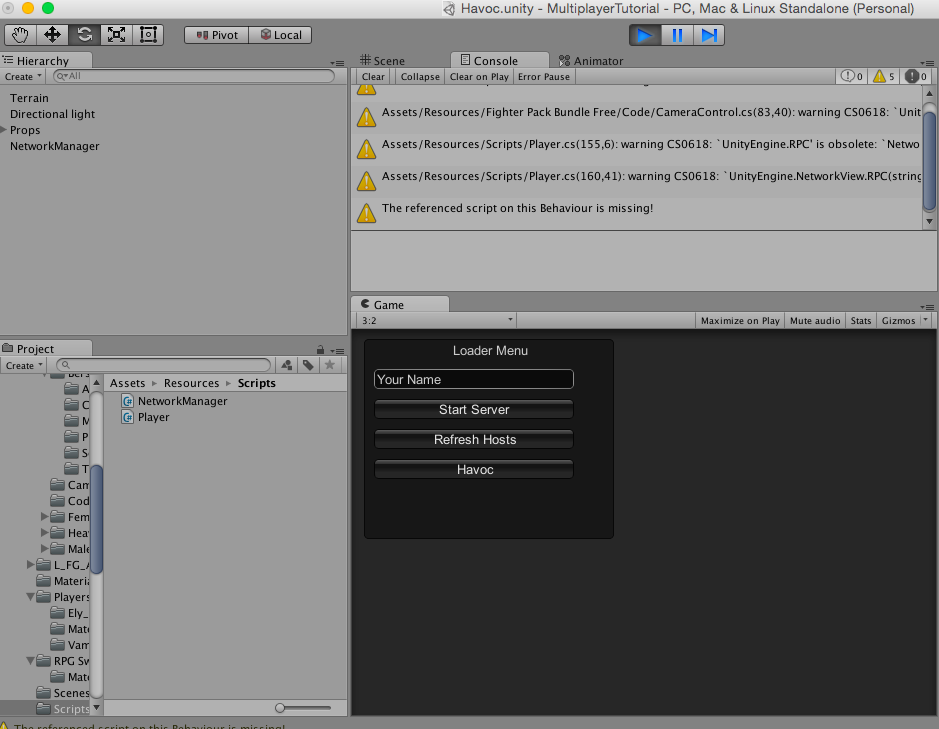
ถ้าตัว Server สร้างแล้วอีกโปรแกรมที่จะเป็น Client ก็ให้กด Refresh Hosts เสีย
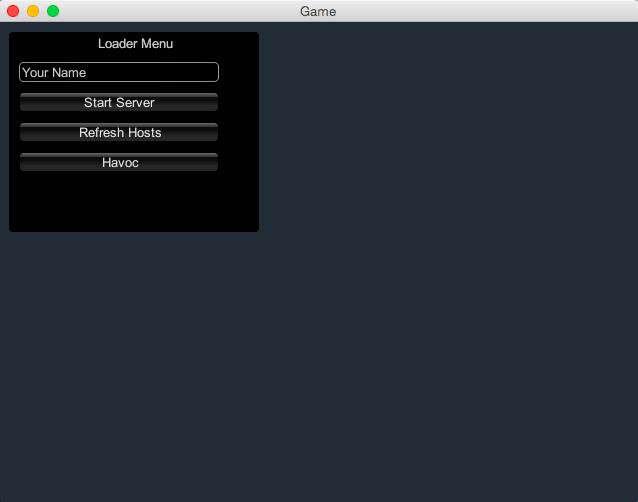
เจอชื่อ Server ว่า Havoc ก็ให้ Join เลย
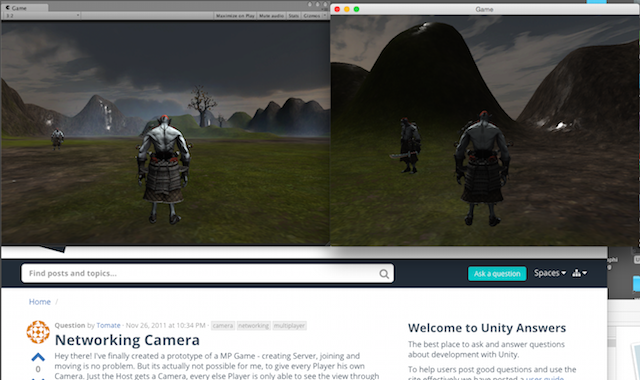
เล่นเกม MultiPlayer ได้แล้ว
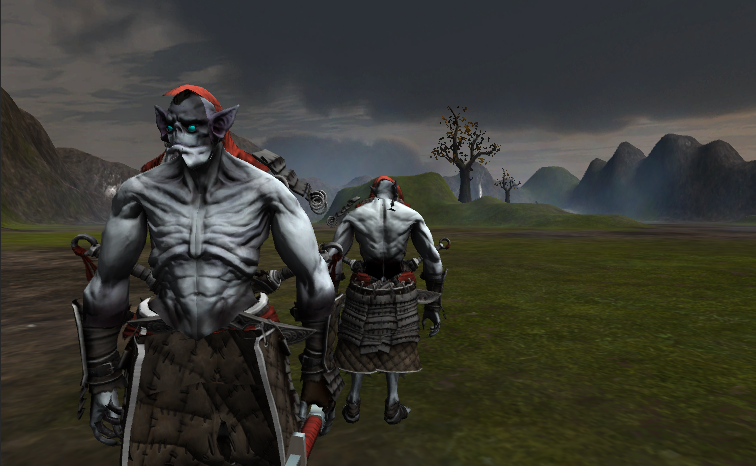
ก็กลายเป็นว่าเล่นเกม MultiPlayer ได้แล้ว
หมายเหตุ: ต้องเปลี่ยน Camera เป็น Global Camera จะไม่มีปัญหาการควบคุมกระตุก แต่ที่ใส่ไว้ใน Prefabs ของ Player เพื่อที่จะทดสอบใน Labs ต่อไปคือการใช้ Network Camera แบ่งการมองในแต่ละ Client ให้เรียบร้อย
อ้างอิง:
- http://docs.unity3d.com/ScriptReference/Networking.NetworkManager.html
- http://docs.unity3d.com/ScriptReference/Networking.NetworkManager.StartHost.html
- http://docs.unity3d.com/ScriptReference/Networking.NetworkLobbyManager-gamePlayerPrefab.html

