บทเรียนสำหรับผู้เริ่มต้นในการพัฒนาแอปพลิเคชันบนแพลตฟอร์ม iOS ด้วย XCode และ Swift (ในตัวอย่างใช้ XCode 10.2.1 และ Swift เวอร์ชัน 5) เรียกใช้ UITableView
ศึกษาบทเรียนก่อนหน้า เพื่อความสนุก:
- เริ่มต้นพัฒนาแอปพลิเคชัน iOS ด้วย Swift เวอร์ชัน 5
- เขียนแอปพลิเคชัน iOS ด้วย Swift 5 การใช้งาน UITextField รับค่าแป้นพิมพ์
- เขียนแอปพลิเคชัน iOS ด้วย Swift 5 การทำงานร่วมกับ UIAlertController
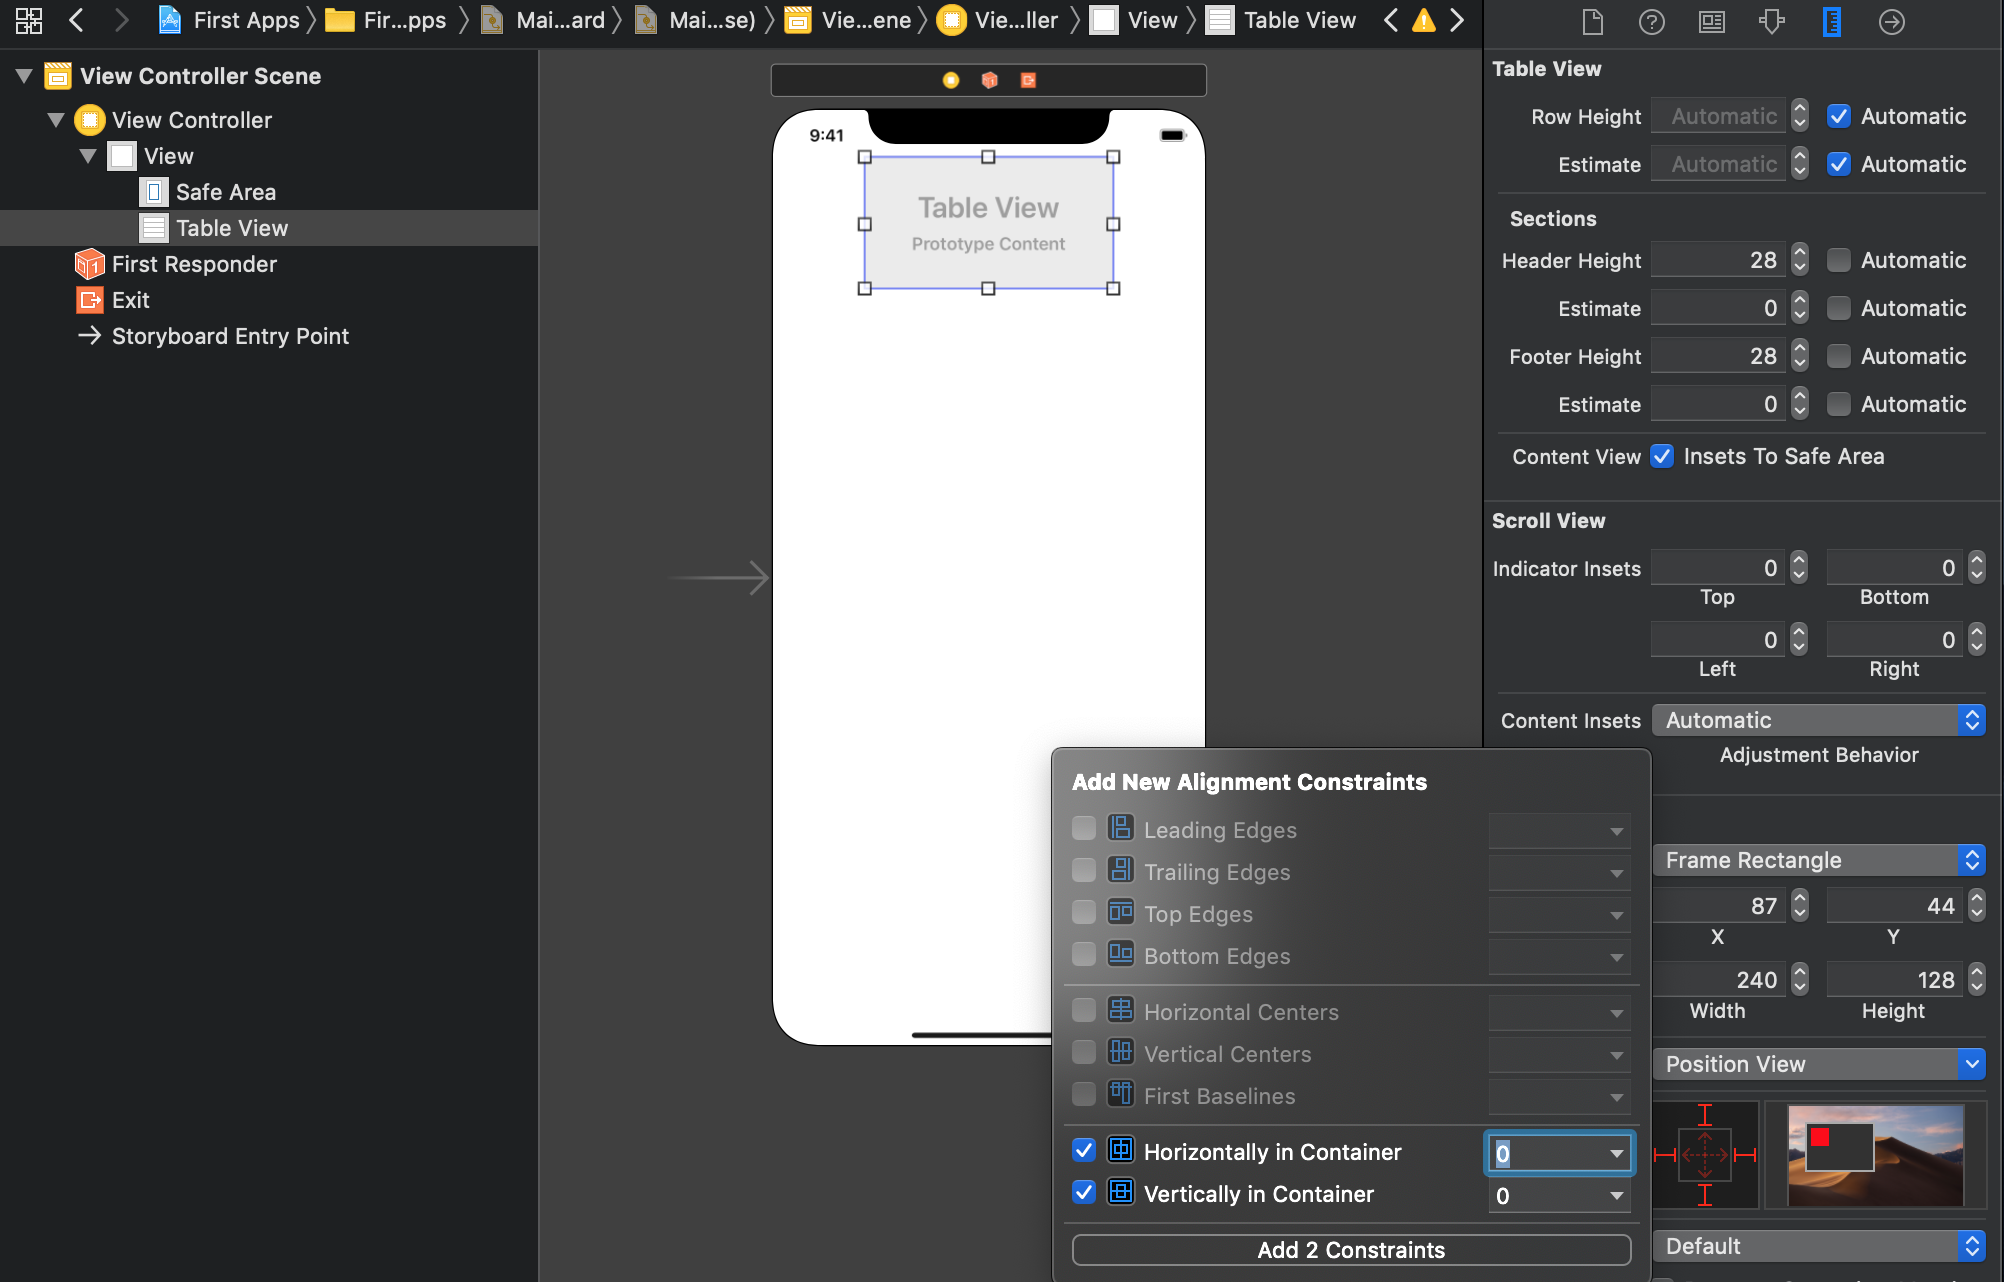
บทเรียนนี้ให้ทำการสร้าง Single View App ขึ้นมาใหม่ แล้วให้ไปที่ Main.Storyboard เพื่อเรียกใช้งาน TableView มาใช้งาน
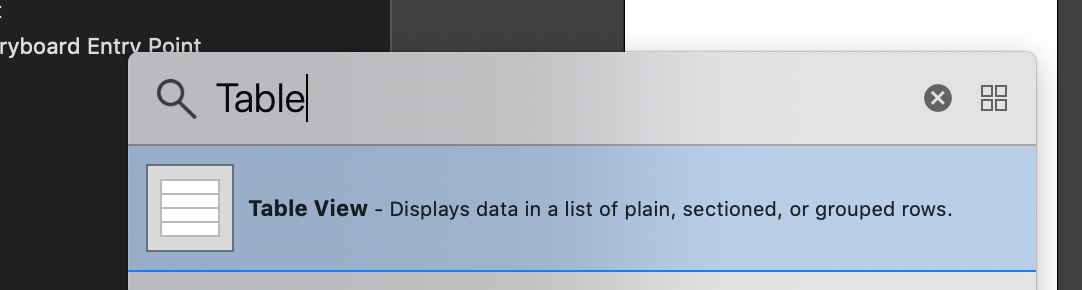
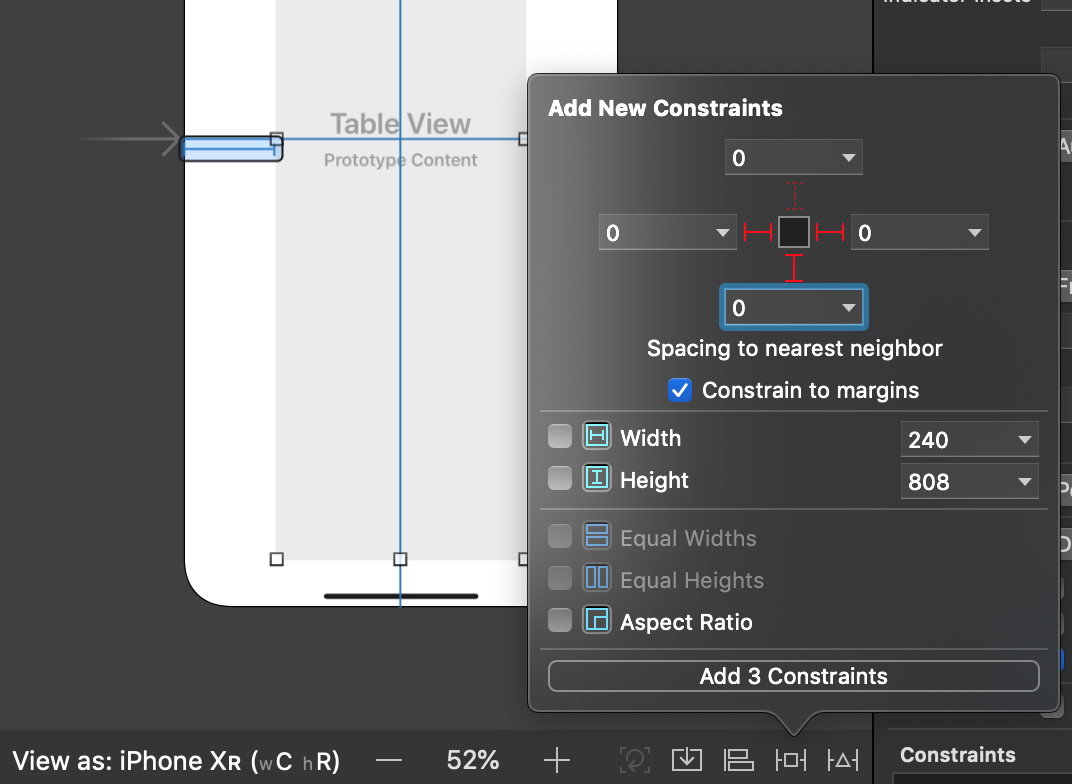
ลากไป ทำการผูก Contraint ใหม่ให้เรียบร้อย
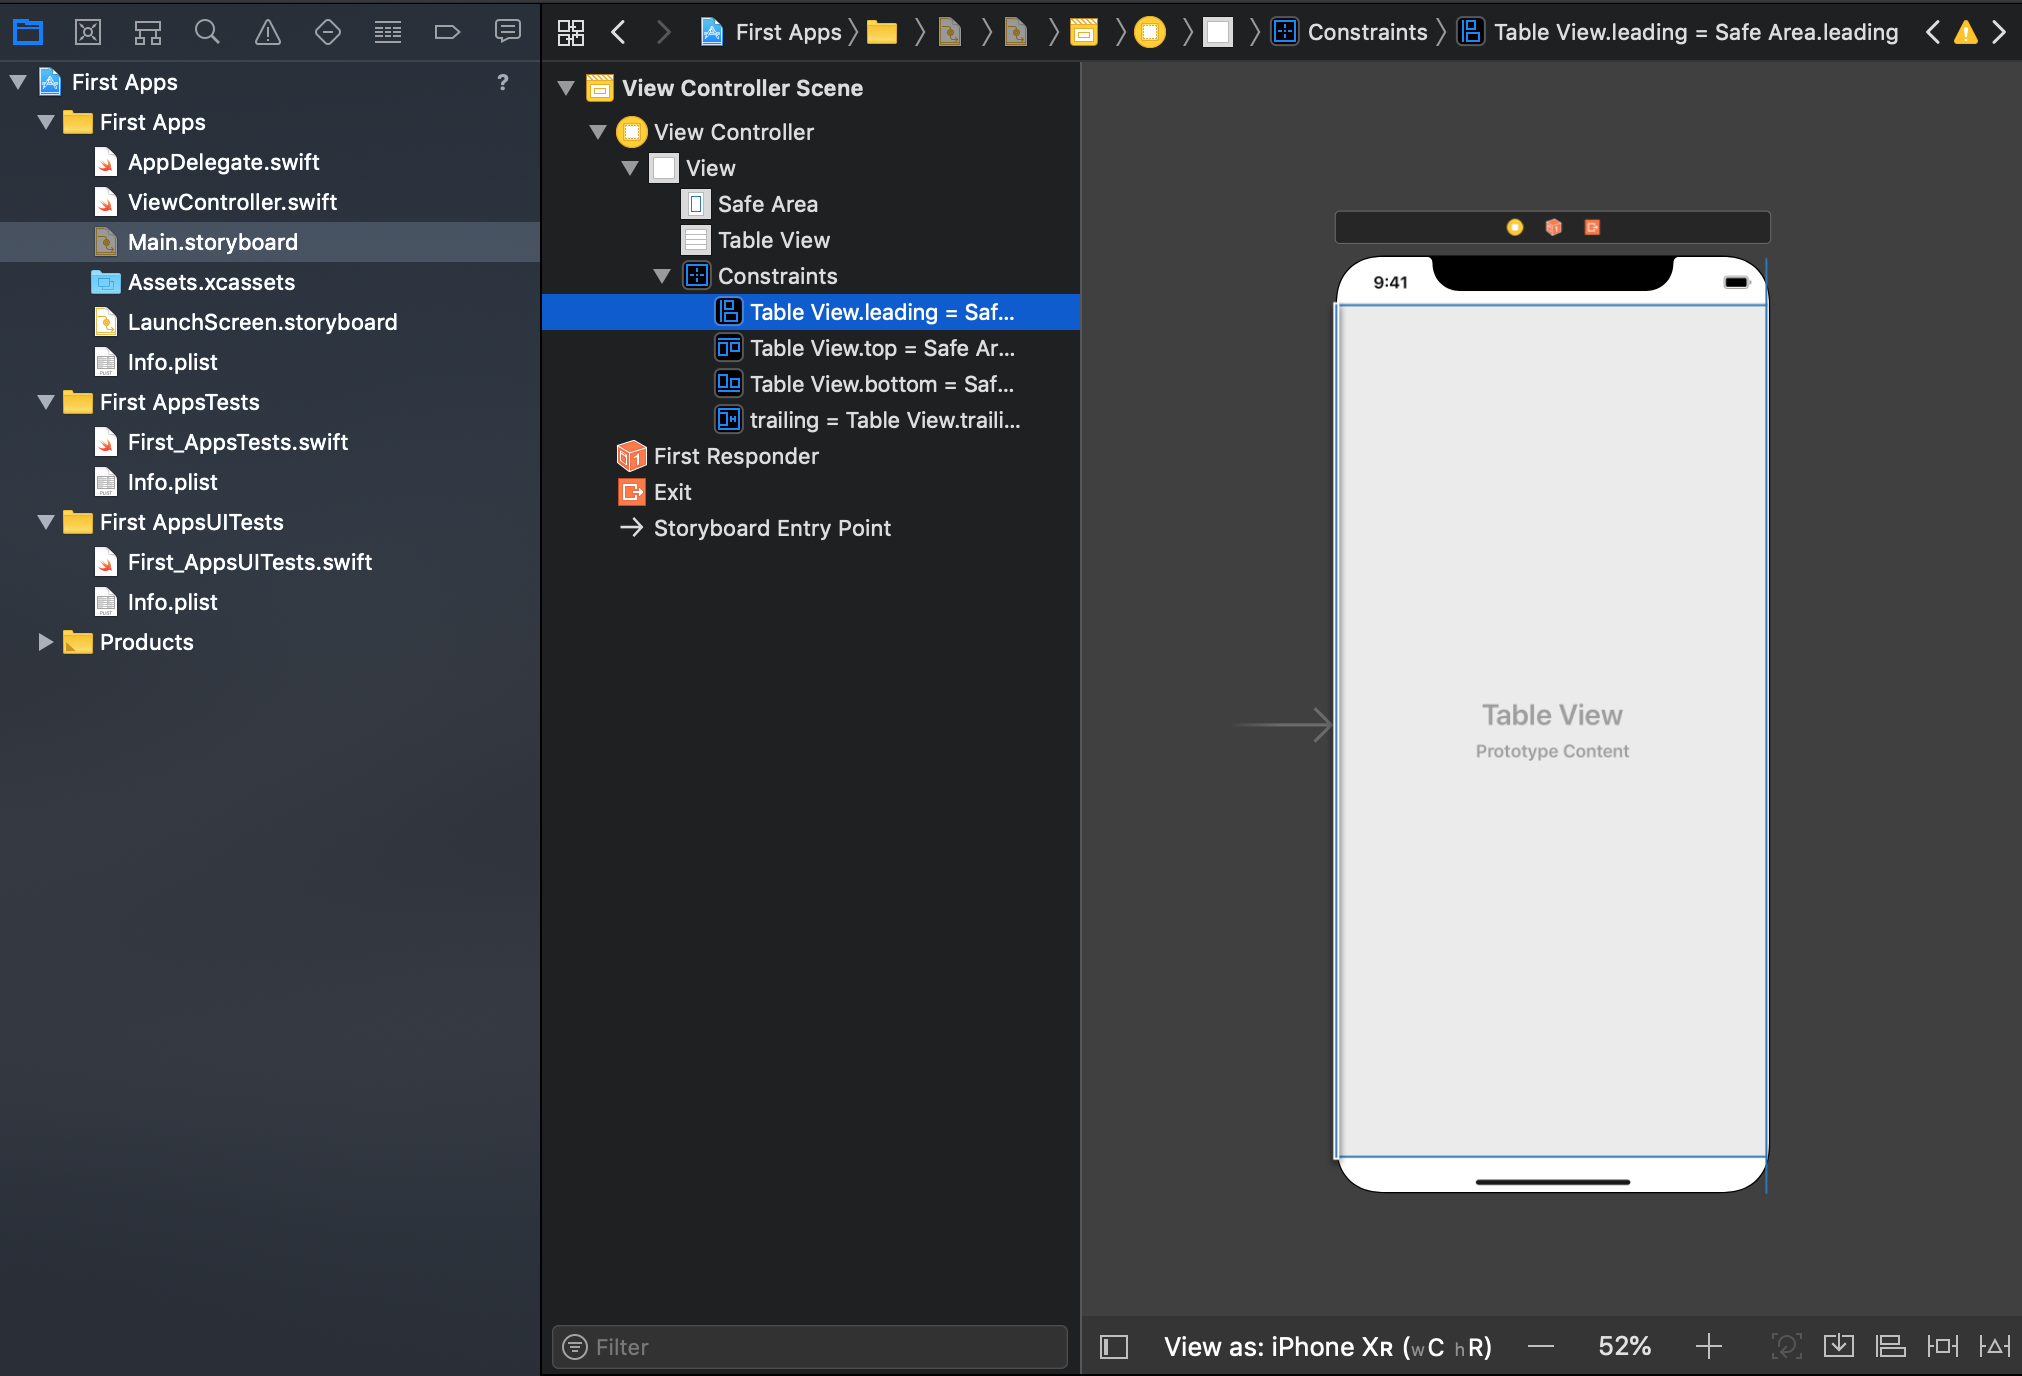
ทำการผูก Constraint แบบนี้
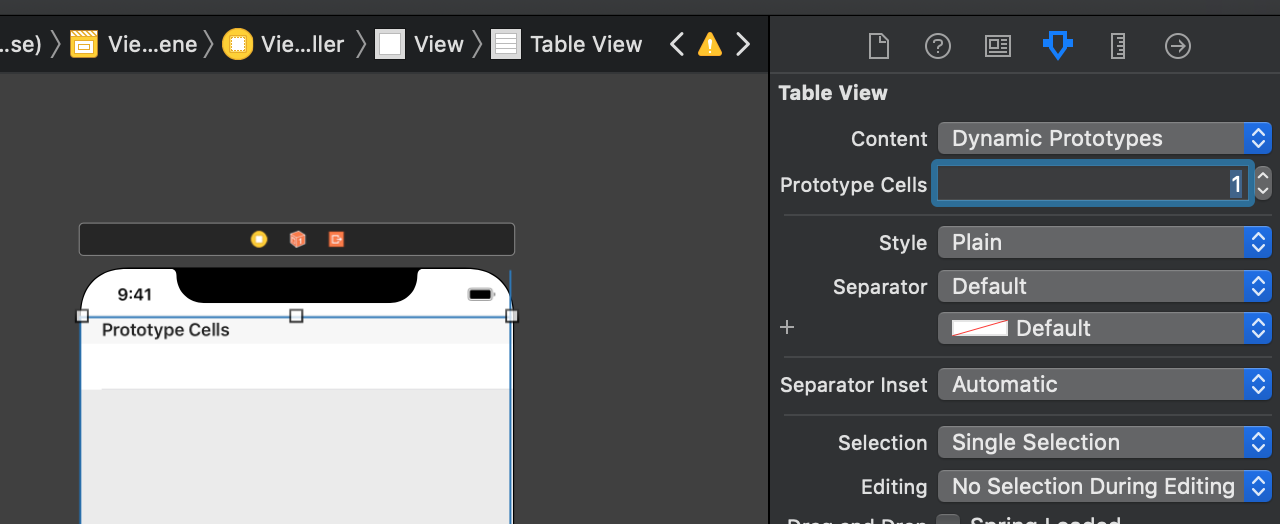
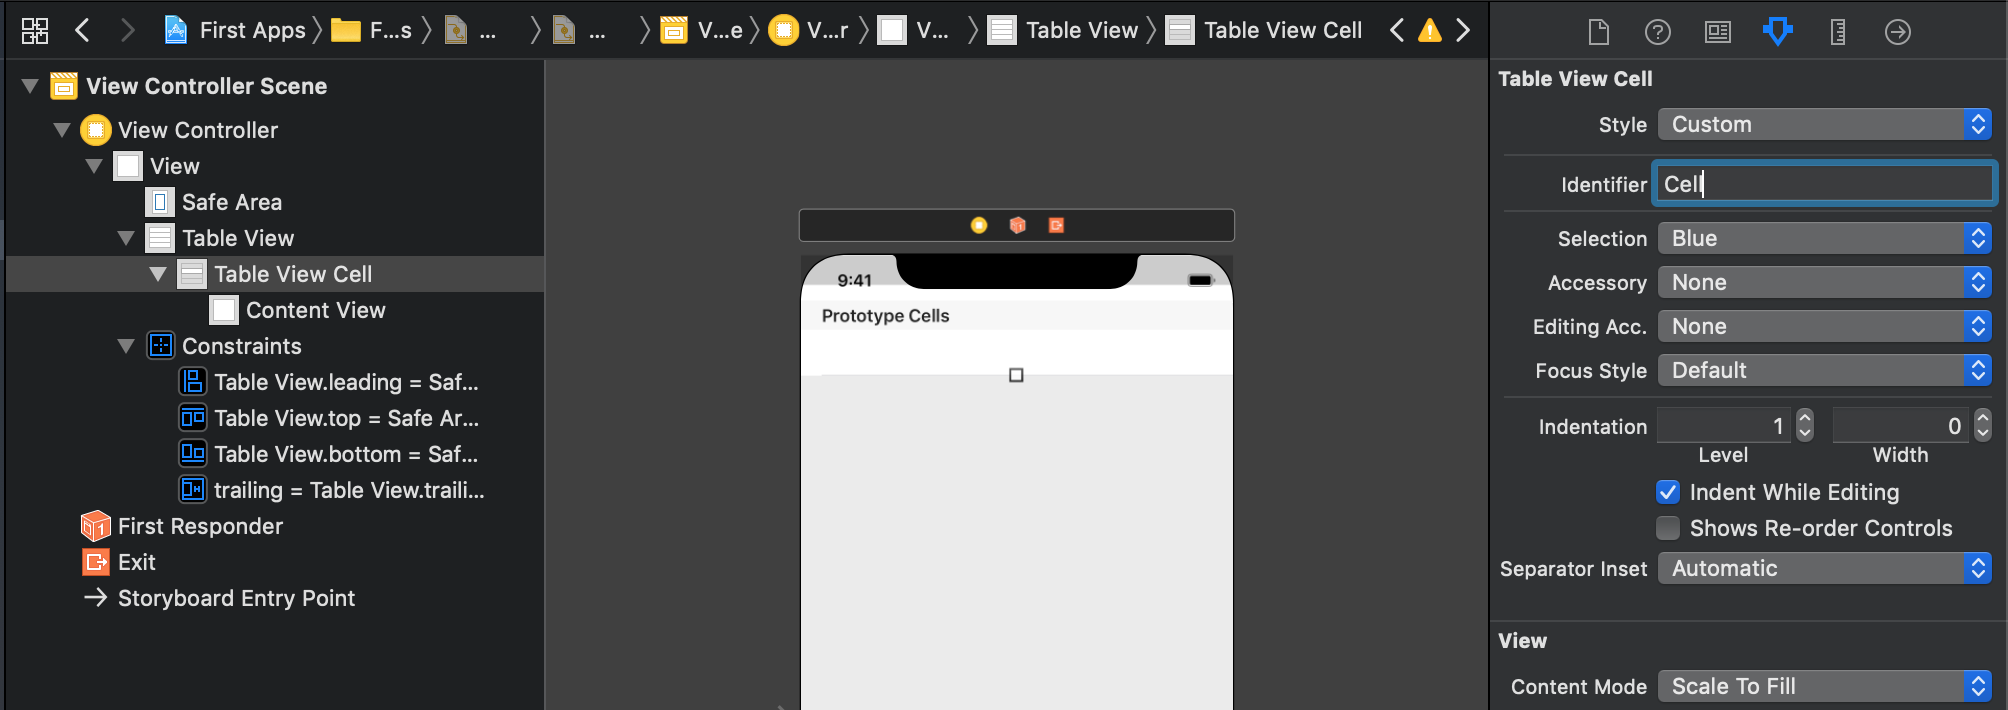
ไปที่ Attribute Inspector แล้วทำการตั้งค่า TableView ดังนี้ เลือก Prototype Cells เป็น 1 เพื่อมี UITableViewCell ปรากฏขึ้นให้เราตั้งค่า Reuse Identifier
ตั้งชื่อ Identifier ของ Table View Cell ว่า “Cell” ขั้นตอนนี้สำคัญ
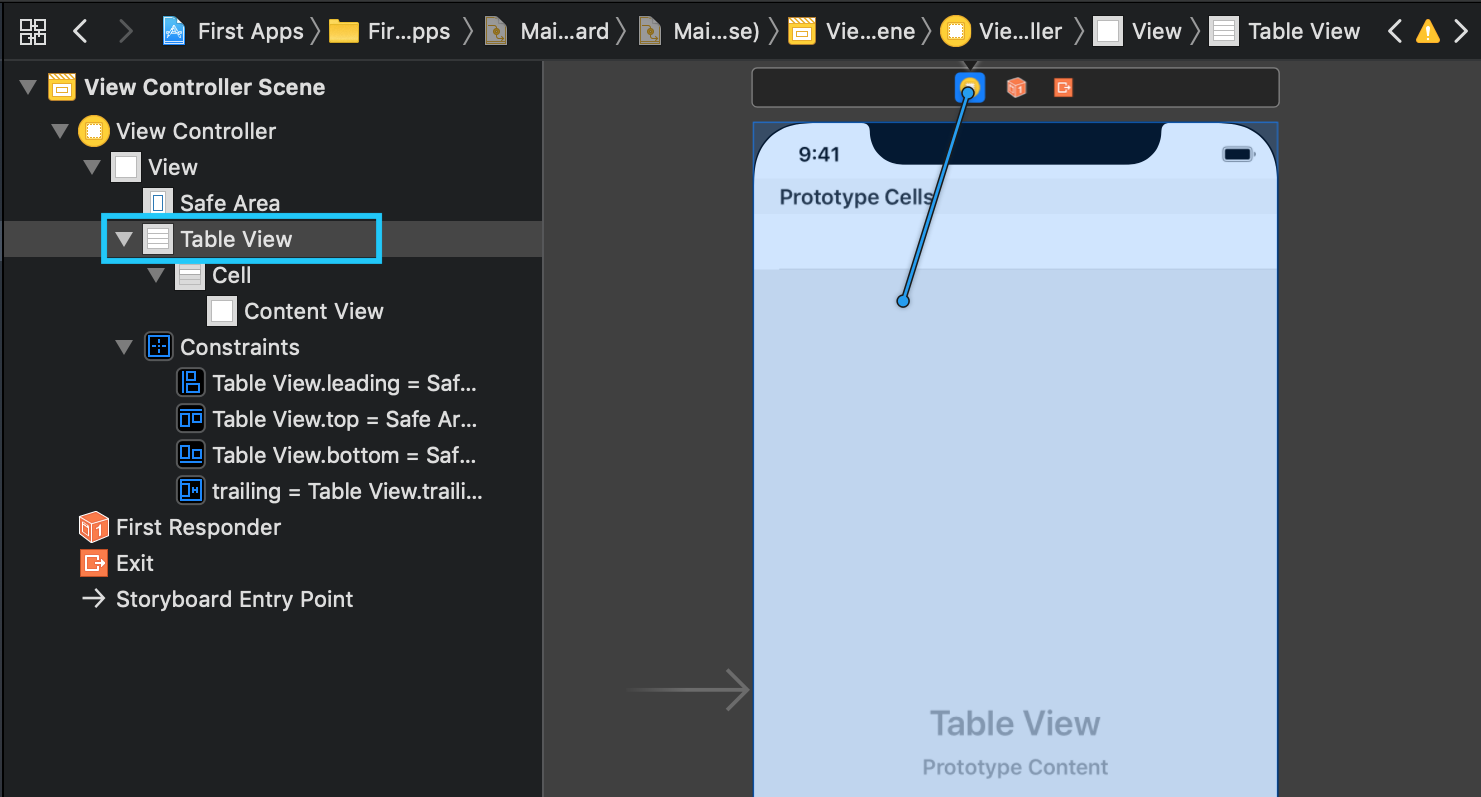
กลับไปที่ TableView แล้วคลิกค้างพร้อมกด Control ลากไปที่ไอคอน ViewController สีเหลือง
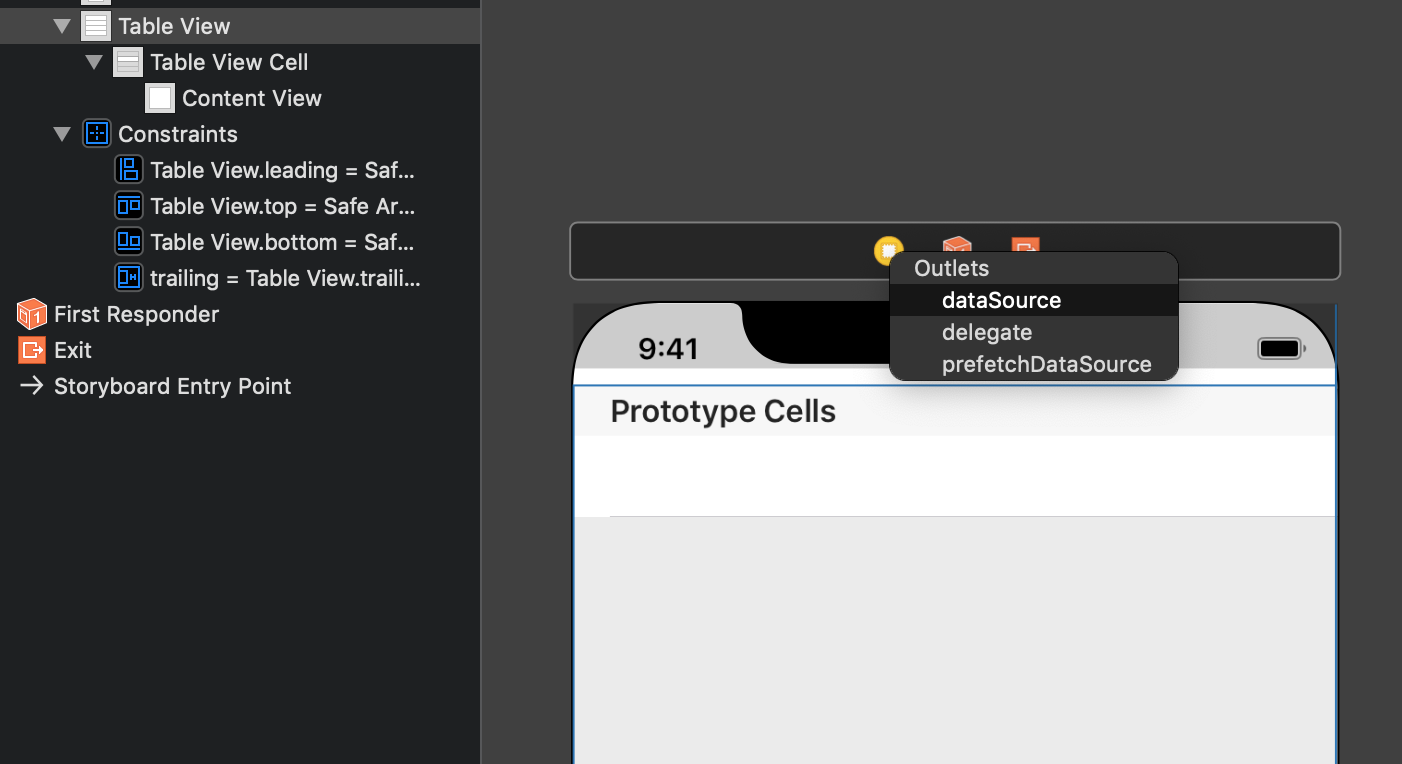
เลือก dataSource และทำอีกครั้งเลือก delegate
ไปที่ ViewController.swift ทำการแก้ไข Class ดังนี้จากเดิม:
class ViewController: UIViewController {
แก้ไขเป็น
class ViewController: UIViewController, UITableViewDelegate, UITableViewDataSource {
หลังจากนั้น ประกาศตัวแปรต่อไปนี้ไว้ใต้คลาส นั่นคือ ชุด Array ของ String ว่า data:
var tableView : UITableView!
    var data:[String] = ["Asa Akira","Kalina Ryu","Tia Tanaka","Asia Carrera"]
สร้างฟังก์ชันใหม่ขึ้นว่าเพื่อจัดการ return row ของ UITableView ด้วยจำนวน Array
func tableView(_ tableView: UITableView, numberOfRowsInSection section: Int) -> Int {
        return self.data.count
}
ประกาศอีกฟังก์ชันในการ Bind Data:
internal func tableView(_ tableView: UITableView, cellForRowAt indexPath: IndexPath) -> UITableViewCell {
        let cell = tableView.dequeueReusableCell(withIdentifier: "Cell", for: indexPath)

        cell.textLabel?.text = self.data[indexPath.row]
        return cell
}
ดังนั้นภาพรวมจะเป็นดังนี้:
import UIKit

class ViewController: UIViewController, UITableViewDelegate, UITableViewDataSource {

    var tableView : UITableView!
    var data:[String] = ["Asa Akira","Kalina Ryu","Tia Tanaka","Asia Carrera"]

    override func viewDidLoad() {
        super.viewDidLoad()
    }

    func tableView(_ tableView: UITableView, numberOfRowsInSection section: Int) -> Int {
        return self.data.count
    }

    internal func tableView(_ tableView: UITableView, cellForRowAt indexPath: IndexPath) -> UITableViewCell {
        let cell = tableView.dequeueReusableCell(withIdentifier: "Cell", for: indexPath)

        cell.textLabel?.text = self.data[indexPath.row]
        return cell
    }
}
ทดสอบกันหน่อยดีกว่า
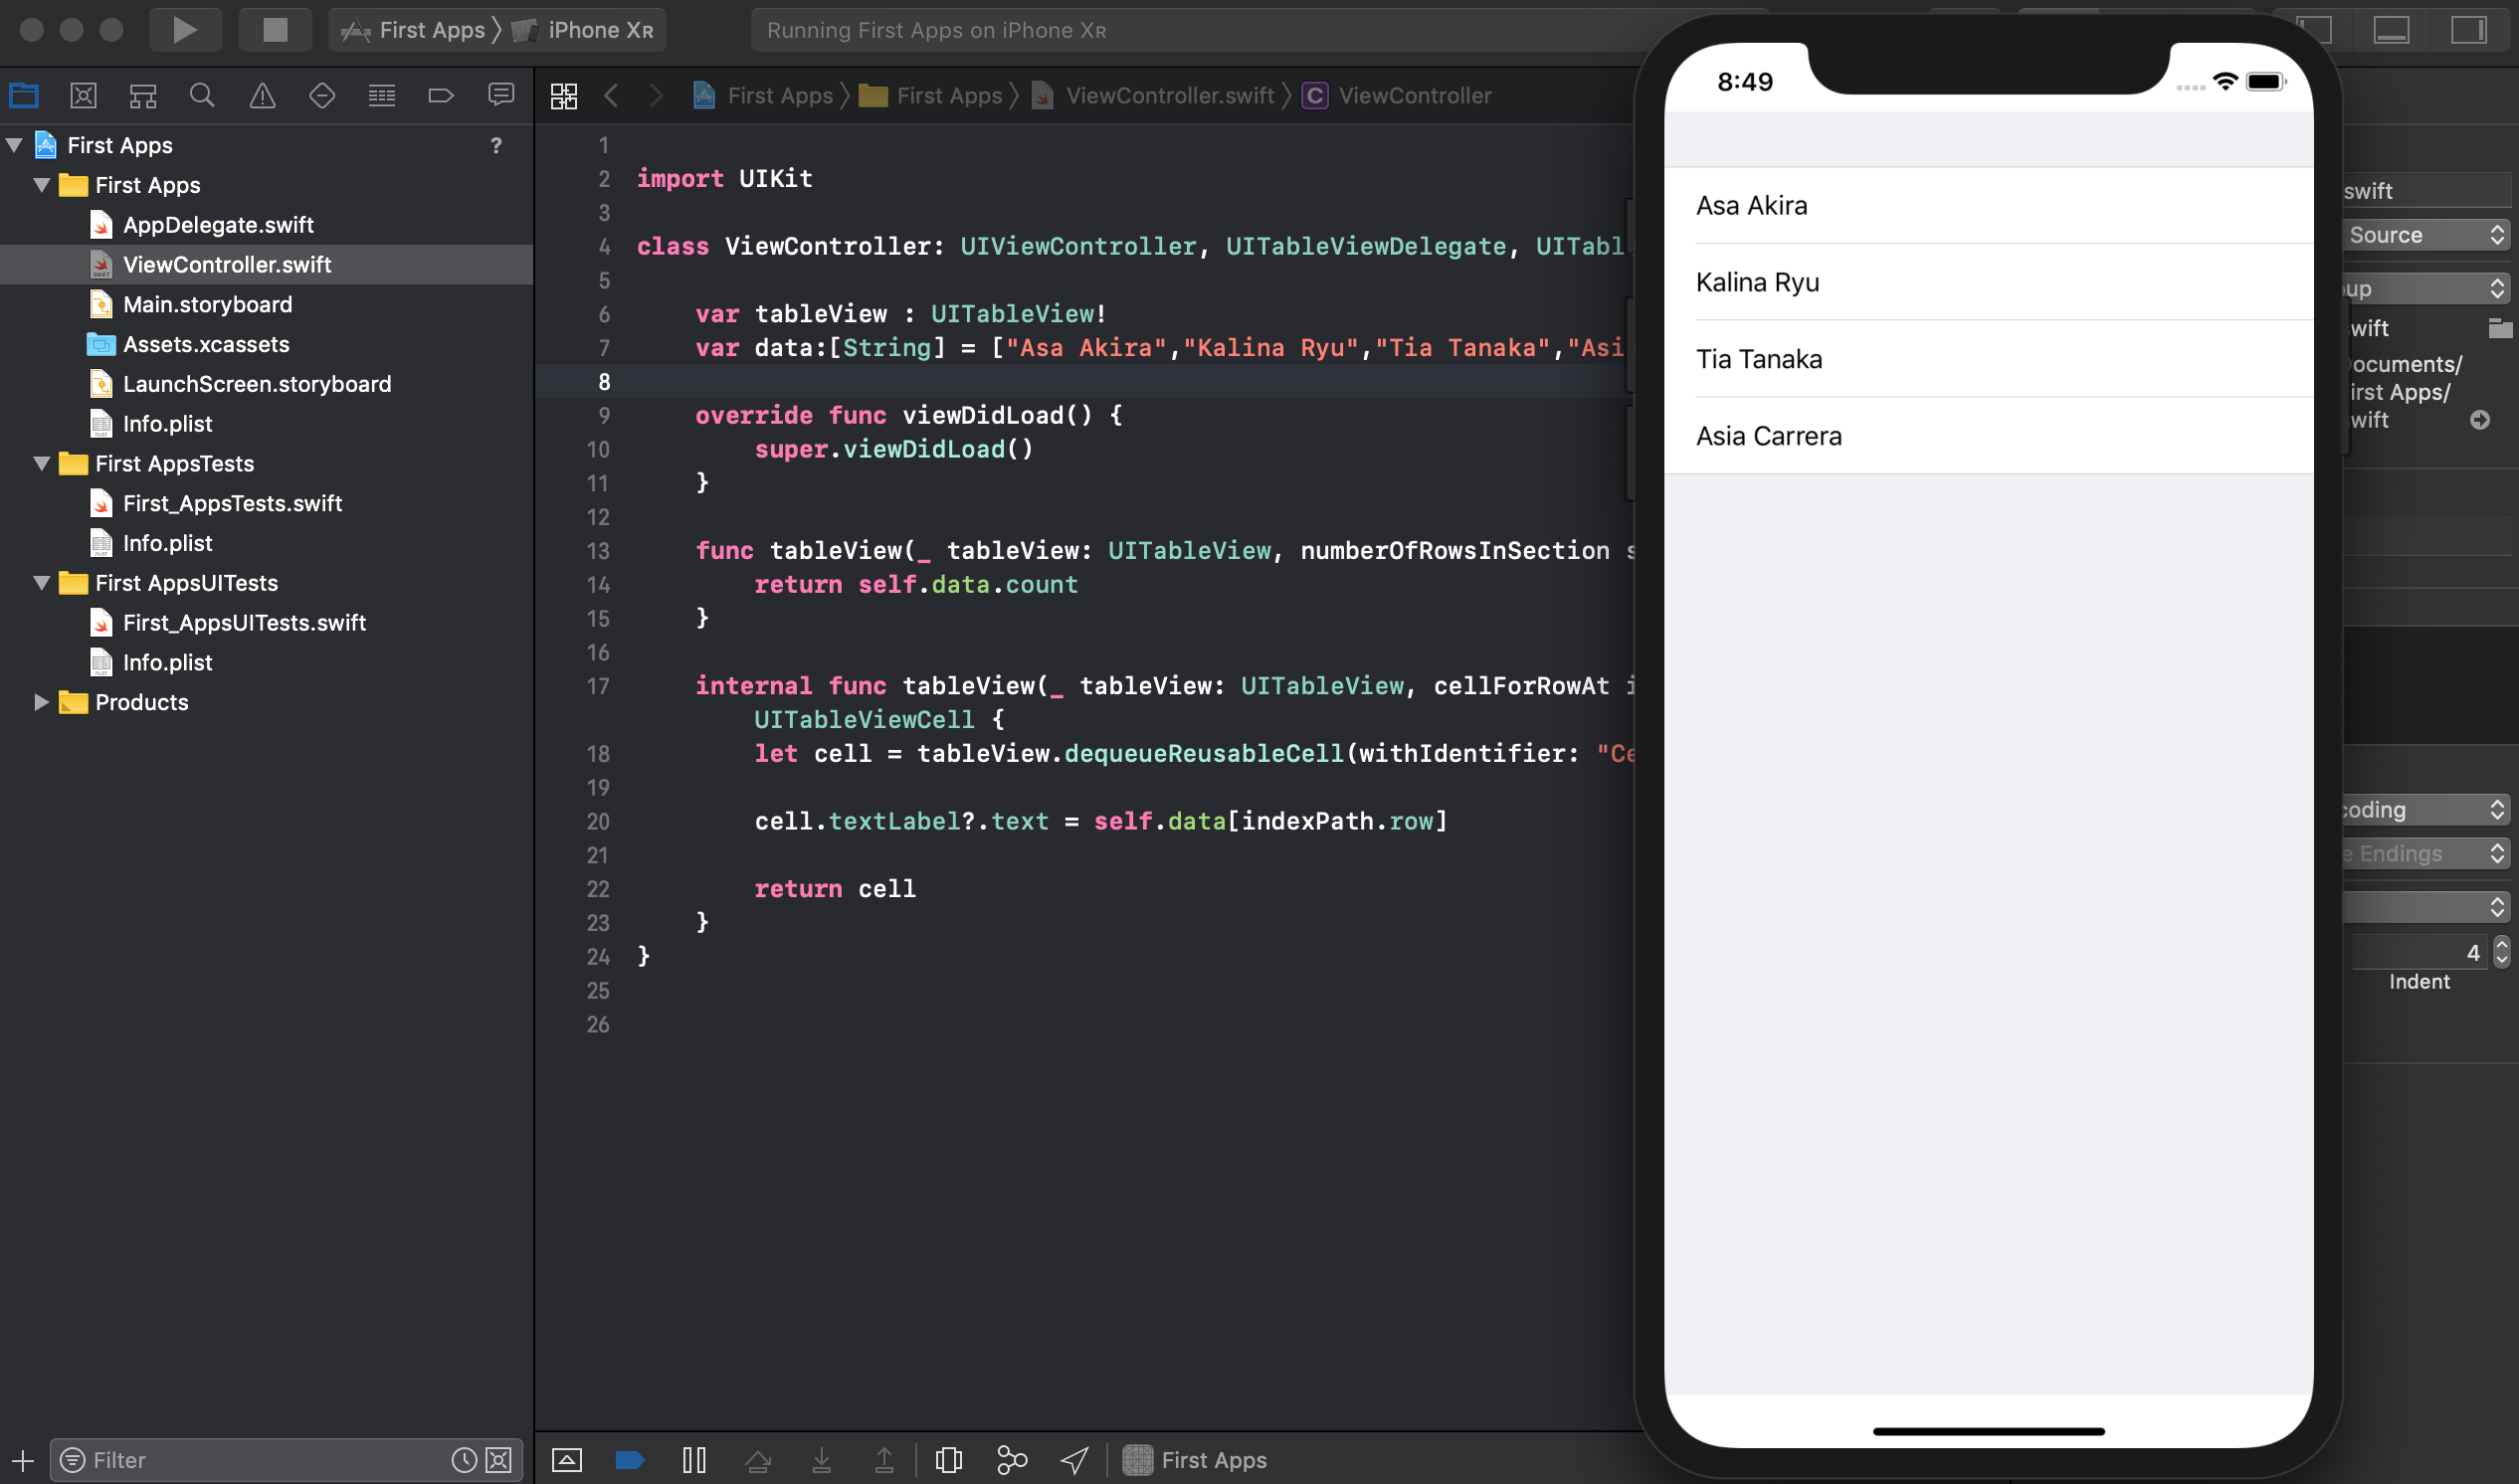
จะบอกว่าเรียบร้อยก็คงไม่ใช่เรามาทำ Style ของ UITableViewCell กันดีกว่าเลือก subtitle
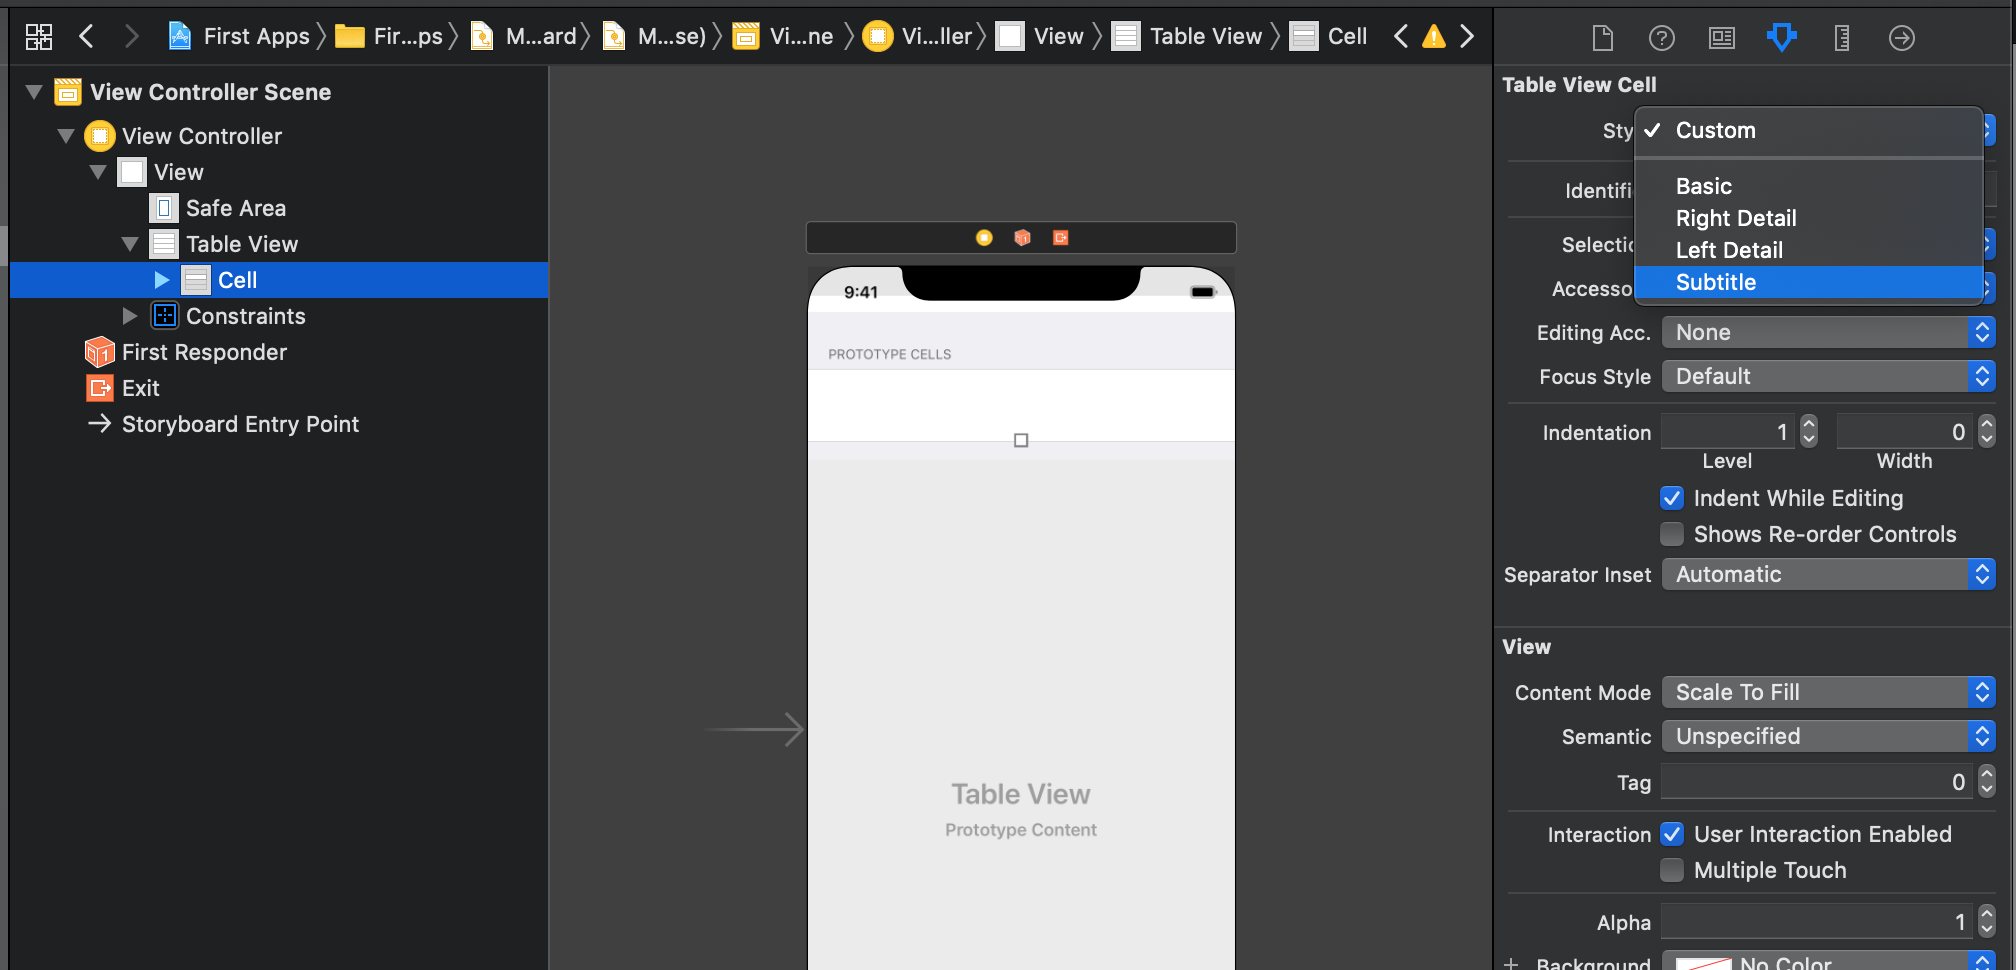
เพิ่ม Code ต่อไปนี้ที่ Global
var detail:[String] = ["Rank #1 Toshy","Rank #2 VR","Rank #3 Retro","Rank #4 Classics"]
แล้วเพิ่มที่ func tableView()
cell.detailTextLabel?.text = self.detail[indexPath.row]
ทดสอบ:
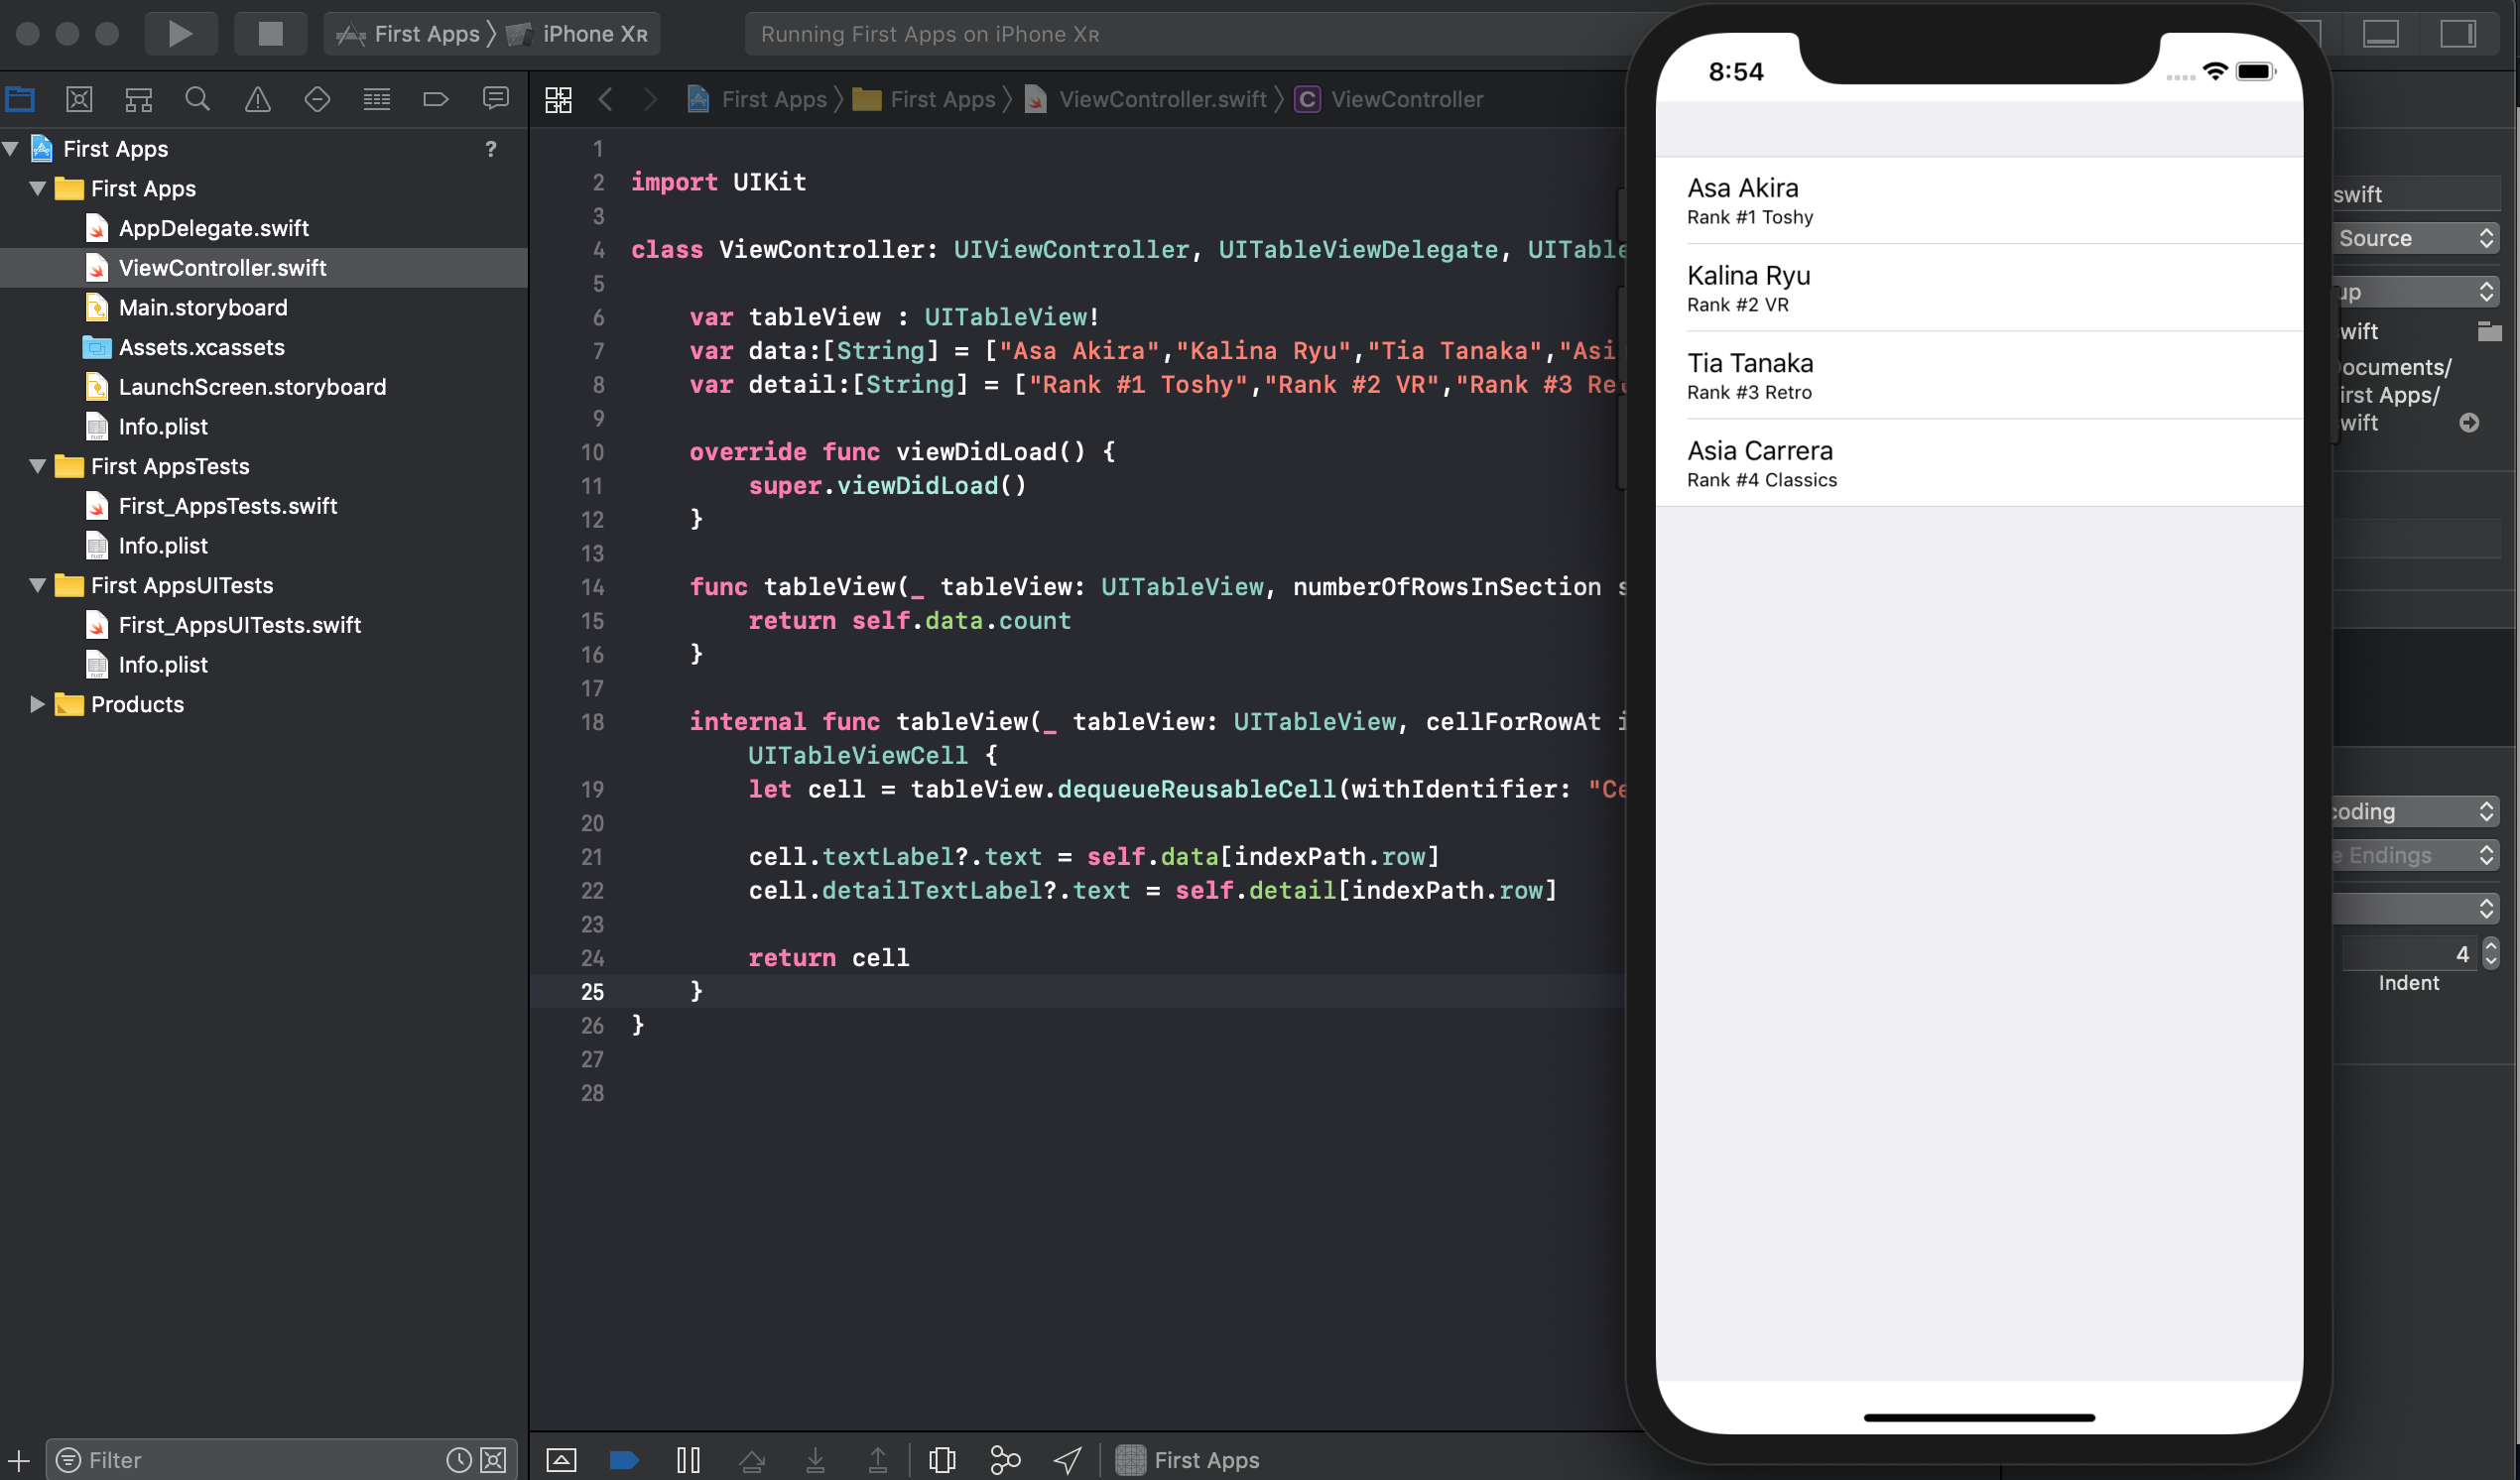
ไปหาภาพมาใส่ดีกว่า เราไปเซฟภาพ นามสกุล .png ดังนี้ดีกว่า
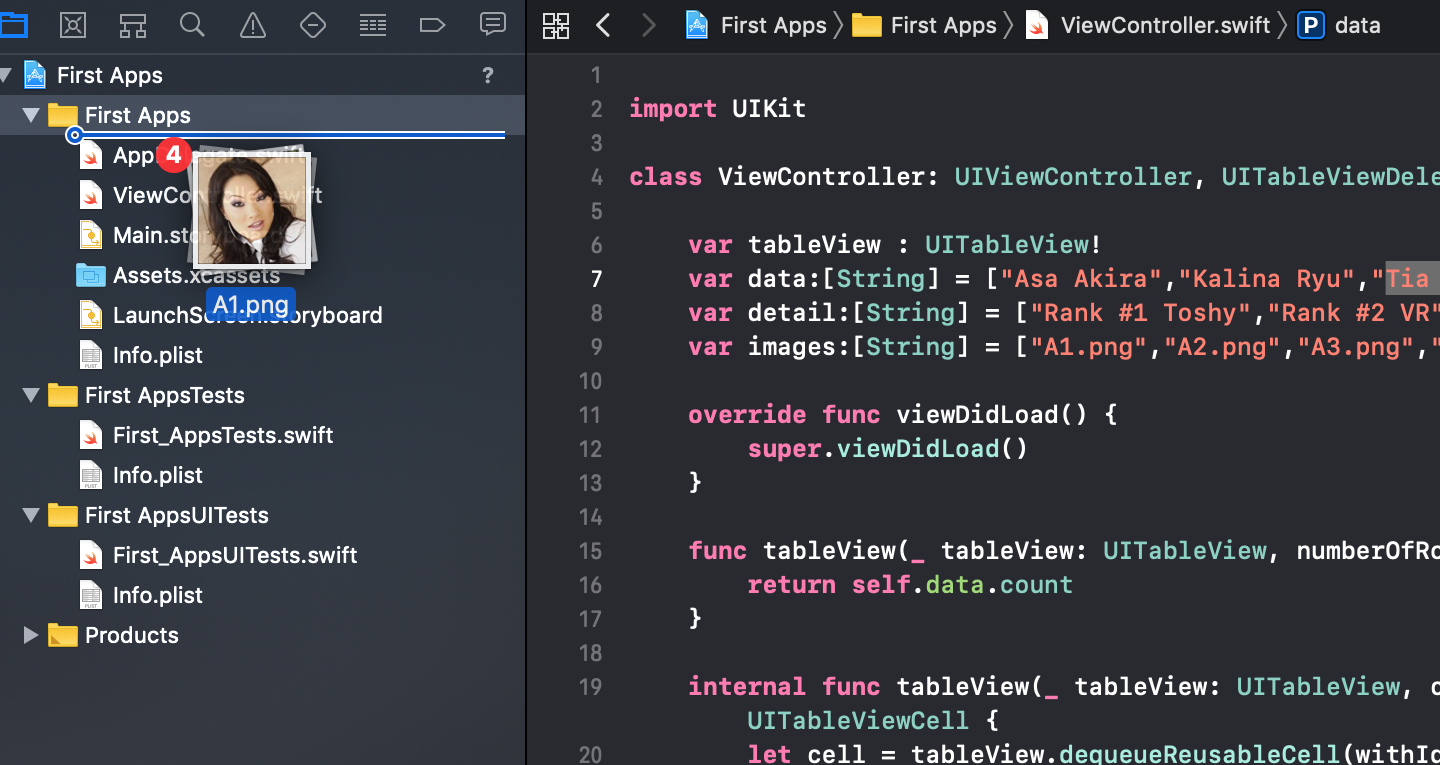
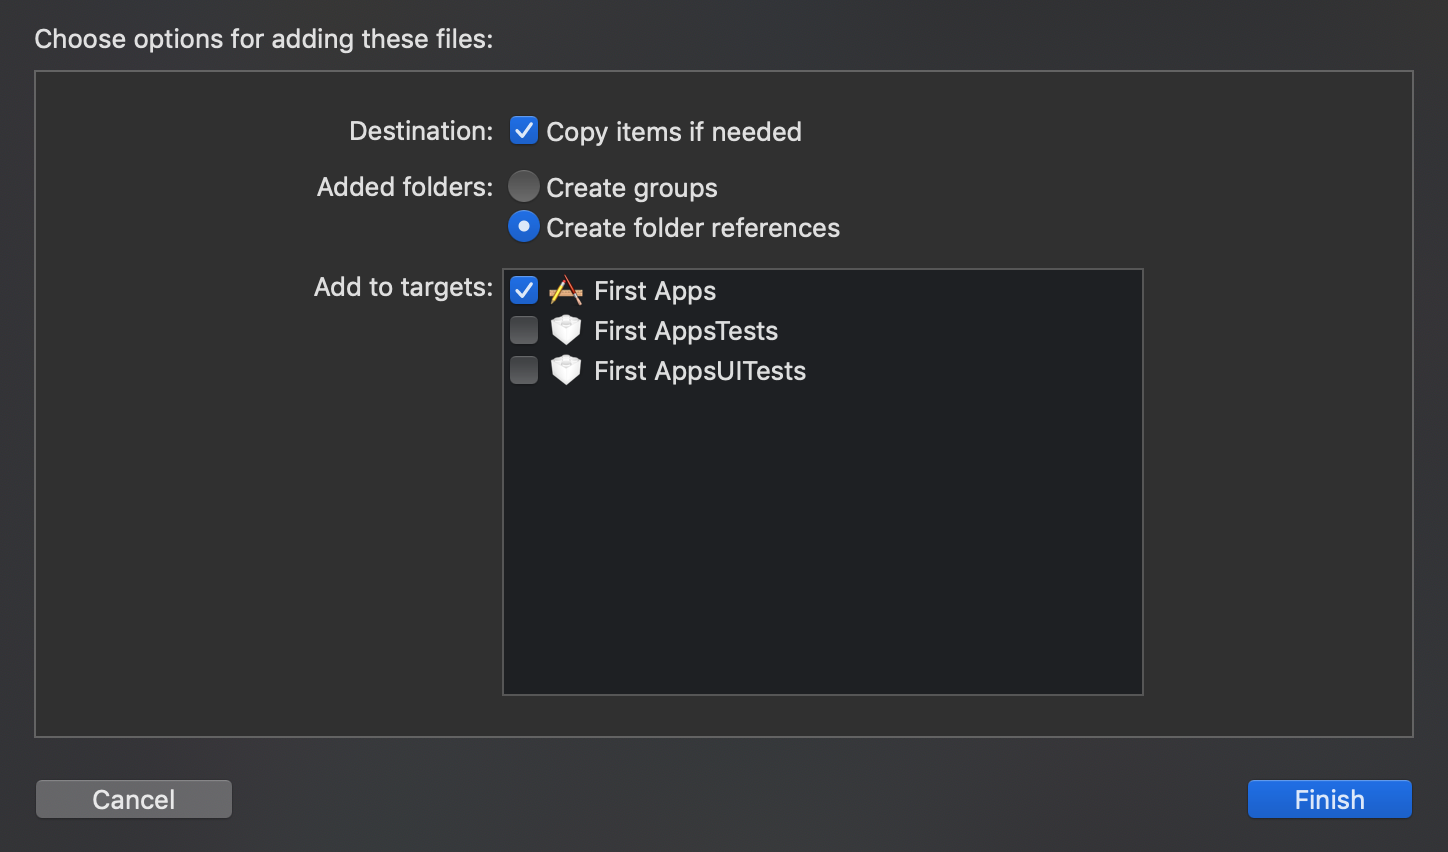
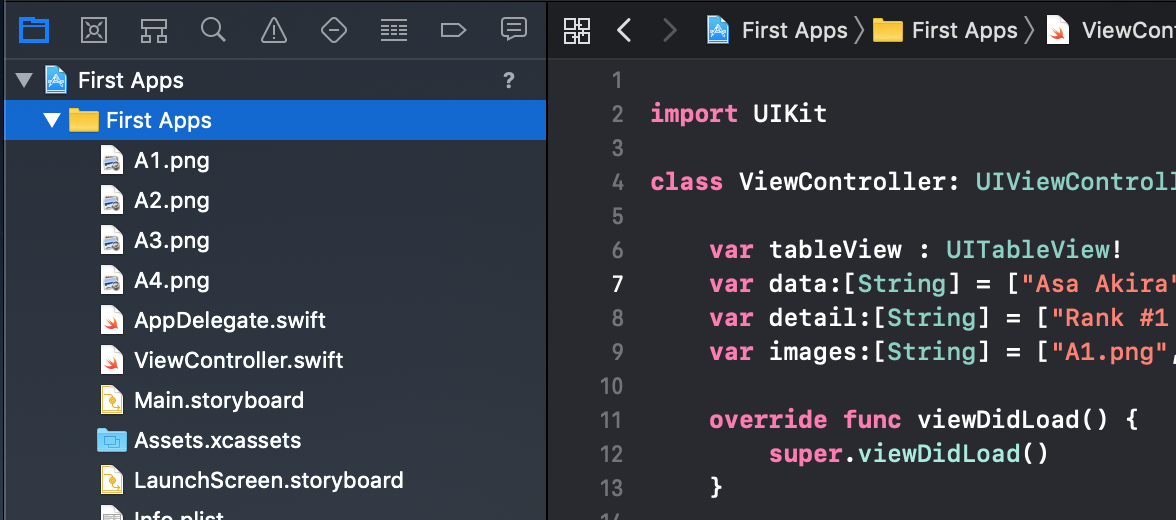
ประกาศตัวแปร Array เพิ่มเติมดังนี้:
var images:[String] = ["A1.png","A2.png","A3.png","A4.png"]
แก้ไข fun tableView() ใหม่ดังนี้:
cell.imageView?.image = UIImage(named: images[indexPath.row])
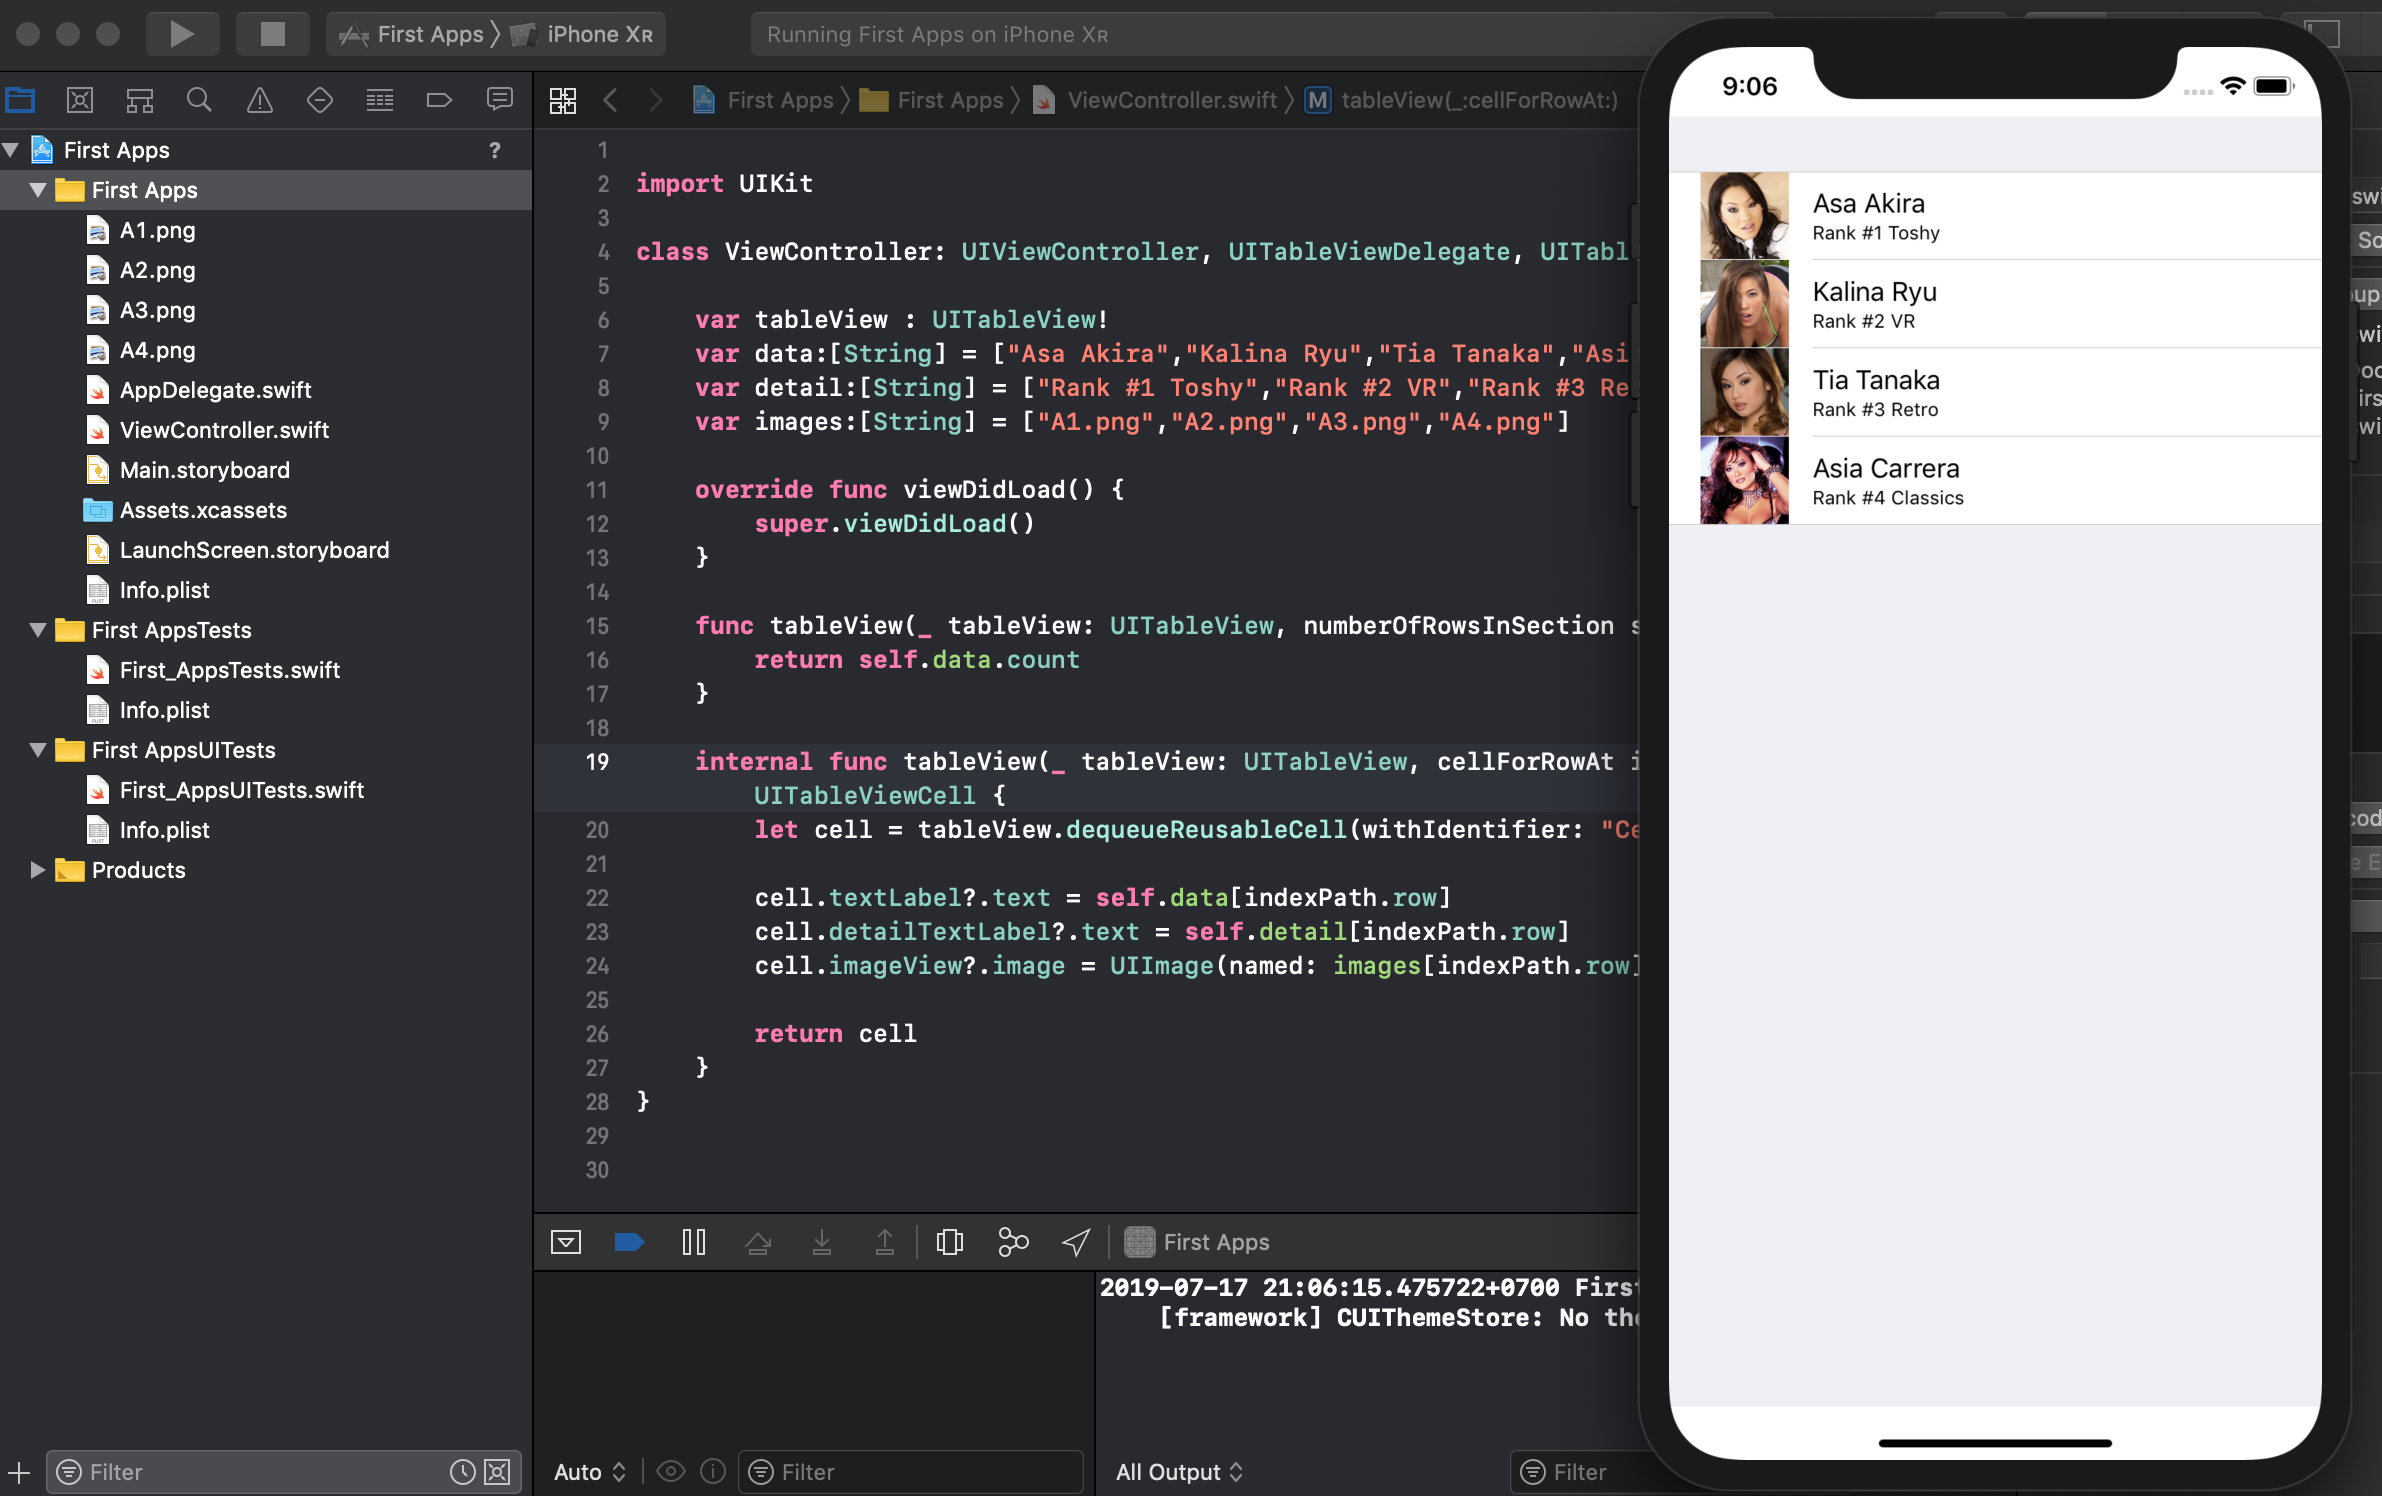
ดังนั้นไฟล์ ViewController.swift จะเป็นดังนี้:
import UIKit

class ViewController: UIViewController, UITableViewDelegate, UITableViewDataSource {

    var tableView : UITableView!
    var data:[String] = ["Asa Akira","Kalina Ryu","Tia Tanaka","Asia Carrera"]
    var detail:[String] = ["Rank #1 Toshy","Rank #2 VR","Rank #3 Retro","Rank #4 Classics"]
    var images:[String] = ["A1.png","A2.png","A3.png","A4.png"]

    override func viewDidLoad() {
        super.viewDidLoad()
    }

    func tableView(_ tableView: UITableView, numberOfRowsInSection section: Int) -> Int {
        return self.data.count
    }

    internal func tableView(_ tableView: UITableView, cellForRowAt indexPath: IndexPath) -> UITableViewCell {
        let cell = tableView.dequeueReusableCell(withIdentifier: "Cell", for: indexPath)

        cell.textLabel?.text = self.data[indexPath.row]
        cell.detailTextLabel?.text = self.detail[indexPath.row]
        cell.imageView?.image = UIImage(named: images[indexPath.row])

        return cell
    }
}
เทสแอปพลิเคชันของเรากันหน่อย:
เสร็จแล้วการพัฒนาแอปพลิเคชันด้วย UITableView แบบง่ายลองเอาไปฝึกทำกันต่อนะครับ