
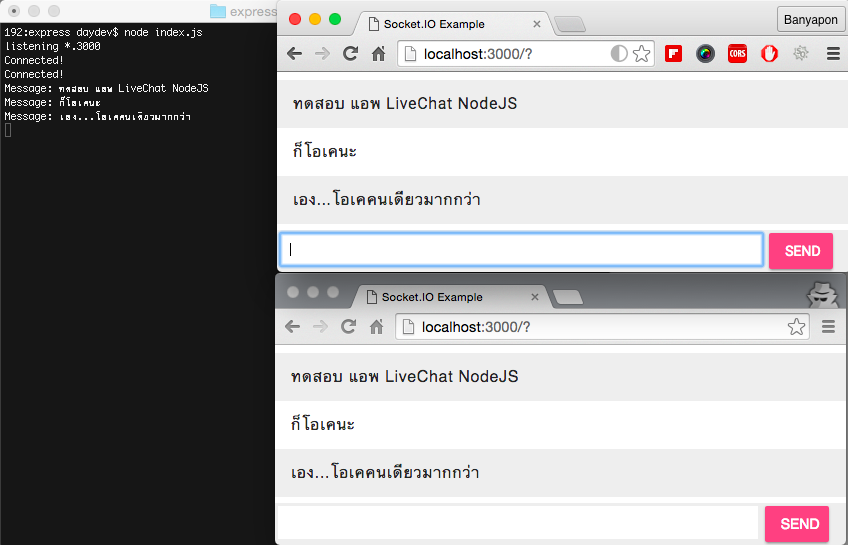
ตัวอย่างการใช้งาน Socket.io รวมกับ NodeJs และ Express JS ในการสร้างเว็บแอพพลิเคชันประเภท Live Chat แบบ Real-Time อย่างง่าย
บทเรียนก่อนหน้านี้เราได้พัฒนา Single Page Website ด้วย ExpressJS และ NodeJS ใน
https://www.daydev.com/developer/single-page-application-node-js-and-express-js.html
รอบนี้เราจะเอาบทเรียนง่ายๆ ที่ทาง Socket.io ได้นำมาช่วยเหลือในการพัฒนาแอพพลิเคชัน Live Chat บนเว็บบราวเซอร์กัน ตามรูปแบบ Stack ทั้งหมด
เริ่มต้นให้เราเตรียมพร้อม Directory ที่เราจะทำงานขึ้นมาให้เรียบร้อยแล้ว เปิด Command Prompt หรือ Terminal ขึ้นมาครับ
ทำการทดสอบ เวอร์ชันของ npm ก่อน ด้วย
npm -v
ทำการสร้าง Package.json ของเราขึ้นมาก่อน โดยคำสั่งต่อไปนี้
npm init
กรอกข้อมูลทั้งหมดลงไปตามสิ่งที่เราอยากให้เป็นครับ ในตัวอย่างของผมผมเลือกส่วนนี้
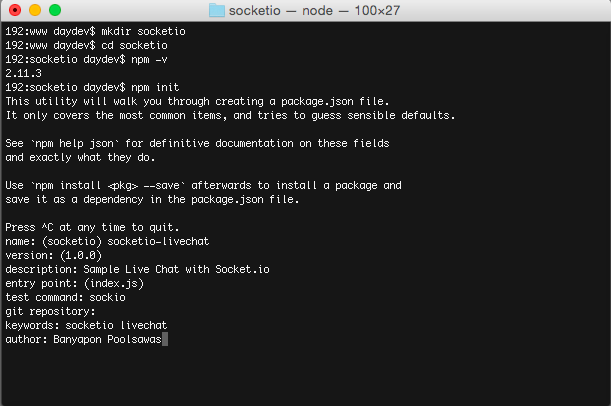
จะได้ package.json ตามนี้ครับ
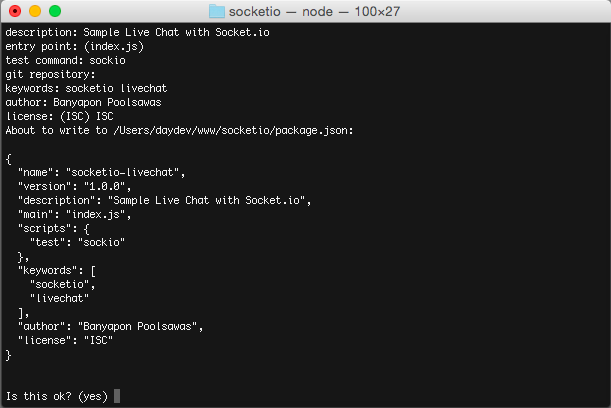
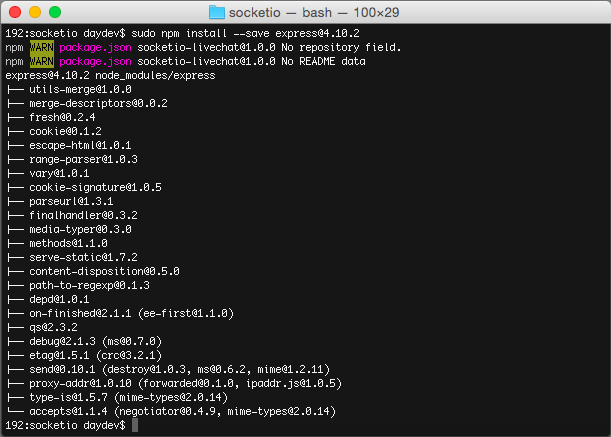
ทำการตกลงโดย yes ซะให้เรียบร้อยแล้วต่อมาให้เราติดตั้ง ExpressJS ลงใน Project ของเราครับ โดยใช้คำสั่ง
npm install --save [email protected]
หรือ
npm install express --save
ระบบจะสร้าง Project ทั้งหมดที่เราต้องใช้งานในการพัฒนาแอพพลิเคชันให้โดยทันที
ไปที่ไฟล์ index.js ใน path ‘directory/node_modules/express/’ แก้ไขโดยใส่คำสั่งต่อไปนี้
module.exports = require('./lib/express');
var myApp = require('express')();
var http = require('http').Server(myApp);
var socketIO = require('socket.io')(http);

myApp.get('/',function(request,response){
    res.send('<h1>My Application</h1>');
});

http.listen(3000, function(){
    console.log('listening *.3000');
});
ทดสอบแอพพลิเคชันของเราว่าทำงานถูกต้องไหมโดยรันคำสั่งต่อไปนี้บน Terminal
node index.js
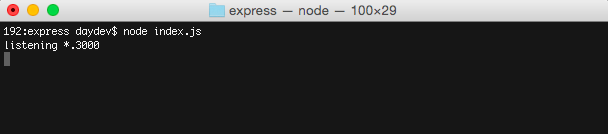
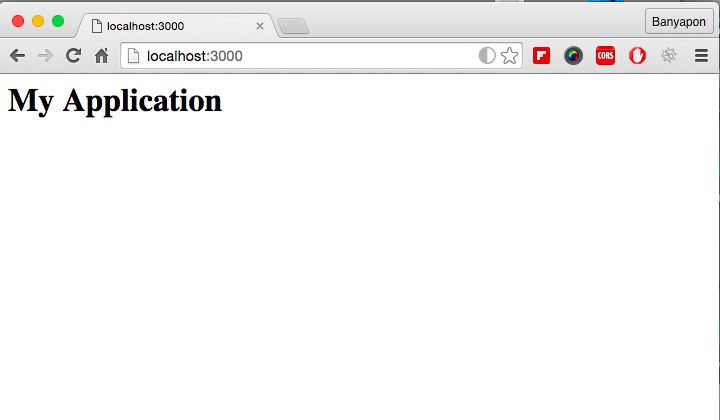
เปิด Browser ขึ้นมาให้วิ่งที่ http://localhost:3000
สร้างไฟล์ Template ชื่อว่า index.html ขึ้นมาใหม่ใน Path เดียวกับ index.js โดยออกแบบดังนี้
<!doctype html>
<html>
  <head>
     <title>Socket.IO Example</title>
    <style>
      * { margin: 0; padding: 0; box-sizing: border-box; }
      body { font: 13px Helvetica, Arial; }
      form { background: #000; padding: 3px; position: fixed; bottom: 0; width: 100%; }
      form input { border: 0; padding: 10px; width: 90%; margin-right: .5%; }
      form button { width: 9%; background: rgb(130, 224, 255); border: none; padding: 10px; }
      #messages { list-style-type: none; margin: 0; padding: 0; }
      #messages li { padding: 5px 10px; }
      #messages li:nth-child(odd) { background: #eee; }
    </style>
  </head>
  <body>
    <ul id="messages"></ul>
    <form action="">
      <input id="m" autocomplete="off" /><button>Send</button>
    </form>
  </body>
</html>
แก้ไขไฟล์ index.js ใหม่ให้เรียก Template ของ index.html ไปแสดงผลแทนหน้าแอพพลิเคชัน
module.exports = require('./lib/express');
var myApp = require('express')();
var http = require('http').Server(myApp);
var socketIO = require('socket.io')(http);

myApp.get('/',function(request,response){
    response.sendFile(__dirname + '/index.html');
});

http.listen(3000, function(){
    console.log('listening *.3000');
});
รันคำสั่ง node index.js ใหม่ (กด Ctrl C ยกเลิกก่อนทุกครั้ง)
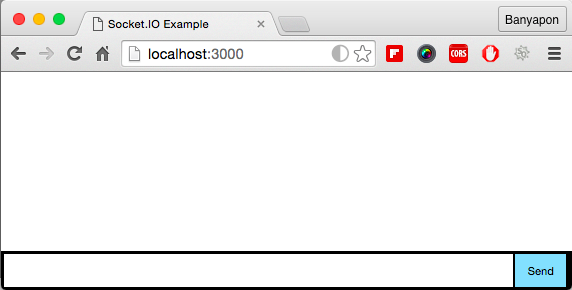
จะได้หน้าตาดังนี้ เป็นหน้าตาของ Live Chat คือมีพื้นที่แสดงข้อความในห้องแชท และมีกล่องใส่ Text พร้อมปุ่ม Send ต่อมาให้เราติดตั้ง Socket.io เพื่อสร้าง Socket ในการรับค่า state ของ Server เวลามีการ Chat ไปมาแบบ Real-Time:
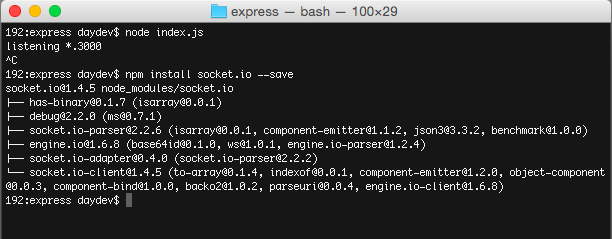
npm install socket.io --save
ระบบจะทำการ Generate โครงสร้างของไฟล์ Library ให้ครับ
สร้าง Connected state ผ่าน Socket.io เราต้องมีการรับค่าว่า Client หรือหน้าจอ chat ของผู้ใช้งานพร้อมแล้ว ให้ทำการแจ้งต่อ Server ดังนั้นต้องมีการเพิ่ม connected State เข้ามาครับ ให้ไปเพิ่มที่ index.js ดังนี้
socketIO.on('connection', function(socket){
    console.log('Connected!');

    socket.on('disconnect', function(){
          console.log('Someone Leave the Chat');
        });

    socket.on('chat message', function(msg){
         console.log('Message: ' + msg);
         socketIO.emit('chat message', msg);
     });
});
เป็นการบอกว่า หากมีหน้าต่าง Chat โผล่ขึ้นมาโดยเปิดไปที่ http://localhost:3000 จะมีข้อความบน Server ว่า connected ผ่าน Console.log
console.log('Connected!');
และหน้ามีการผิดหน้าต่าง chat ไปจะส่งข้อความว่า “Someone Leave the Chat” และอัพเด็ต State ของ Server ว่า ‘disconnect’ กลับไปผ่านทาง Socket
socket.on('disconnect', function(){
          console.log('Someone Leave the Chat');
});
เพิ่มเติม jQuery เล็กน้อยใน index.html (หน้า Template) ก่อนปิด </body>
<script src="/socket.io/socket.io.js"></script>
<script>
  var socket = io();
</script>
ทดสอบ
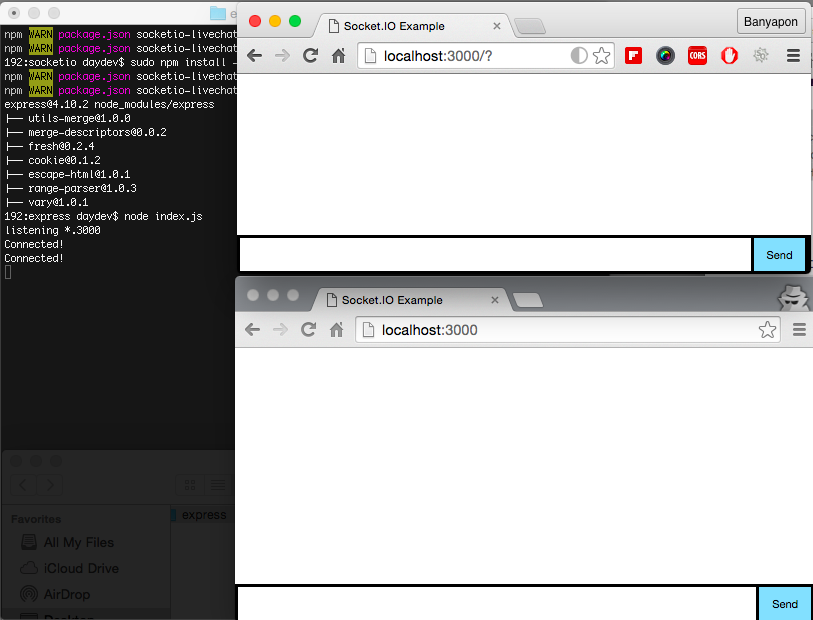
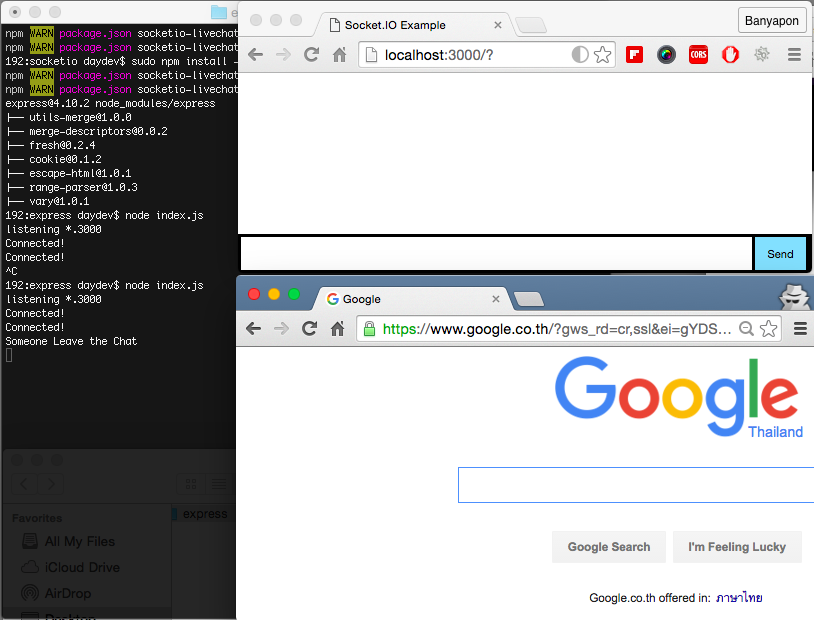
ส่วนของการส่ง ข้อความไปมาระหว่างผู้ใช้งานผ่า Socket.io บน Server State ให้เราใช้ส่วนต่อไปนี้ในการส่งข้อความไปมาครับ
socket.on('chat message', function(msg){
         console.log('Message: ' + msg);
         socketIO.emit('chat message', msg);
});
เป็นการเพิ่ม State ชื่อ “chat message” ให้ Server เข้าใจและเมื่อพิมพ์อะไรไปจะส่งไปแสดงผลผ่าน Console ของ Socket ก่อน เราต้องเพิ่มหน้าการทำงานด้วย jQuery เล็กน้อยใน index.html (หน้า Template) ก่อนปิด </body>
<script src="/socket.io/socket.io.js"></script>
<script src="http://code.jquery.com/jquery-1.11.1.js"></script>
<script>
  var socket = io();
  $('form').submit(function(){
    socket.emit('chat message', $('#m').val());
    $('#m').val('');
    return false;
  });
</script>
ทดสอบโดยการส่งค่าไปมา
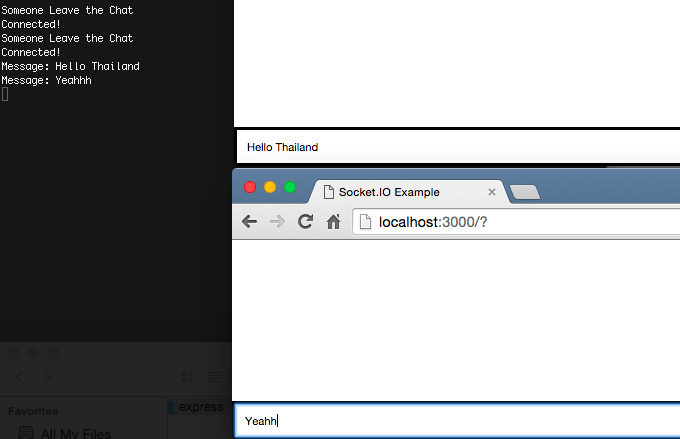
ข้อความจะปรากฏบน Console log ของ ระบบ ต่อมาเราจะแสดงผลที่ส่วนของ Client แล้ว ให้ไปแก้ไขที่ index.html (หน้า Template) เพิ่ม code jQuery เข้าไปดังนี้
<script src="/socket.io/socket.io.js"></script>
    <script src="http://code.jquery.com/jquery-1.11.1.js"></script>
    <script language="javascript">
        var socket = io();
        $('form').submit(function(){
        socket.emit('chat message', $('#m').val());
            $('#m').val('');
        return false;
        });
        socket.on('chat message', function(msg){
            $('#messages').append($('<li>').text(msg));
         });
    </script>
ทดสอบการทำงาน ส่งค่าไปมา จะมีการเขียน <li> ด้วยตัวแปร msg ที่ส่งไปมาบน Socket.io
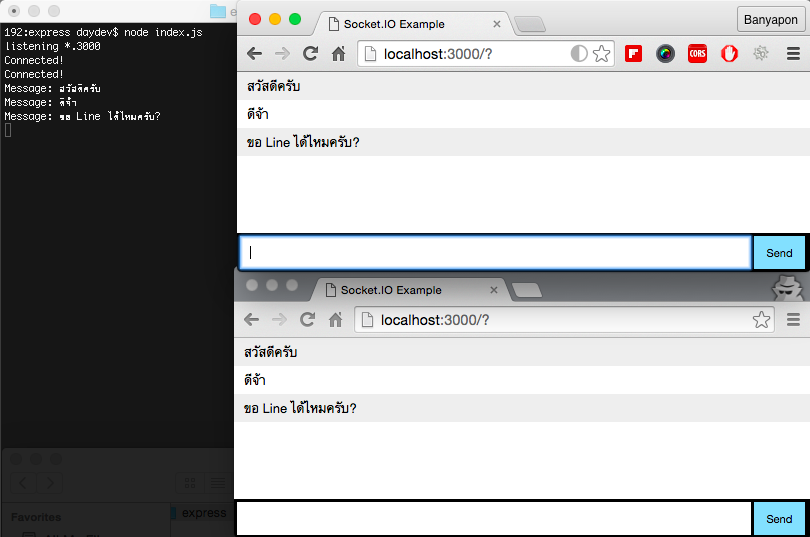
ตกแต่งด้วย Material Design Lite ของ Google เล็กน้อยเพื่อความสวยงาม ไฟล์ index.html จะเป็นดังนี้
<!doctype html>
<html>
  <head>
    <title>Socket.IO Example</title>
    <link rel="stylesheet" href="https://fonts.googleapis.com/icon?family=Material+Icons">
    <link rel="stylesheet" href="https://code.getmdl.io/1.1.1/material.indigo-pink.min.css">
    <script defer src="https://code.getmdl.io/1.1.1/material.min.js"></script>
    <style>
     .demo-list-icon {width: 100%;}
     #messages li:nth-child(odd) { background: #eee; }
      * { margin: 0; padding: 0; box-sizing: border-box; }
      body { font: 13px Helvetica, Arial; }
      form { background: #eee; padding: 3px; position: fixed; bottom: 0; width: 100%; }
      form input { border: 0; padding: 10px; width: 85%; margin-right: .5%; }
      form button { width: 9%; background: rgb(130, 224, 255); border: none; padding: 10px; }

    </style>
  </head>
  <body>
    <ul id="messages" class="demo-list-icon mdl-list"></ul>
    <form action="">
      <input id="m" autocomplete="off" />
      <button class="mdl-button mdl-js-button mdl-button--raised mdl-js-ripple-effect mdl-button--accent">Send</button>
    </form>
    <script src="/socket.io/socket.io.js"></script>
    <script src="http://code.jquery.com/jquery-1.11.1.js"></script>
    <script language="javascript">
        var socket = io();
        $('form').submit(function(){
        socket.emit('chat message', $('#m').val());
            $('#m').val('');
        return false;
        });
        socket.on('chat message', function(msg){
            $('#messages').append($('<li class="mdl-list__item"><i class="material-icons mdl-list__item-icon">person</i>').text(msg));
         });
    </script>
  </body>
</html>
ไฟล์ index.js จะเป็นดังนี้
module.exports = require('./lib/express');
var myApp = require('express')();
var http = require('http').Server(myApp);
var socketIO = require('socket.io')(http);

myApp.get('/',function(request,response){
    response.sendFile(__dirname + '/index.html');
});

http.listen(3000, function(){
    console.log('listening *.3000');
});

socketIO.on('connection', function(socket){
    console.log('Connected!');

    socket.on('disconnect', function(){
       console.log('Someone Leave the Chat');
     });

    socket.on('chat message', function(msg){
         console.log('Message: ' + msg);
         socketIO.emit('chat message', msg);
     });
});
เราก็จะมีแอพพลิเคชัน Live Chat สวยๆ ตามภาพตัวอย่าง ลองไปทำเล่นกันดูนะครับ
Ref: node.js, express js, socket.io