

ซีรีย์การพัฒนาเกม VR ผ่าน WebXR ด้วย A-Frameกับการจำลอง VR Controller ทดสอบผ่าน VR Headset
แน่นอนว่าต้องผ่านบทเรียนแรกก่อนคือ
เมื่อผ่านมาแล้วบทเรียนนี้เราจะทดสอบ WebXR ของเราผ่าน WebXR API Emulator ของ Chrome หรือ Edge กันหน่อย ประเด็นคือเราต้องรันผ่าน https://locahost นะครับ วิธีของผมคือ Firebase ไปเลยทำตามได้ที่ Labs: การใช้งาน Firebase Hosting และ Database สร้างเว็บไซต์ เพื่อจะได้ทดสอบ Inspect การทำงานของเราได้
แนะนำให้ดาวน์โหลด Components ต่อไปนี้นะครับ ผมได้ทำการ Zip รวมให้เรียบร้อยแล้ว ไปวางไว้ Path เดียวกับ index.html
https://drive.google.com/file/d/1QccXQdoe_S_2a2Qmug-bUhXQt2NcpRnZ/view?usp=sharing
ประกอบไปด้วย Folder ชื่อ components และไฟล์ Model นามสกุล .glb ที่เป็น Hand Lowpolygon สำหรับแทนมือของเราไว้ใน WebXR โดยวางตาม Path นี้ครับ
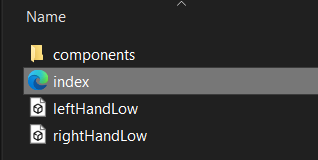
ต่อมาเราจะลบ Camera เดิมของเราออกไป คือลบบรรทัด
<a-camera position="0 0 2"></a-camera>
และลบส่วนของ <a-sphere> ออกไปจาก <a-entity> ของ Player ครับ ลบบรรทัด
<a-sphere raduis="0.05">
  <a-light type="point" intent="0.5" color="#58FFEA"></a-light>
</a-sphere>
<a-sphere raduis="0.05">
  <a-light type="point" intent="0.5" color="#58FFEA"></a-light>
</a-sphere>
ลบออกไปแล้วเราจะไปแก้ไขส่วนของ <a-entity> ของ id=”player” คือเพิ่มคำสั่งต่อไปนี้
<a-entity id="leftHand" position="0 0 0" rotation="-90 0 0" hand-controls="hand: left; handModelStyle: lowPoly; color: #ffcccc"></a-entity>
<a-entity id="rightHand" position="0 0 0" rotation="-90 0 0" hand-controls="hand: right; handModelStyle: lowPoly; color: #ffcccc"></a-entity>

<a-entity position="0 0 0" camera look-controls wasd-controls></a-entity>
สร้าง <a-entity> มา 2 ตัวก่อนคือ leftHand และ RightHand โดยมีการหัก แกน X เป็น Rotate ค่า -90 องศา เลือก Parammeter handModelStyle เป็น lowPoly แบบที่เราดาวน์โหลดมา (เอกสารที่: Interactions & Controllers – A-Frame)
ไปที่ <head> แทรก Script ต่อไปนี้เรียก components สำหรับการหยิบจับ grab และต่างๆ
<script src="components/aabb-collider.js"></script>
<script src="components/grab.js"></script>
<script src="components/ground.js"></script>
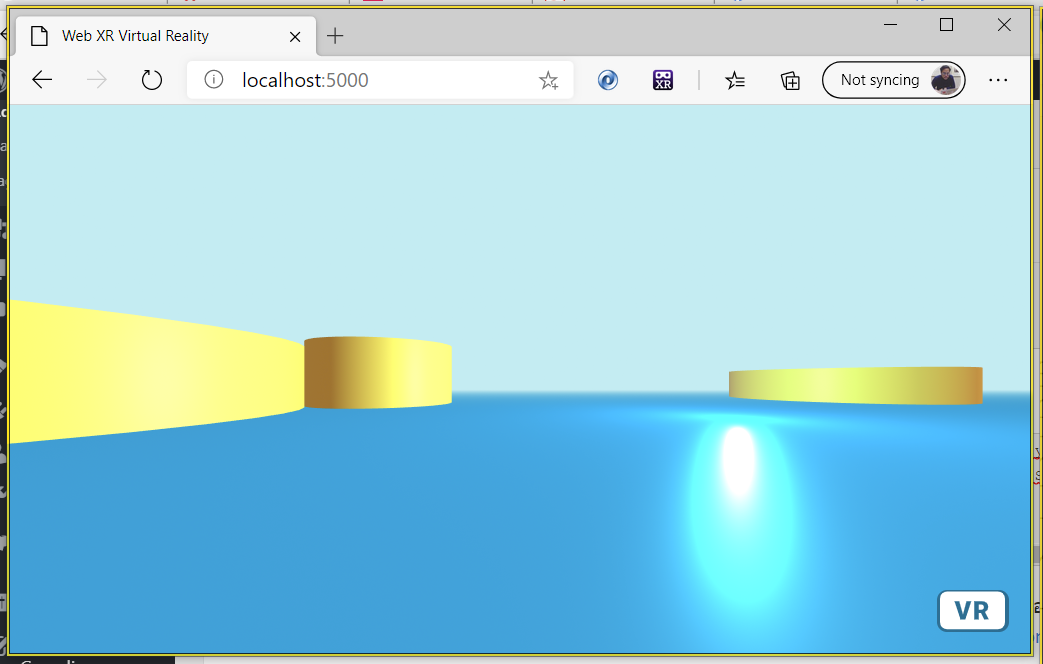
หลังจากนั้นสร้าง <a-camera> ใหม่ โดยเล่นได้ 2 Mode คือ ถ้าไม่เข้า VR Mode ก็เดินได้ด้วยปุ่ม W,A,S,D ผ่าน Parameter wasd-control ทดสอบได้โดยการกด เล่นได้เลย ดังภาพ
เอาล่ะมาเข้าโหลด VR กันดีกว่ากดปุ่ม VR เลยหน้าจะ Preview แบ่ง แว่น 2 จอแบบมุมมอง VR แล้วให้เราทดสอบผ่าน Inspect->WebXR API Emulator กันหน่อย
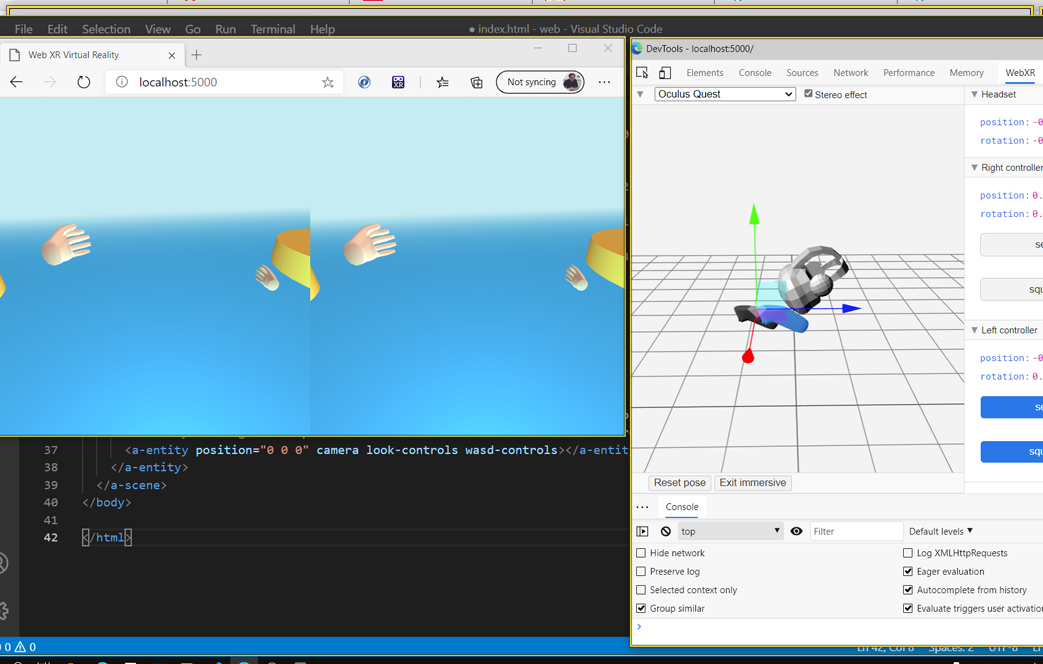
อย่างที่บอกว่าผมใช้ Firebase ทดสอบผ่าน
$ firebase serve
ผมเลย Deploy ขึ้นไปบน Server ไว้เทสผ่าน Oculus Browser ในแว่น VR ดู
$ firebase deploy --project govrspace
ทดสอบผ่าน Live จริงๆได้ที่ https://govrspace.web.app (ตัว content เปลี่ยนไปตามเนื้อหาแต่ละตอน)
ดังนั้นไฟล์ index.html จะเป็นดังนี้!
<!DOCTYPE html>
<html>

<head>
  <title>Web XR Virtual Reality</title>
  <script src="https://aframe.io/releases/1.1.0/aframe.min.js"></script>
  <script src="components/aabb-collider.js"></script>
  <script src="components/grab.js"></script>
  <script src="components/ground.js"></script>
</head>

<body>
  <a-scene fog="type: linear; color: #BEECF2; near:5; far:20">

    <!-- Lights -->
    <a-light type="directional" castShadow="true" intensity="0.4" color="#FDFFDB" position="5 4 1"></a-light>
    <a-light intensity="0.8" type="ambient" color="#FDFFDB"></a-light>
    <!--Groud-->
    <a-box depth="50" width="100" height="1" color="#1D8BDA" position="0 -1 0"></a-box>
    <a-sky color="#a3d0ed"></a-sky>
    <!--GameObject-->
    <a-cylinder class="boxWhite" segment-radial="5" color="#CD9046" radius="2.5" height="1" position="6 -0.2 -6.5">
    </a-cylinder>
    <a-cylinder class="boxWhite" segment-radial="5" color="#CD9046" radius="1.5" height="2" position="-6 -0.2 -4.5">
    </a-cylinder>
    <a-cylinder class="boxWhite" segment-radial="5" color="#CD9046" radius="3.5" height="1.7" position="-10 -0.2 -1.5">
    </a-cylinder>
    <!--Entity-->
    <a-entity id="tree-container" position="0 0 -1.5" rotation="0 0 0">
      <!--Player-->
      <a-entity id="player" player>
        <a-light type="point" intent="0.5" color="#58FFEA"></a-light>
      </a-entity>

      <a-entity id="leftHand" position="0 0 0" rotation="-90 0 0" hand-controls="hand: left; handModelStyle: lowPoly; color: #ffcccc"></a-entity>
      <a-entity id="rightHand" position="0 0 0" rotation="-90 0 0" hand-controls="hand: right; handModelStyle: lowPoly; color: #ffcccc"></a-entity>
      <a-entity position="0 0 0" camera look-controls wasd-controls></a-entity>
    </a-entity>
  </a-scene>
</body>

</html>
ทดสอบก็ประมาณนี้ครับดูไปเปิด Browser ใน Oculus Quest ก่อนแล้วเข้า VR Mode
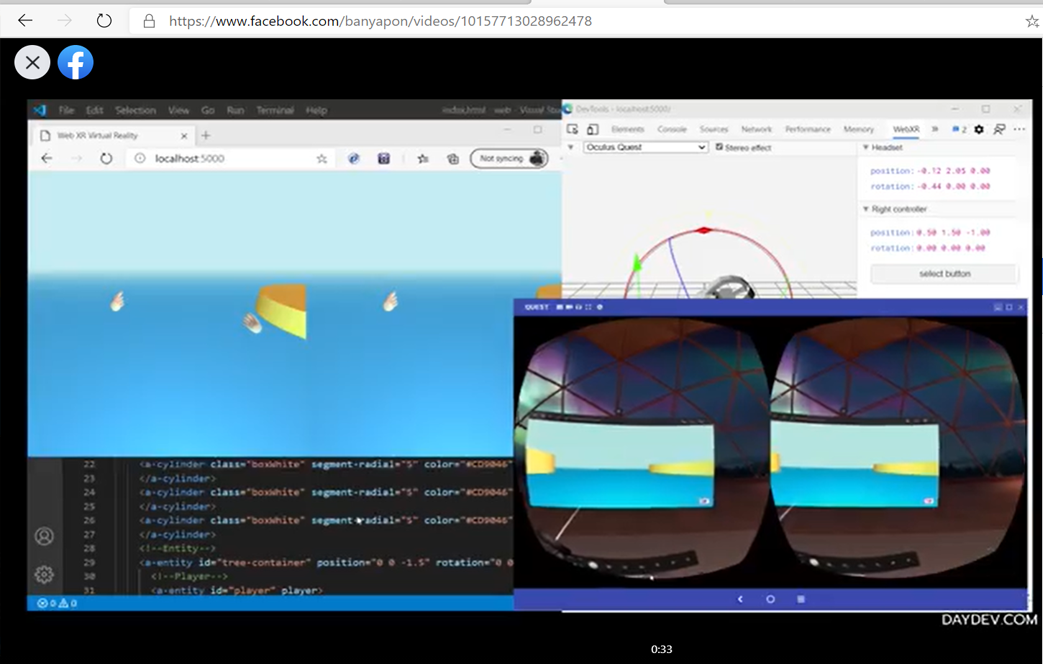
ทดสอบ แปลว่า “ผ่าน”
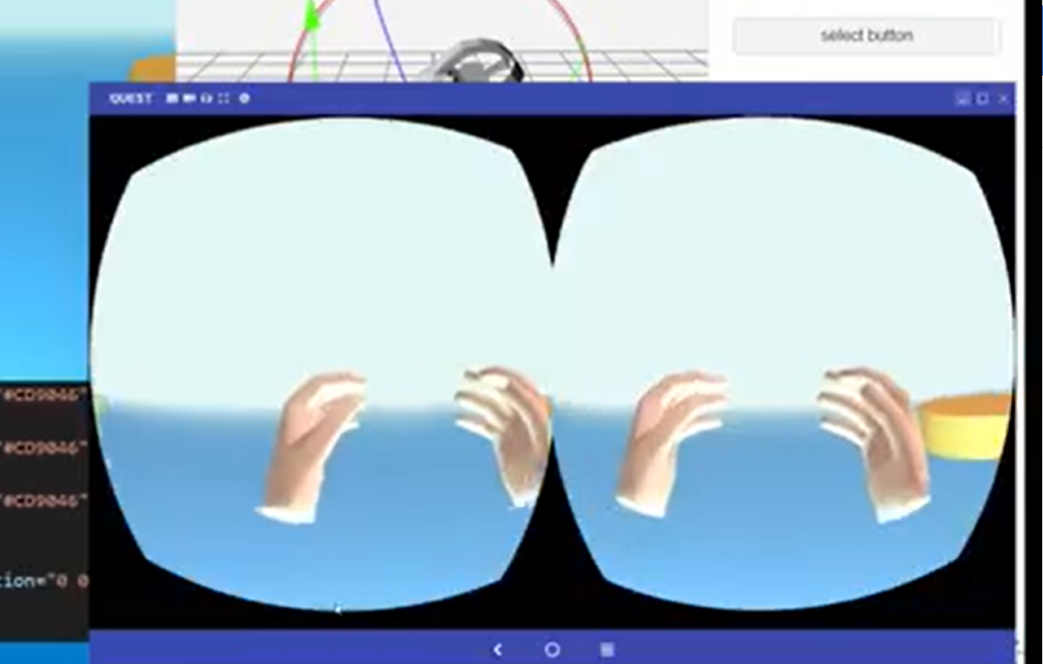
ภาพอาจจะไม่ชัด แต่รันได้ชัวร์
ต่อตอนที่ 3ได้เลยที่: WebXR กับ A-frame ตอนที่ 3 การเขียน Javascript ควบคุมการ Spawn วัตถุในเกม VR





One Comment