
คำสั่งแบบง่ายสำหรับผู้เริ่มต้นพัฒนาแอพพลิเคชันแบบ Cross-Platform ด้วย ionic framework และ AngularJS ดึง API ของ instagram ผ่านการใช้ #HashTag ต่างๆ มาแสดงผล
ง่ายและเร็ว คือ คำนิยามสั้นของบทความนี้
ทบทวนบทเรียนย้อนหลังได้ที่
เราจะใช้ตัวอย่างของบทเรียนก่อนหน้านี้แบบเน้นๆ เลยในบทเรียนนี้คือ
- ระบบ Login ผ่าน Webservice บน ionic framework ด้วย AngularJS
- การใช้งาน ionic Framework ร่วมกับ AngularJS แสดง Card View
- AngularJS กับการทำงานร่วมกับ Web Service JSON
เพียงเท่านั้นครับ รันคำสั่งสร้างแอพฯ เราขึ้นมาเลย
ionic start LoginSample sidemenu
ไปทำการสมัคร instagram API ให้เรียบร้อย
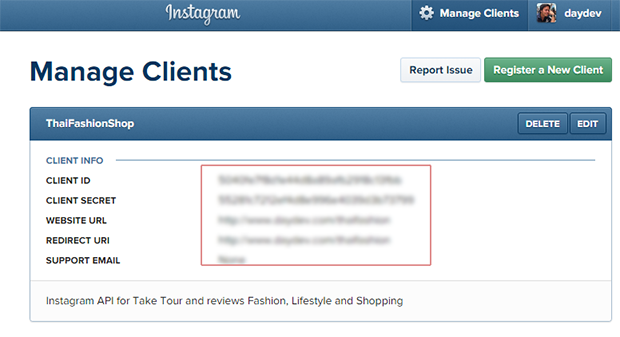
เราจะใช้ #HashTag และ Client_id ในการค้นหา รูปแบบการเรียก jSON Webservice คือ
https://api.instagram.com/v1/tags/ใส่ # ของคุณ/media/recent?client_id=ใส่ Client ID&count=200
ผมเลือกใช้ #DPUCuteGirl ของกลุ่มลูกศิษย์ที่มหาวิทยาลัยแล้วกัน
แก้ไขไฟล์ ‘www/js/controller.js’ ให้เรียก Web Service โดยการประกาศ Header เรียก $Function เพิ่มคือ
angular.module('starter.controllers', [])
.controller('AppCtrl', function($scope, $ionicModal, $timeout, $ionicPopup, $http ,$location, $window) {
และแก้ไข ‘PlaylistsCtrl’ ใหม่เป็นดังนี้
.controller('PlaylistsCtrl', function($scope,$http, $location, $window) {
  $http.get("https://api.instagram.com/v1/tags/CleoCampaign/media/recent?client_id=5040fe7f8d1e44d8a89afb2918c13fbb&count=200")
  .success(function (response) {$scope.instagram = response.data;});
})
ภาพรวมของไฟล์เป็นแบบนี้ครับ
angular.module('starter.controllers', [])
.controller('AppCtrl', function($scope, $ionicModal, $timeout, $ionicPopup, $http ,$location, $window) {

  // With the new view caching in Ionic, Controllers are only called
  // when they are recreated or on app start, instead of every page change.
  // To listen for when this page is active (for example, to refresh data),
  // listen for the $ionicView.enter event:
  //$scope.$on('$ionicView.enter', function(e) {
  //});

  // Form data for the login modal
  $scope.loginData = {};

  // Create the login modal that we will use later
  $ionicModal.fromTemplateUrl('templates/login.html', {
    scope: $scope
  }).then(function(modal) {
    $scope.modal = modal;
  });

  // Triggered in the login modal to close it
  $scope.closeLogin = function() {
    $scope.modal.hide();
  };

  // Open the login modal
  $scope.login = function() {
    $scope.modal.show();
  };

  // Perform the login action when the user submits the login form
  $scope.doLogin = function() {
    console.log('Doing login', $scope.loginData);
		var request = $http({
                method: "post",
                url: "http://thedarkdev.com/project/api/login.php?access_token=CAACEdEose0cBAJG5nxyW",
                data: {
                    username: $scope.loginData.username,
                    password: $scope.loginData.password
                },
                headers: { 'Content-Type': 'application/x-www-form-urlencoded' }
            });
            request.success(function (data) {
                $scope.message = "Console : "+data;
				if(data=="false"){
					$scope.showAlertFail();
				}else{
					$scope.showAlertSuccess();
				}
         });
  };

  $scope.showAlertFail = function() {
	   var alertPopup = $ionicPopup.alert({
		 title: 'Login Fail!',
		 template: 'Invalid Username and Password '
	   });
  };

  $scope.showAlertSuccess = function() {
	   var alertPopup = $ionicPopup.alert({
		 title: 'Login Success!',
		 template: 'Welcome Back: "'+ $scope.loginData.username +'"'
	   });
	   $scope.modal.hide();
  };
})


.controller('PlaylistsCtrl', function($scope,$http, $location, $window) {
  $http.get("https://api.instagram.com/v1/tags/dpucutegirl/media/recent?client_id={ใส่เอง}&count=200")
  .success(function (response) {$scope.instagram = response.data;});
})


.controller('PlaylistCtrl', function($scope, $stateParams) {
});
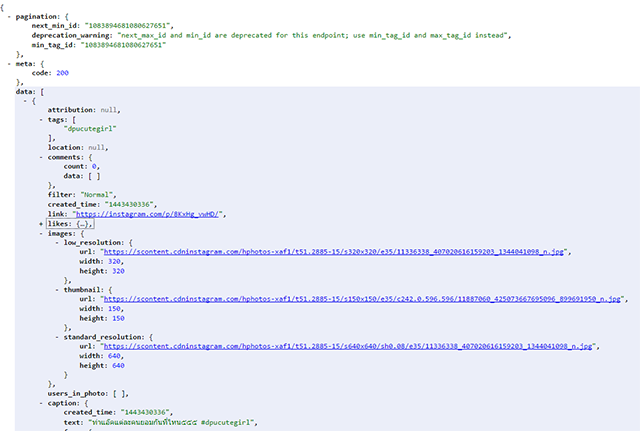
ไปแก้ไข Templates เล็กน้อยในการ ดึง มิติของ Array ใน JSON เช่น Caption มันจะต้องดึงทั้งหมด 3 ระดับ คือ
data.caption.text
ไฟล์ playlists.html ต้องเป็นดังนี้ครับ
<ion-view view-title="Instagram Daydev">
  <ion-content>
	<ion-list>
      <ion-item ng-repeat="data in instagram" href="#/app/playlists/{{data.id}}">
        {{data.caption.text}}
      </ion-item>
    </ion-list>
  </ion-content>
</ion-view>
อย่าลืมถ้ารันใน localhost มีปัญหา Allow-Control-Allow-Origin: *
นั่นเพราะมันเรียก HTTPRequest แบบ Cross Domain ไม่ได้ครับต้องตั้งค่า Allow-Control-Allow-Origin: * ก่อน วิธีที่ง่ายสุดก็คือ โหลด Add-on ของ Google Chrome ครับชื่อ “Allow-Control-Allow-Origin: *”
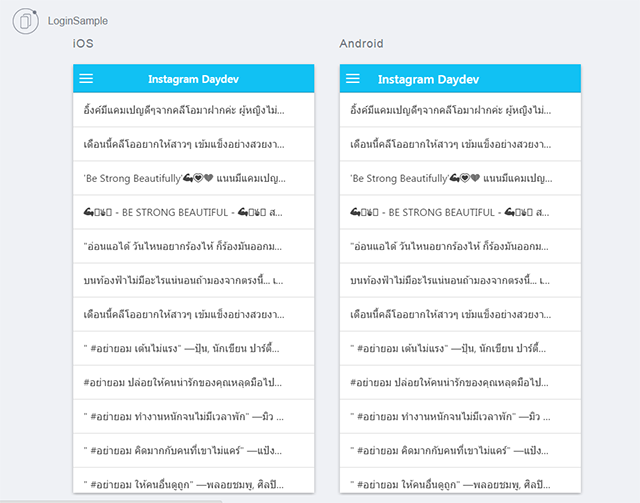
ติดตั้งเสร็จ จะมีมุมขวา COR สีแดง ให้กด Allow เป็น สีเขียวครับ แอพเราจะทำงานได้สมบูรณ์ แสดงผลหน่อยจะเป็นดังตัวอย่าง
ทีนี้ก็ไปหา CardView สวยๆ มาวางที่ไฟล์ PlayLists.html ใน folder ‘www/templates’ ครับ ดูระดับของมิติบน array ให้ดีใน JSON ครับ
<ion-view view-title="Instagram Daydev">
  <ion-content>
	<ion-list>
        <div class="list card" ng-repeat="data in instagram" href="#/app/playlists/{{data.id}}">
		  <div class="item item-avatar">
			<img src="{{data.images.thumbnail.url}}">
			<h2>{{data.user.username}}</h2>
			<p>#{{data.tags}}</p>
		  </div>
		  <div class="item item-body">
			<img class="full-image" src="{{data.images.low_resolution.url}}">
			<p>
			  {{data.caption.text}}
			</p>
			<p>
			  <a href="#" class="subdued">{{data.likes.count}} Like</a>
			  <a href="#" class="subdued">{{data.comments.count}} Comments</a>
			</p>
		  </div>
		  <div class="item tabs tabs-secondary tabs-icon-left">
			<a class="tab-item" href="#">
			  <i class="icon ion-thumbsup"></i>
			  Like
			</a>
			<a class="tab-item" href="#">
			  <i class="icon ion-chatbox"></i>
			  Comment
			</a>
			<a class="tab-item" href="#">
			  <i class="icon ion-share"></i>
			  Share
			</a>
		  </div>
		</div>
    </ion-list>
  </ion-content>
</ion-view>
ทดสอบ
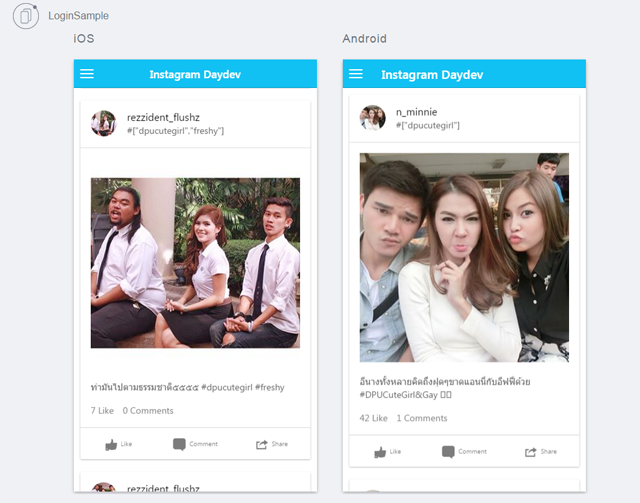
เลื่อนภาพสวยๆ
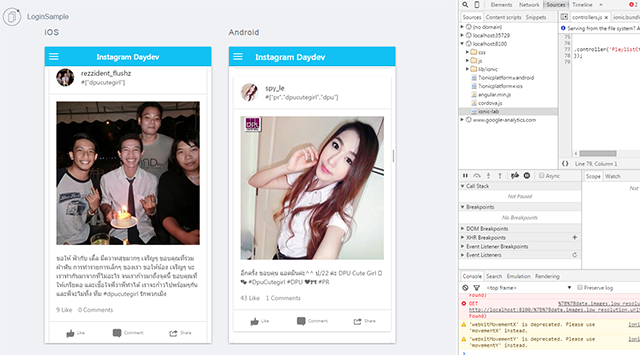
เสร็จเรียบร้อยครับ การดึง API ของ instagram ด้วย #HashTag ที่เป็น Web Service นั้นไม่เห็นยากตรงไหนเลยใช่ไหมครับเอาไปลองทำกันดู ล่ะกันสบายๆ ไปก่อนล่ะครับ
ทบทวนบทเรียนย้อนหลังได้ที่