

บทเรียนการพัฒนาเกมแนว God Simulator ตอนที่ 2 บน Unity 3D ฟังก์ชันการสร้าง Power Element สำหรับลดอุปสรรคต่างๆ ในเกม
บทเรียนก่อนหน้านี้คือ:
ในบทเรียนนี้จะเป็นการสร้าง Power Element หรือพลังของธรรมชาติที่ตัวผู้เล่นแนวเกม God Simulation จะต้องทำการควบคุมการจัดการครับ โดยเราจะสร้าง Power Element กี่ตัวก็ได้ในตัวอย่างระบุไว้ 2 ตัวครับ โดยการควบคุมมันก็จะคล้ายกับการควบคุมตัว Planet ของเราจากบทความก่อน
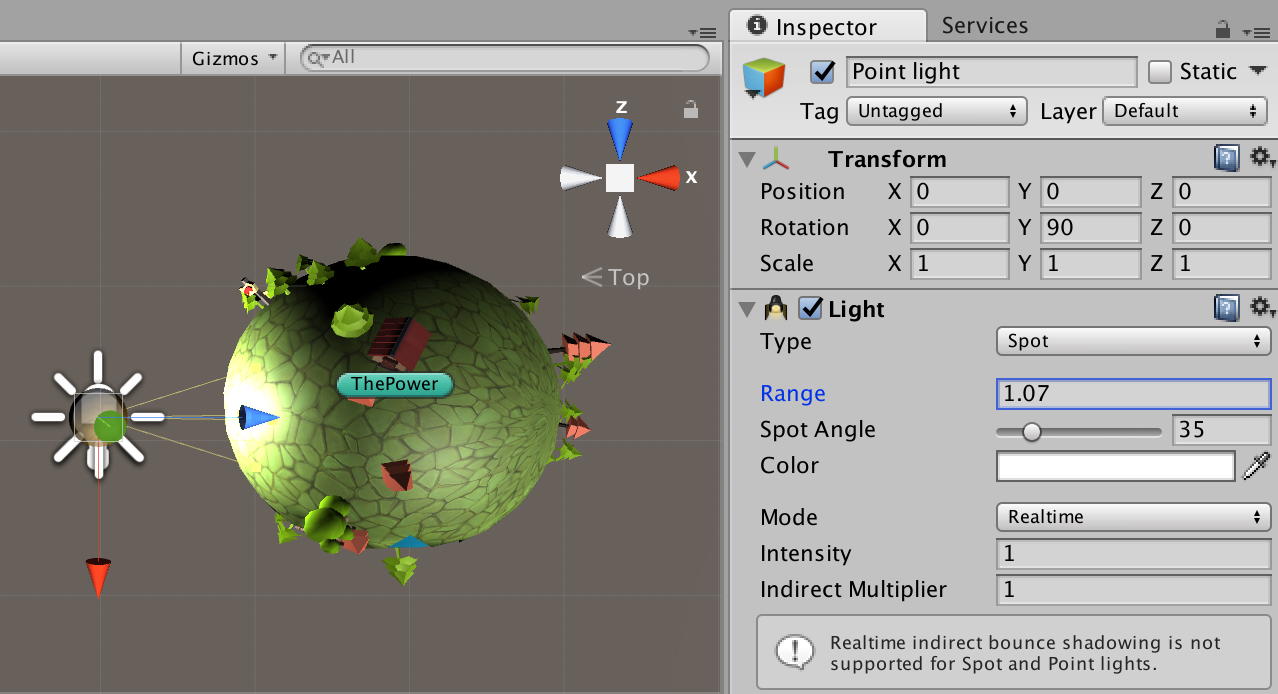
ให้สร้าง Sphere ขึ้นมาใน Empty GameObject ตั้งชื่อว่า ThePower ตกแต่งโดยการสร้าง Spot Light หรือ Point Light ให้เหมือนกับพระอาทิตย์ส่องแสงลงไป
สร้างไฟล์ C# ขึ้นมาใน Element Power นั้นว่า ThePower.cs
using System.Collections;
using System.Collections.Generic;
using UnityEngine;

public class ThePower : MonoBehaviour {
	public static ThePower instance;
	public Transform TurnedPart;
	public float RotationSpeed = 10f;
	public float LerpSpeed = 1f;
	private Vector3 _speed = new Vector3();
	private Vector3 _avgSpeed = new Vector3();
	private bool _dragging = false;
	public LayerMask turnLayerMask;

	void OnEnable(){
		instance = this;
	}

	void Update () {
		if (Input.GetMouseButtonDown(0))
		{
			RaycastHit hit;
			Ray ray = Camera.main.ScreenPointToRay(Input.mousePosition);

			if (Physics.Raycast(ray, out hit, 200f, turnLayerMask))
			{
					_dragging = true;
			}
	}

	if (Input.GetMouseButton(0) && _dragging)
	{
		if (Application.platform == RuntimePlatform.Android)
			_speed = new Vector3(-Input.touches[0].deltaPosition.x, Input.touches[0].deltaPosition.y, 0);
		else
			_speed = new Vector3(-Input.GetAxis ("Mouse X"), Input.GetAxis("Mouse Y"), 0);

		_avgSpeed = Vector3.Lerp(_avgSpeed, _speed, Time.deltaTime * 5);
	}
	else
	{
		if (_dragging)
		{
			_speed = _avgSpeed;
			_dragging = false;
		}

		float i = Time.deltaTime * LerpSpeed;
		_speed = Vector3.Lerp(_speed, Vector3.zero, i);
	}

	TurnedPart.Rotate( Vector3.up * _speed.x * RotationSpeed, Space.World );
	TurnedPart.Rotate( Vector3.right * _speed.y * RotationSpeed, Space.World );
	}
}
รูปแบบการหมุนก็คล้ายคลึงกันคือ Rotate ปกติ
TurnedPart.Rotate( Vector3.up * _speed.x * RotationSpeed, Space.World );
TurnedPart.Rotate( Vector3.right * _speed.y * RotationSpeed, Space.World );
กลับไปที่ Sphere ที่อยู่ใน ThePower ตั้งชื่อว่า Sun ตั้งค่า Sphere Collider กันสักหน่อย

ตั้งค่า ส่วนของ The Power เล็กน้อยให้เลือกตามนี้

ทำการเลือก ThePower ของเราในช่อง Turned Part ปรับค่า Rotation Speed ตามใจชอบได้สบาย แล้วทดลอง run ตัวเกมของเราดู
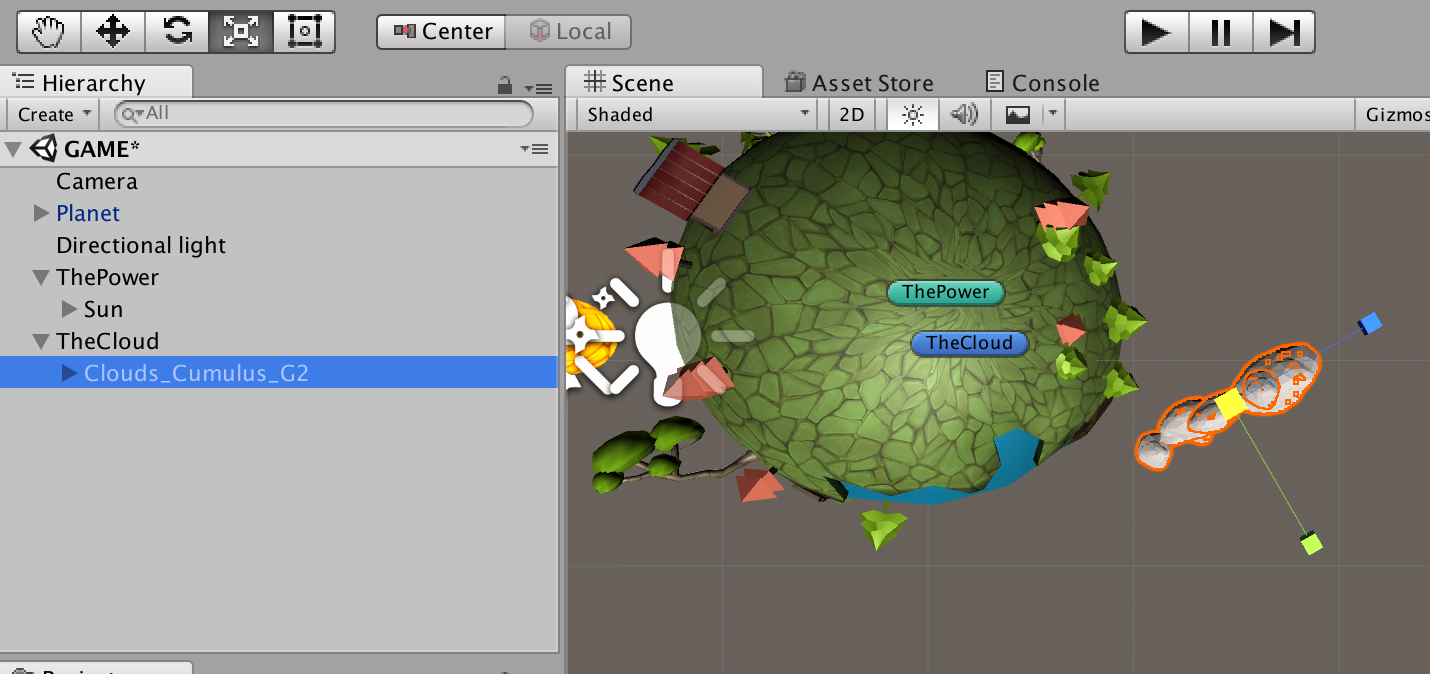
ขั้นตอนต่อมาคือการสร้าง TheCloudPower เป็นอีกหนึ่ง Power Element ครับ ผมใช้ Free Asset คือ 3LE Low Poly Cloud Pack, การใช้ Free Asset ไม่ใช่เรื่อง น่ายี้ ครับหากมันช่วยให้งานเราเสร็จได้ก็ใช้ไปเถอะ อย่าไปฟังคนอื่นว่ากันมาก
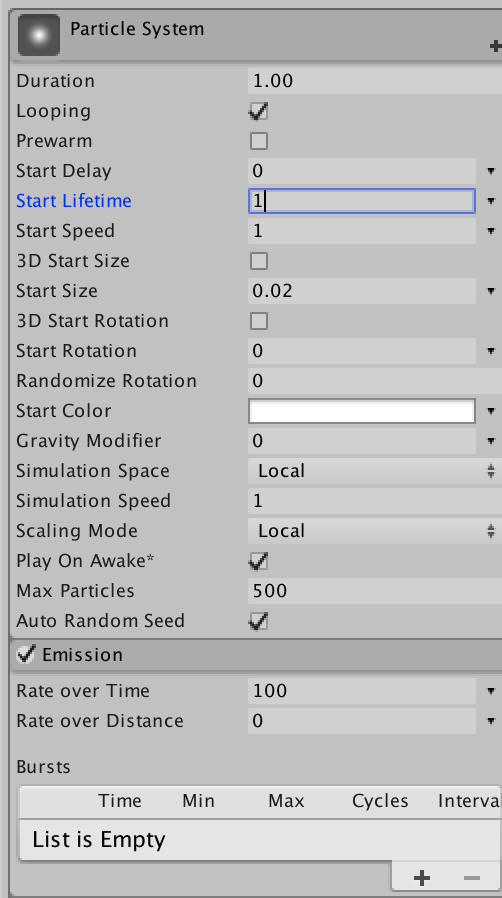
 ปรับตั้งค่า theCloudPower ของเราเหมือนกันใช้ Script ตัวเดียวกันต่างกันตรงใช้ Particle มาตกแต่งให้เหมือนฝนตกหรือหิมะ
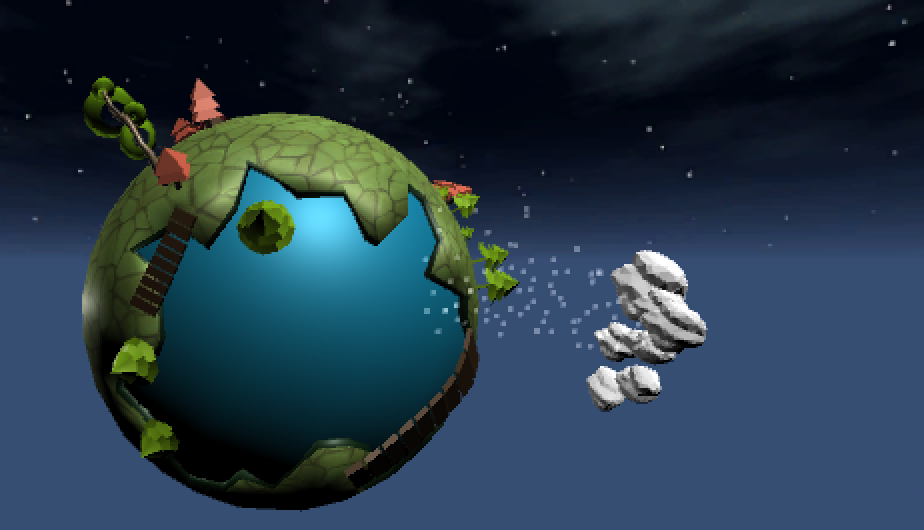
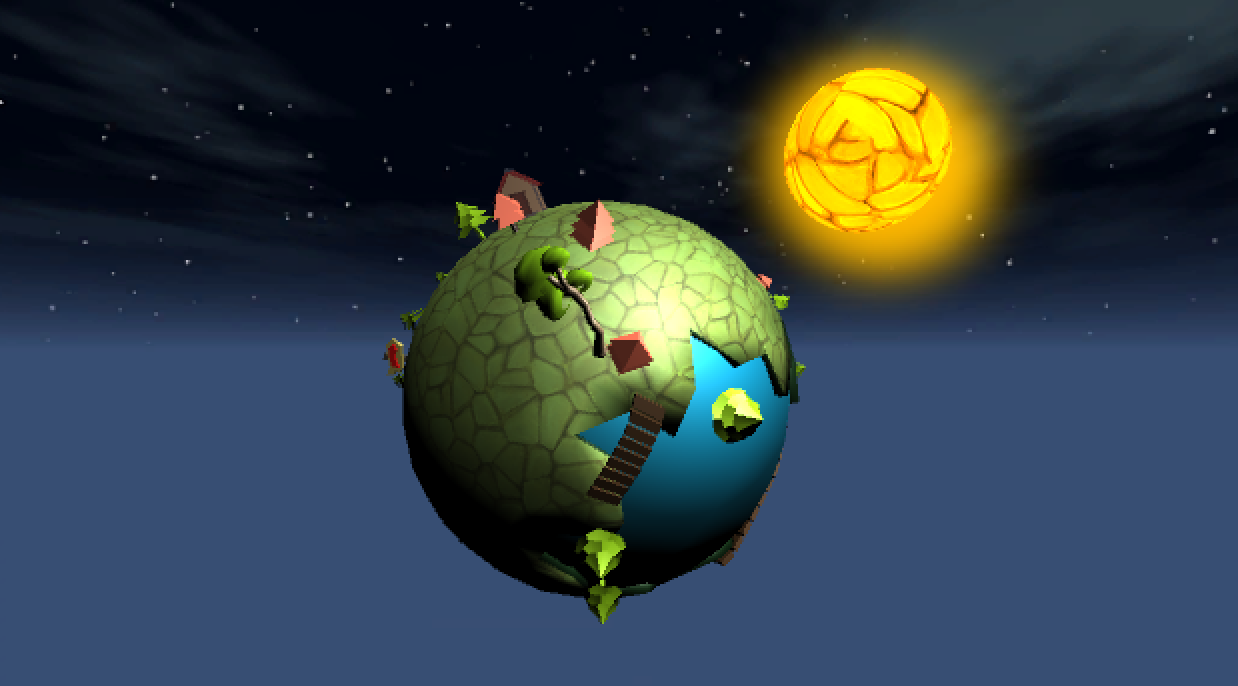
ทดสอบการเล่นของเกมที่เราสร้างส่วนของ Power Element โดยการ Run ตัวเกมได้ผลลัพธ์ดังนี้ครับ

จบการพัฒนาตอนที่ 2 ของ Tutorial ซีรีย์นี้แล้วนะครับ


One Comment