ตัวอย่างการเขียนเกมแนว Temple Run ด้วย Unity สำหรับผู้ที่สนใจสร้างเกม 3 มิติกับตอนที่ 3 การควบคุมตัวละครและเงื่อนไขเมื่อชนวัตถุในเกมขณะที่เรากำลังวิ่ง
ก่อนจะเข้าสู่บทเรียนนี้แนะนำว่าให้ไปศึกษา บทเรียนก่อนหน้านี้ก่อน อย่าได้ข้ามขั้นครับ เพราะนี่เป็น Workshop ที่เราต้องเรียนรู้การทำงานกันไปตามขั้นตอน
บทเรียนก่อนหน้านี้คือ
- Workshop เขียนเกมแนว Temple Run ด้วย Unity 3D ตอนที่ 1
- Workshop เขียนเกมแนว Temple Run ด้วย Unity 3D ตอนที่ 2
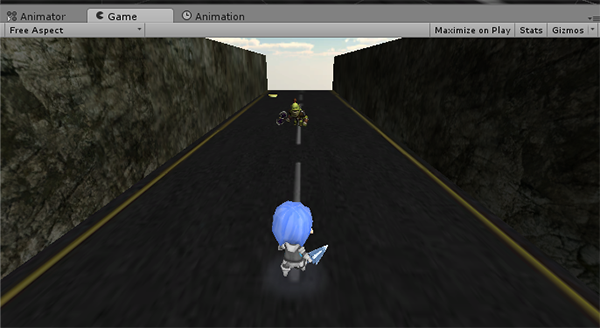
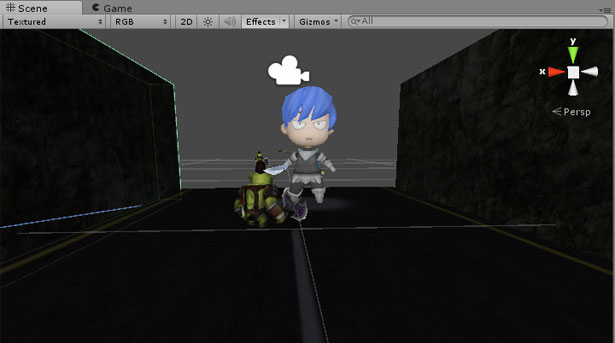
ผลลัพธ์จากครั้งก่อนคือการสร้าง Prefab ของ ไอเท็ม และ ศัตรูให้สุ่ม Ramdom โผล่มาในเกมของเรา ในบทเรียนนี้จะเป็นการ บังคับตัวละครของเราครับให้ สามารถกระโดด และวิ่งไปมาในฉากได้
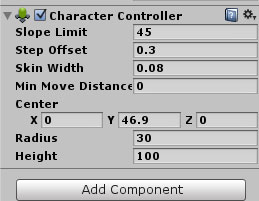
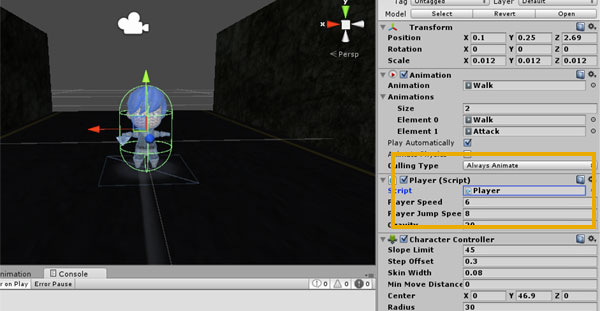
ให้เราทำการเพิ่ม Character Controller ขึ้นมาให้กับตัวละครของเราทันที โดยการกด Add Component ใหม่ที่ Physics -> Character Controller ใส่เข้าไป
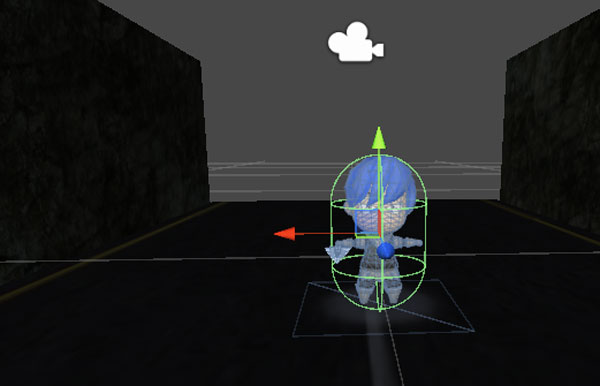
ทำการปรับสเกลของ Capsule ให้ครอบคลุมตัวละครของเราตั้งค่า Inspector ตามนี้
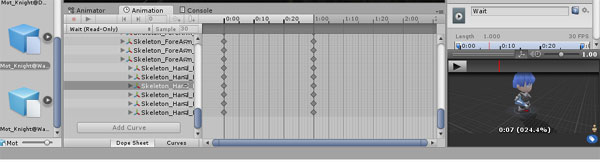
แนวคิดของการควบคุมตัวละคร ใน Game World นั้นจะต้อง ให้ตัวละครของเรา วิ่งไปมาซ้ายขวาได้ และกระโดดได้ ซึ่ง Animation ของ Cha_Knight ใน Asset Store ไม่มี “Jump” ผมจึงใช้ “Attack” เป็น Animation สำหรับตอนกระโดดแทนไปก่อน หรือใครที่มี Model 3D ที่ทำการ Rig เรียบร้อยแล้วก็มาสร้าง Animation ใน Unity ได้เลย
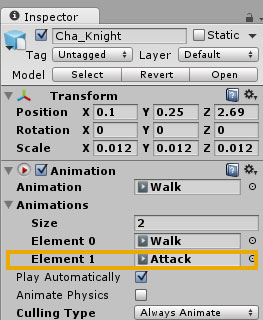
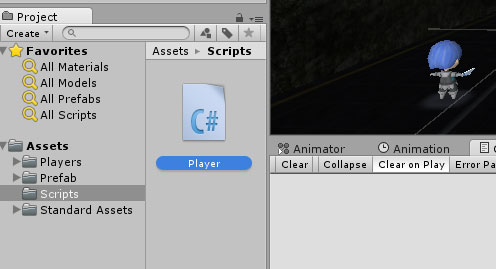
ปรับที่ส่วนของ Animation ใน Inspector ของตัว Player ของเราให้มี Element เพิ่มมาทันทีครับให้กด Add เข้าไป เคยเขียนในบทความ “เขียนเกมด้วย Unity3D ระบบ AI Enemy ของศัตรูวิ่งตามเรา” ไปแล้วเพิ่ม Script ภาษา C# มาใหม่ตั้งชื่อว่า Player.cs ครับ จะเป็นการเขียนเพื่อควบคุมตัวละคร ทั้งวิ่ง และกระโดด
- เพิ่มตัวแปร PlayerSpeed เป็น 6.0f สำหรับการวิ่งเคลื่อนไหว และตัวแปร PlayerJumpSpeed เป็น 8.0f เพื่อความเร็วในการกระโดด
- สำหรับตัวละครนั้น จะตั้งค่าแรงดึงดูุดไว้ที่ตัวแปร gravity เป็น 20.0f
- การเคลื่อนไหวของตัวละครจะใช้ Vector3 สำหรับค่า Vector ตำแหน่งสำหรับวัตถุ 3 มิติที่ตัวแปร PlayerMoveDirection
CharacterController controller;
bool isGrounded= false;
public float PlayerSpeed = 6.0f;
public float PlayerJumpSpeed = 8.0f;
public float gravity = 20.0f;
private Vector3 PlayerMoveDirection = Vector3.zero;
ฟังก์ชัน Start() กำหนดการควบคุมเบื้องต้นไว้ให้อ้างอึงถึง Character Controller
// Use this for initialization
void Start () {
  controller = GetComponent<CharacterController>();
}
และฟังก์ชัน Update() ก็ใช้คำสั่งเคลื่อนไหวตาม Keyboard ตัว W,A,S,D สำหรับควบคุมแนวระนาบ Horizontal และปุ่ม SpaceBar สำหรับกระโดด โดยมีการเปลี่ยน animation.Play(); มาควบคุมท่าทางตอนวิ่ง และกระโดดอีกครั้ง เช่นกด SpaceBar จะเป็น animation.Play(“Attack”); ตามที่บอกไปผมจะใช้ Attack แทน Jump เพราะ Cha_Knight ไม่มี Animation ชื่อ Jump
if (controller.isGrounded) {
			animation.Play("Walk");
//play "run" animation if spacebar is not pressed
			PlayerMoveDirection = new Vector3(Input.GetAxis("Horizontal"), 0, 0);  //get keyboard input to move in the horizontal direction
			PlayerMoveDirection = transform.TransformDirection(PlayerMoveDirection);  //apply this direction to the character
			PlayerMoveDirection *= PlayerSpeed;
//increase the speed of the movement by the factor "speed"

			if (Input.GetButton ("Jump")) {
//play "Jump" animation if character is grounded and spacebar is pressed
				animation.Stop("run");
				animation.Play("Attack");
				PlayerMoveDirection.y = PlayerJumpSpeed;
//add the jump height to the character
			}
			if(controller.isGrounded)
//set the flag isGrounded to true if character is grounded
				isGrounded = true;
		}
โดย moveDirection.y = jumpSpeed; จะเป็นตัวกำหนดความเร็วในการกระโดด พร้อมกับนำไปคำนวณกับ moveDirection.y -= gravity * Time.deltaTime; นับ Interval ให้แรงดึงดูดดึงค่าตัวละครเรากลับมาที่พื้นเพื่อไม่ให้มันลอยหายไป
PlayerMoveDirection.y -= gravity * Time.deltaTime;
 //Apply gravity
controller.Move(PlayerMoveDirection * Time.deltaTime);
 //Move the controller
ส่วนของ Collision Detect
ตัวละครในเกมของเรา จะต้องเก็บเหรียญ เป็นเงื่อนไขหลักและเงื่อนไขรองคือ ตัวละครของเราสามารถวิ่งชนตัวก๊อบบลิน ดังนั้นถ้าตัวละครของเราไปชนวัตถุ Prefab แล้วเราควรจะกำหนดให้มันหายไป คำสั่ง การทำลาย GameObject ในเกมนั้นสามารถใช้คำสั่ง Destroy(var.gameObject); มาช่วย
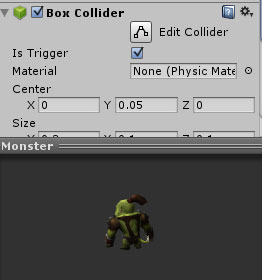
ในบทเรียนที่แล้ว Prefab ของเราใน console และ Heirarchy หากสังเกตดีๆ จะมีการ Clone ปรากฏขึ้นตลอด และจะมีชื่อใหม่ คือ Items(Clone) และ Monster(Clone) ดังนั้นเราต้องเขียนคำสั่ง Collision Detect เมื่อตัวละครของเราไปสัมผัสเข้ากับ Box Collider ของ Prefab
void OnTriggerEnter(Collider other)
	{
		if(other.gameObject.name == "Items(Clone)")
		{
			//+Health+Score
		}
		else if(other.gameObject.name == "Monster(Clone)")
		{
			//-Health
		}
		Destroy(other.gameObject);

	}
จะเห็นว่า //+Health & Score และ //-Health จะเป็นเงื่อนไข ที่ทำเมื่อชนกับ Items(Clone) และ Monster(Clone) ชัดเจนตามลำดับ แต่ทั้งหมดจะมีเงื่อนไขที่เหมือนกันคือ ทำลาย Game Object ออกจากฉากนั่นคือ Destroy(other.gameObject);
ภาพรวมคำสั่งใน Player.cs ทั้งหมดจะเป็นดังนี้
using UnityEngine;
using System.Collections;

public class Player : MonoBehaviour {

	CharacterController controller;
	bool isGrounded= false;
	public float PlayerSpeed = 6.0f;
	public float PlayerJumpSpeed = 8.0f;
	public float gravity = 20.0f;
	private Vector3 PlayerMoveDirection = Vector3.zero;

	void Start () {
		controller = GetComponent<CharacterController>();
	}

	void Update () {
		if (controller.isGrounded) {
			animation.Play("Walk");
			PlayerMoveDirection = new Vector3(Input.GetAxis("Horizontal"), 0, 0);
			PlayerMoveDirection = transform.TransformDirection(PlayerMoveDirection);
			PlayerMoveDirection *= PlayerSpeed;

			if (Input.GetButton ("Jump")) {
				animation.Stop("run");
				animation.Play("Attack");
				PlayerMoveDirection.y = PlayerJumpSpeed;
			}
			if(controller.isGrounded)
				isGrounded = true;
		}

		PlayerMoveDirection.y -= gravity * Time.deltaTime;
		controller.Move(PlayerMoveDirection * Time.deltaTime);  r
	}

	//check if the character collects the powerups or the snags
	void OnTriggerEnter(Collider other)
	{
		if(other.gameObject.name == "Items(Clone)")
		{
			//+Health,score
		}
		else if(other.gameObject.name == "Monster(Clone)")
		{
			//-Health
		}
		Destroy(other.gameObject);

	}

}
การ trigger ก็จะไปอ้าง Prefab ที่เราสร้างจากบทเรียนที่แล้วครับ
นำ Player.cs ไป Add component กับตัวละคร และ Character Controller ของเรา
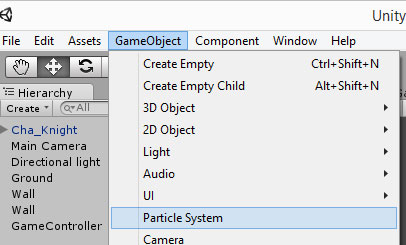
ส่วนของ Particle Systems
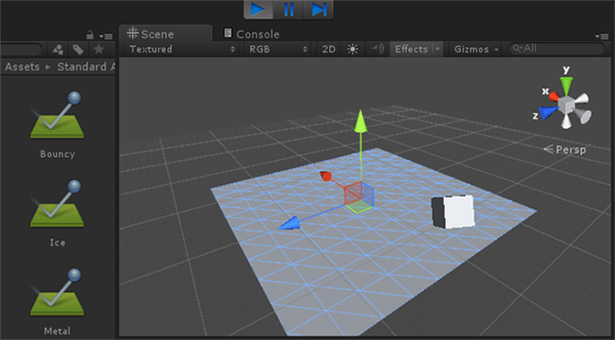
Particle Systems คือพวก Effect การกระแทก หมอก ควัน ไฟ หรือ พลังเรืองแสง บางอย่างปรากฏขึ้นกับตัวละคร ทำการวาง Particle Systems บน Scene ก่อน
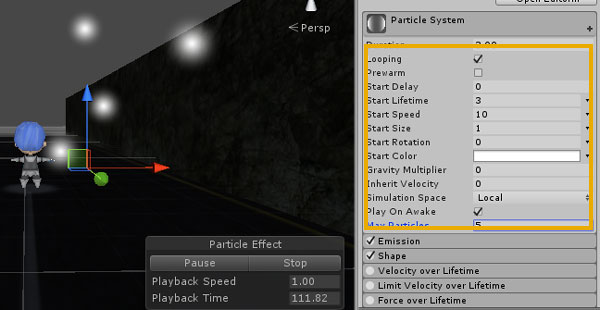
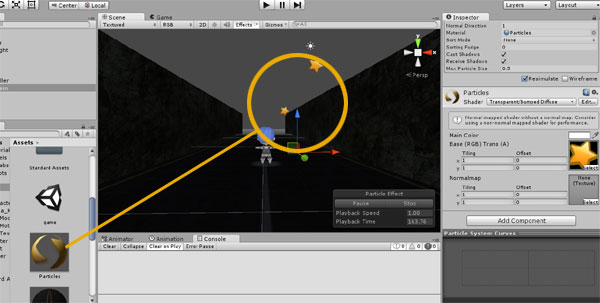
ตั้งค่า Particle ของเราให้เร็ว และน้อยตามตัวอย่าง หรือใครชอบยังไงก็ปรับเอาส่วนนี้ครับ
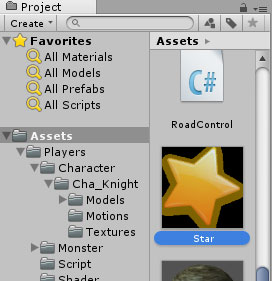
ในตัวอย่างเราจะไปหาไฟล์ PNG ที่ฉากหลังเป็น Transparent มาสักไฟล์นั่นคือ Star.png เอาไปไว้ใน Project ของเรา

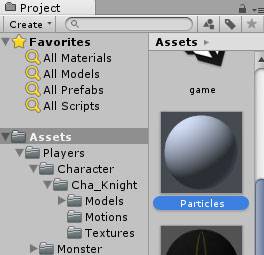
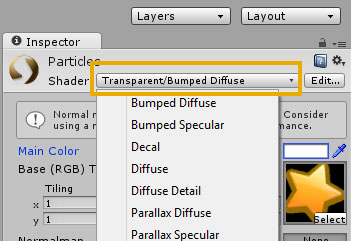
ทำการสร้าง Material ขึ้นมาใหม่อีกตัวชื่อว่า “Particle” แล้วปรับ Texture ใหม่เป็น Star.png ซะ ตั้งค่าโหมด Transparent ซะหน่อยให้ไม่มีขอบดำปรากฏ
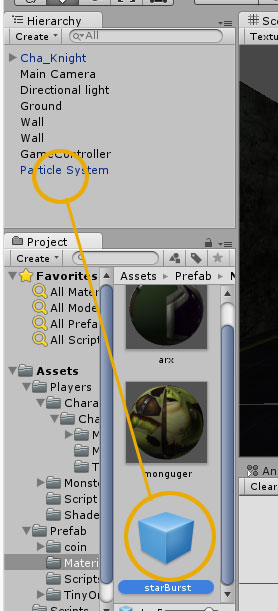
สร้าง Prefab ขึ้นมาใหม่ตั้งชื่อว่า “starBurst” หลังจากนั้นให้ ลาก Particle Systems ใน Heirarchy ไปที่ Prefab ที่เราเพิ่งสร้าง สังเกตว่า Prefab “starBurst” ของเราเป็นสีน้ำเงินหรือยังถ้าเป็นแล้ว ก็ลบ Particle Systems ออกจาก Heirarchy ได้เลยเพราะเรามี Prefab แล้ว
จับ Particle systems “starBurst” ไปวางตามฉากที่เราอยากจะวางให้เกิดดาวกระจาย
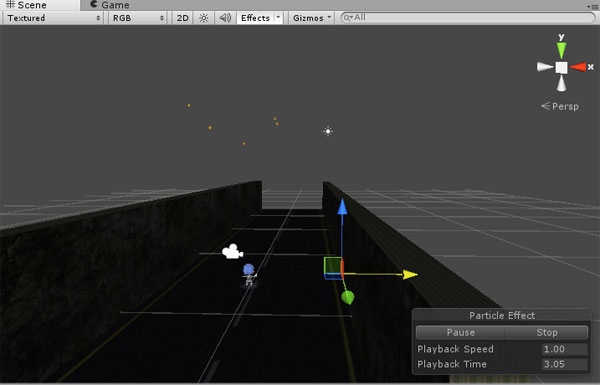
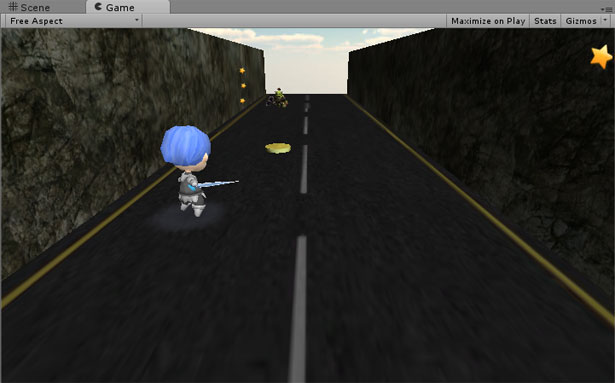
ทำการ Run เกมของเราซะ ลองควบคุมด้วย แป้นพิมพ์ A,S,D,W และ Space Bar ดูครับ
วีดีโอผลลัพธ์ ข้างล่าง