เขียนแอพพลิเคชัน iPhone บน iOS8 กับวิธีการใช้ UIAlertView เมื่อแตะ ที่ UITableViewCell บน UITableView ด้วยภาษา Swift บน Xcode6 BETA สำหรับผู้เริ่มต้น
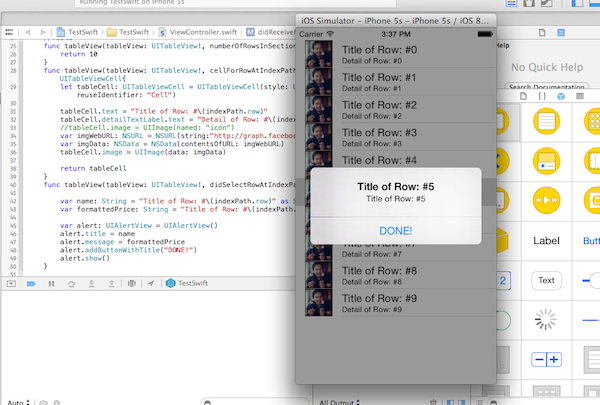
แอพพลิเคชันของเราจะมีการทำงานแบบนี้นะครับ
ก่อนอื่นลองศึกษาบทความก่อนหน้านี่ก่อนครับไม่น่ายากอะไร
- รู้จักภาษาโปรแกรม Swift สำหรับแพลตฟอร์ม iOS ของ Apple
- Fundamental พื้นฐานของภาษา Swift ตอนที่ 1
- เขียนแอพ iPhone บน iOS8 ภาษา Swift ด้วย Xcode6 BETA
- เขียนแอพ iPhone บน iOS8 ภาษา Swift กับ UITableView
- เขียนแอพ iPhone ภาษา Swift กับการแทรก Image บน UITableView
และตัวอย่างที่เราจะหยิบมาพัฒนาต่อก็คือ ตัวอย่างจากบทความนี้
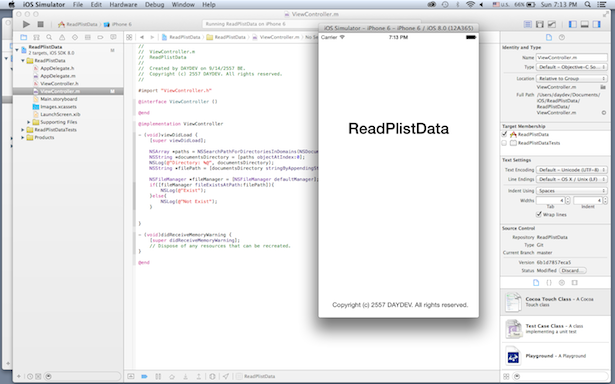
จากบทความเดิมเราจะทำ ไปแล้วประมาณนึง ให้ลองตรวจสอบ ไฟล์ ViewController.swift ก่อนครับ ว่าเป็นแบบนี้หรือเปล่า
//
//  ViewController.swift
//  TestSwift
//
//  Created by PERSONAL on 6/11/2557 BE.
//  Copyright (c) 2557 Daydev Co., Ltd. All rights reserved.
//

import UIKit

class ViewController: UIViewController, UITableViewDelegate{

    override func viewDidLoad() {
        super.viewDidLoad()
        // Do any additional setup after loading the view, typically from a nib.

    }

    override func didReceiveMemoryWarning() {
        super.didReceiveMemoryWarning()
        // Dispose of any resources that can be recreated.
    }

    //Table
    func tableView(tableView: UITableView!, numberOfRowsInSection section: Int) -> Int{
        return 10
    }
    func tableView(tableView: UITableView!, cellForRowAtIndexPath indexPath: NSIndexPath!) -> UITableViewCell{
        let tableCell: UITableViewCell = UITableViewCell(style: UITableViewCellStyle.Subtitle, reuseIdentifier: "Cell")

        tableCell.text = "Title of Row: #\(indexPath.row)"
        tableCell.detailTextLabel.text = "Detail of Row: #\(indexPath.row)"
        //tableCell.image = UIImage(named: "icon")
        var imgWebURL: NSURL = NSURL(string:"http://graph.facebook.com/banyapon/picture/")
        var imgData: NSData = NSData(contentsOfURL: imgWebURL)
        tableCell.image = UIImage(data: imgData)

        return tableCell
    }


}
การทำงานรอบนี้ คือเราจะทำการใช้ UIAlertView มาช่วย เป็นข้อความแจ้งเตือน เมื่อเกิดการแตะที่แถวสักแถวหรือ Cell หนึ่งบน UITableView ครับ
การใช้คำสั่ง UIAlertView สามารถใช้ด้วยรูปแบบนี้
var alert: UIAlertView = UIAlertView()
        alert.title = name
        alert.message = formattedPrice
        alert.addButtonWithTitle("Message on Button")
        alert.show()
ทำการเพิ่ม Function ใหม่เข้าไปเลยครับ ในที่นี้ให้ใช้ฟังก์ชันนี้
func tableView(tableView: UITableView!, didSelectRowAtIndexPath indexPath: NSIndexPath!) {
}
ใส่คำสั่งลงไป โดยอ้างอิงกับ indexPath.row มาใช้แทนข้อความที่ต้องการให้เกิด Alert ครับ
var name: String = "Title of Row: #\(indexPath.row)" as String
        var formattedPrice: String = "Title of Row: #\(indexPath.row)" as String
ดังนั้นภาพรวมคำสั่งจะเป็นดังนี้
func tableView(tableView: UITableView!, didSelectRowAtIndexPath indexPath: NSIndexPath!) {

        var name: String = "Title of Row: #\(indexPath.row)" as String
        var formattedPrice: String = "Title of Row: #\(indexPath.row)" as String

        var alert: UIAlertView = UIAlertView()
        alert.title = name
        alert.message = formattedPrice
        alert.addButtonWithTitle("DONE!")
        alert.show()
    }
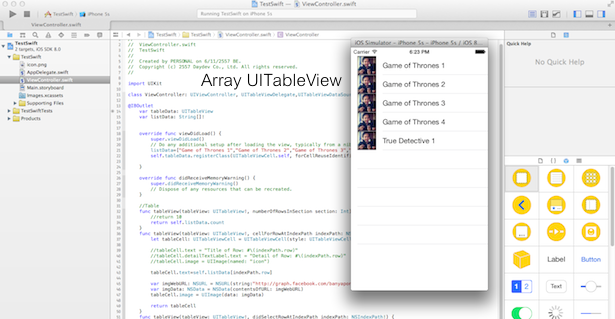
ตรวจสอบ Source Code หน้า ViewController.swift กันหน่อยครับว่าเหมือนกันหรือเปล่า?
//
//  ViewController.swift
//  TestSwift
//
//  Created by PERSONAL on 6/11/2557 BE.
//  Copyright (c) 2557 Daydev Co., Ltd. All rights reserved.
//

import UIKit

class ViewController: UIViewController, UITableViewDelegate{

    override func viewDidLoad() {
        super.viewDidLoad()
        // Do any additional setup after loading the view, typically from a nib.

    }

    override func didReceiveMemoryWarning() {
        super.didReceiveMemoryWarning()
        // Dispose of any resources that can be recreated.
    }

    //Table
    func tableView(tableView: UITableView!, numberOfRowsInSection section: Int) -> Int{
        return 10
    }
    func tableView(tableView: UITableView!, cellForRowAtIndexPath indexPath: NSIndexPath!) -> UITableViewCell{
        let tableCell: UITableViewCell = UITableViewCell(style: UITableViewCellStyle.Subtitle, reuseIdentifier: "Cell")

        tableCell.text = "Title of Row: #\(indexPath.row)"
        tableCell.detailTextLabel.text = "Detail of Row: #\(indexPath.row)"
        //tableCell.image = UIImage(named: "icon")
        var imgWebURL: NSURL = NSURL(string:"http://graph.facebook.com/banyapon/picture/")
        var imgData: NSData = NSData(contentsOfURL: imgWebURL)
        tableCell.image = UIImage(data: imgData)

        return tableCell
    }
    func tableView(tableView: UITableView!, didSelectRowAtIndexPath indexPath: NSIndexPath!) {

        var name: String = "Title of Row: #\(indexPath.row)" as String
        var formattedPrice: String = "Title of Row: #\(indexPath.row)" as String

        var alert: UIAlertView = UIAlertView()
        alert.title = name
        alert.message = formattedPrice
        alert.addButtonWithTitle("DONE!")
        alert.show()
    }

}
ทดสอบ Run ตัวแอพพลิเคชันของเราดูครับ แล้วลองแตะ Cell สัก แถว ใดแถวหนึ่ง ดูหน่อยว่าโอเคไหม
เสร็จเรียบร้อย Source code ไม่มีอีกแล้วครับ เพราะไม่ยากอะไรทำตามได้นี่เนอะ
บทเรียนที่เกี่ยวข้อง
- รู้จักภาษาโปรแกรม Swift สำหรับแพลตฟอร์ม iOS ของ Apple
- Fundamental พื้นฐานของภาษา Swift ตอนที่ 1
- เขียนแอพ iPhone บน iOS8 ภาษา Swift ด้วย Xcode6 BETA
- เขียนแอพ iPhone บน iOS8 ภาษา Swift กับ UITableView
- เขียนแอพ iPhone ภาษา Swift กับการแทรก Image บน UITableView