บางครั้งการ Render ภาพ 360 Photo จากโปรแกรม 3D ก็นานเกินไป ลองมาหาโซลูชันแบบ Real-Time Render บน Unity 3D สำหรับสร้างกราฟิกภาพ 360 แบบรวดเร็ว
ถ้ามีการรับงานทำกราฟิก 3D แบบ 360 สำหรับทำการตลาดบน Facebook หรือ Social Media แล้ว ถ้ามีกล้อง 360 Camera ก็ไม่มีปัญหา แต่ถ้าหากว่าลูกค้าต้องการ 3D Graphic ที่ Render ขึ้นมาเอง เราก็ต้องเปิด Maya, Blender, 3DsMax แล้วทำกราฟิก วางกล้อง ตั้งค่า ViewPort แล้วก็ Render ออกมาเป็น 360 Photo ซึ่งการ Render มันก็เสียเวลานานมาก แล้วถ้าเราทำทุกอย่างบน Unity แล้วใช้ข้อดีของการทำ Real-Time Render ดูเนี่ยมันจะโอเคไหม ก็ไปเจอโซลูชันมาจาก Blog ของ Unity Developer เข้าให้ เราก็เลยเอามาปรับใช้ให้ตรงกับงานเรา มาลองทำตามดูครับ
สร้าง Project Unity ขึ้นมาใหม่ สำหรับงานนี้:
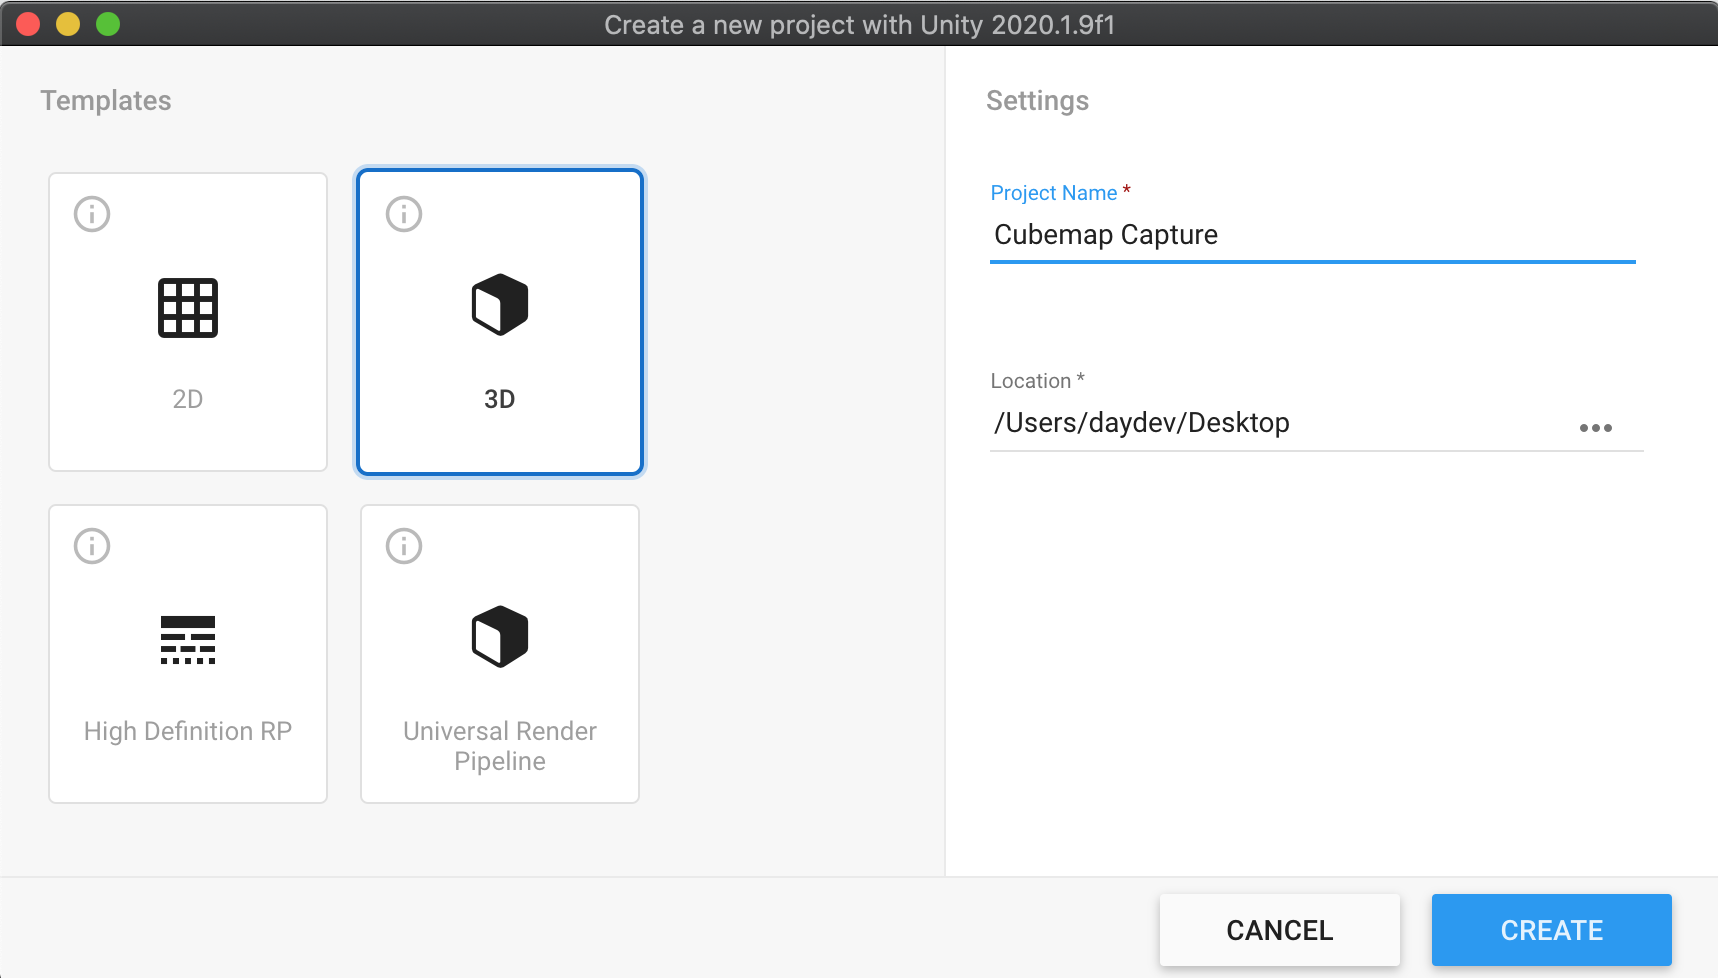
สร้าง Project ให้เรียบร้อยด้วยความที่นี่เป็น Sample สำหรับสอนทำกราฟิก ก็เลยอยากจะดาวน์โหลด Asset ตัวนี้มาใช้ https://assetstore.unity.com/packages/3d/environments/fantasy/make-your-fantasy-game-lite-8312

ดาวน์โหลดผ่าน Package Manager ละกัน ติดตั้ง Install และนำเข้า Import ให้เรียบร้อย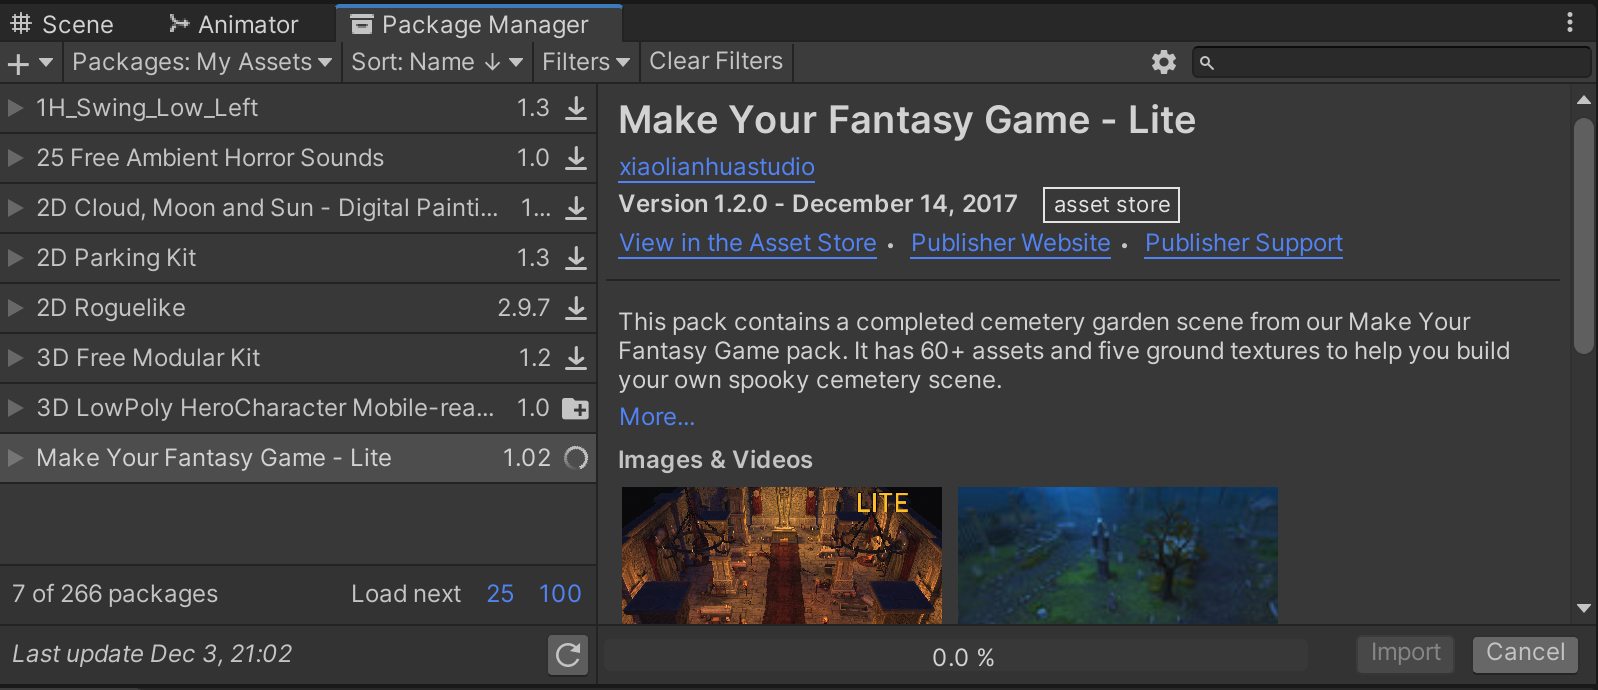
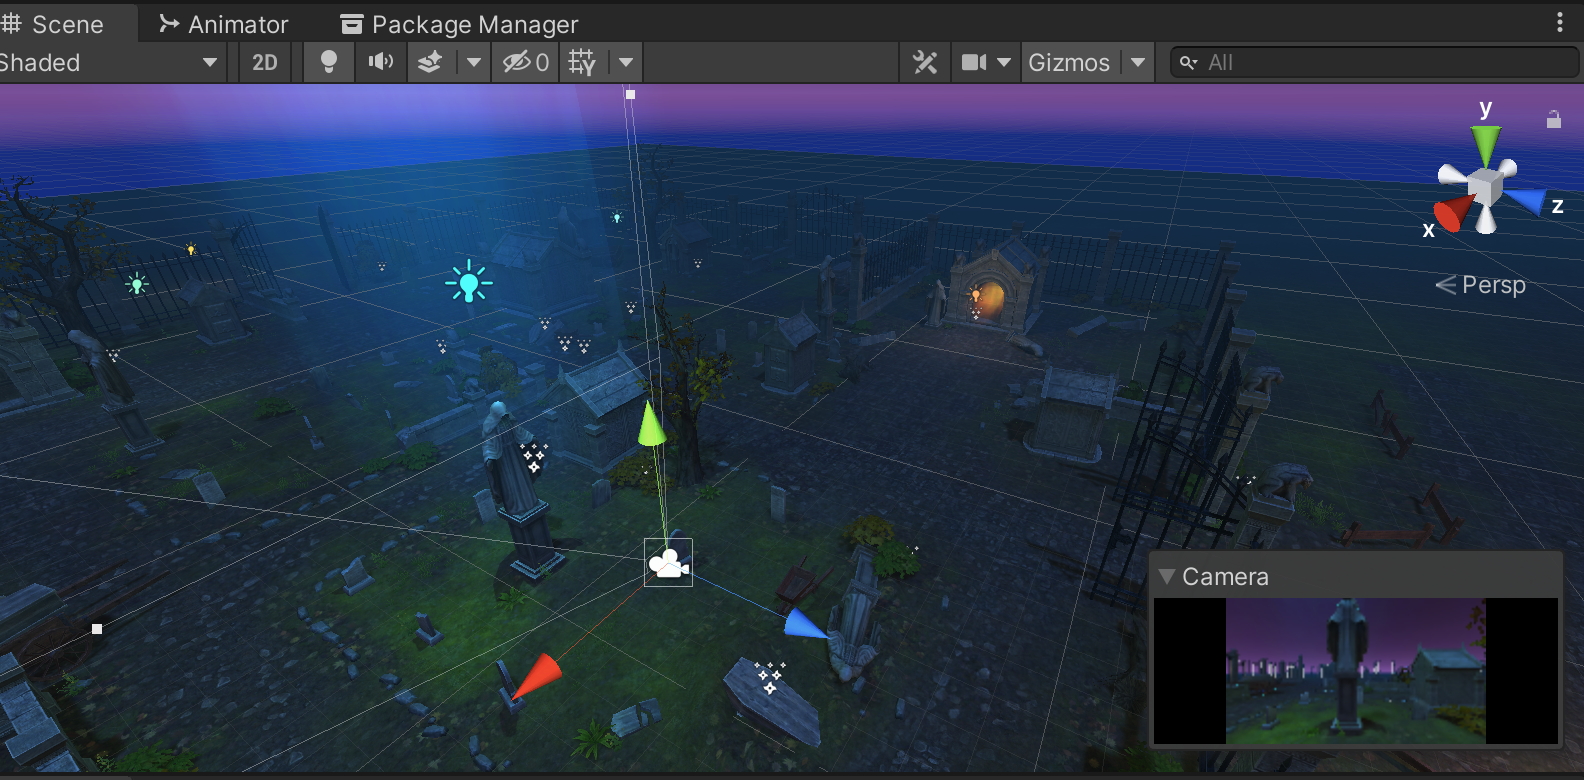
จัดฉากตามใจชอบเสร็จแล้ววางตำแหน่งกล้องของเราตำแหน่งตรงกลางของฉากที่เราจะใช้ ประหนึ่งว่าอยู่ตรงกลางสภาพแวดล้อม ตามตัวอย่างก็ได้ครับ
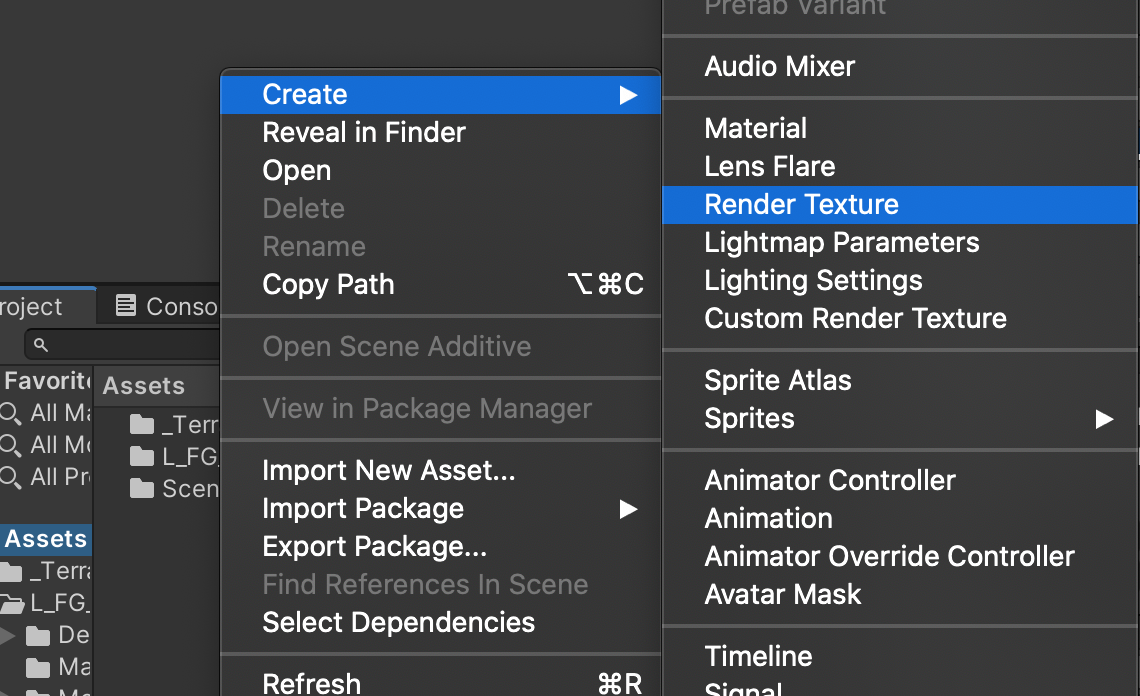
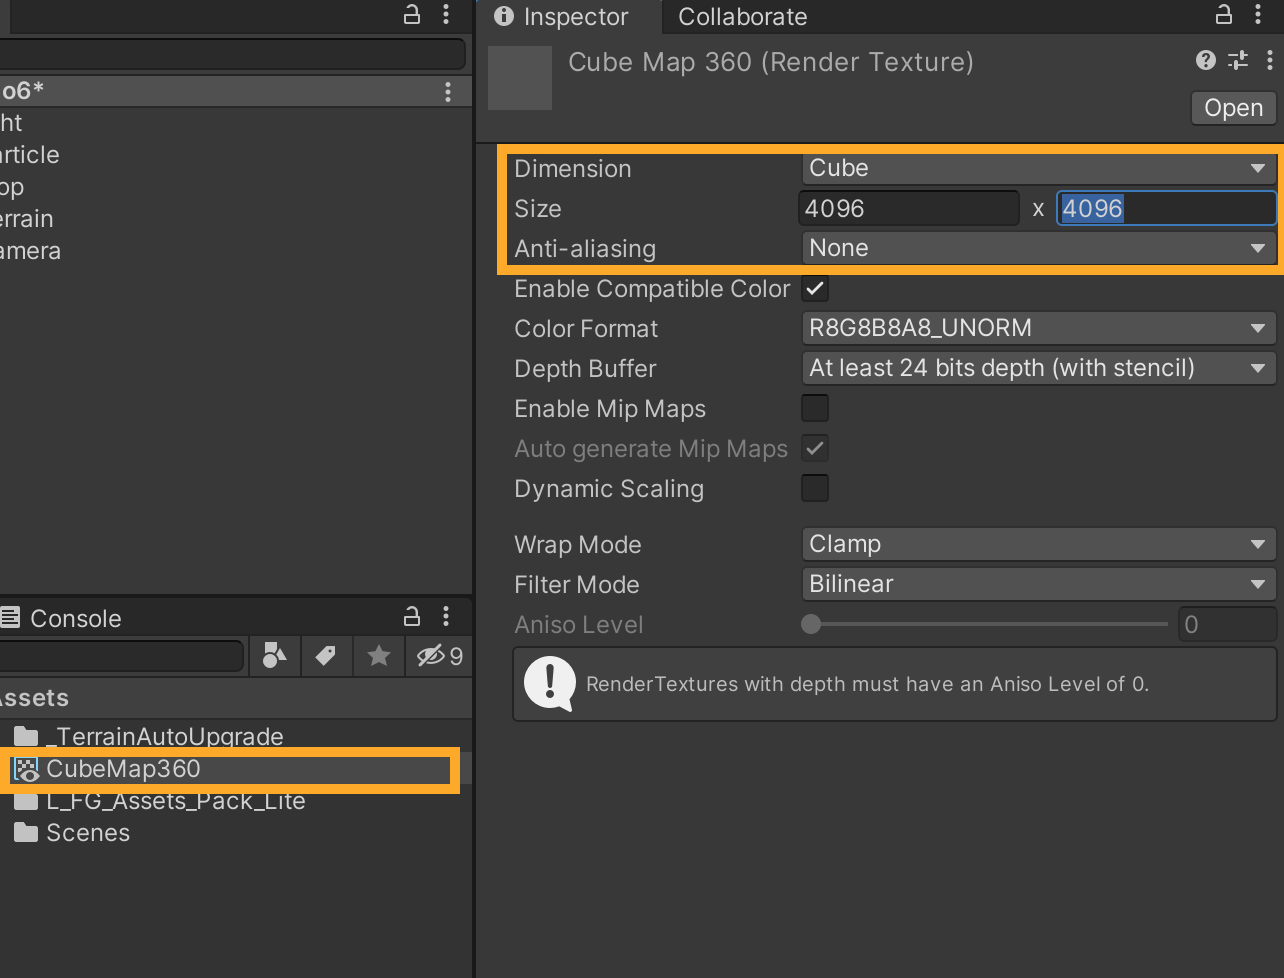
วางกล้องเป็นที่น่าพอใจแล้วต่อมาเราต้องสร้าง Render Texture ใหม่ขึ้นมาตั้งชื่อว่า CubeMap360
ตั้งค่า Render Texture ตรง dimension เป็น Cube กำหนดขนาดเป็น 4098×4098 Pixels (ค่อนข้างใหญ่)
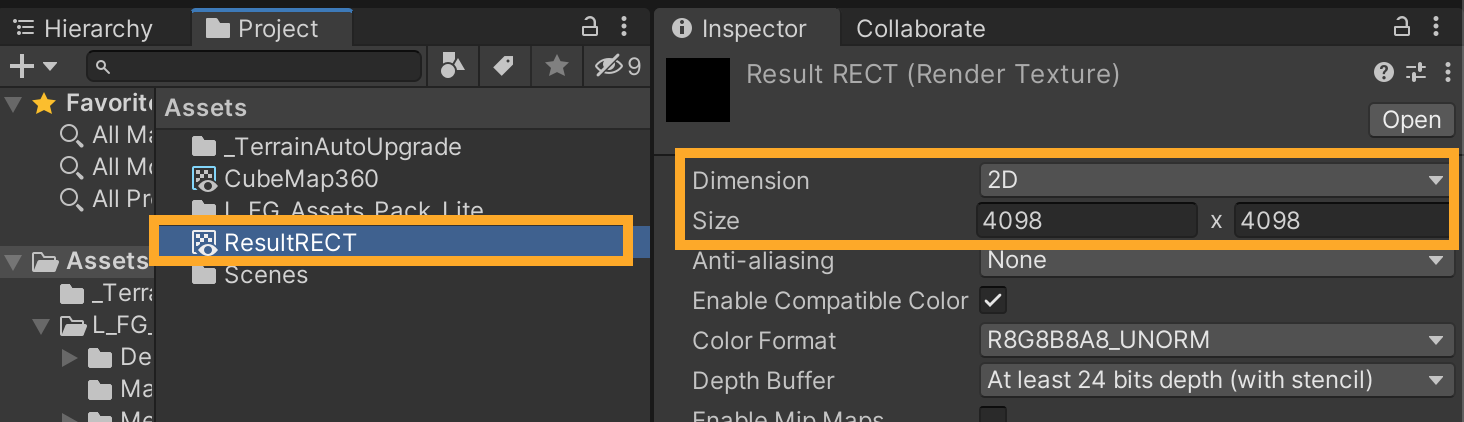
สร้าง Render Texture มาอีกตัว ตั้งชื่อว่า ResultRECT แต่ไม่ต้องปรับ Dimension ใช้แค่ 2D ปรับขนาดเป็น 4098×4098 pixels ให้เรียบร้อย
เมื่อพร้อมแล้วให้เราสร้าง GameObject เปล่าๆ ขึ้นมาตั้งชื่อว่า PanoramaCapture สร้างไฟล์ C# ขึ้นมาว่า PanoramaCapture.cs
ประกาศ Using บน Header เรียกไลบรารี่การเขียนไฟล์
using System.IO;
ต่อจากนั้นประกาศ Global Variable ดังนี้:
public Camera MainCamera;
public RenderTexture cubeMap;
public RenderTexture resultRect;
ไปที่ Method ของ function ที่ Update() เขียนคำสั่งคลิกเมาส์ซ้าย ให้ทำการ ดึงภาพจาก MainCamera ไปเก็บใน CubeMap เป็นรูปแบบ Panorama Sphere แล้วจึงเอา Panorama Sphere หรือเจ้า CubeMap ไปกางเขียนทับ Render Texture ที่เป็นภาพ 2D อย่าง ResultRect ที่เราสร้างไว้
if (Input.GetMouseButton(0)){
    MainCamera.RenderToCubemap(cubeMap);
    cubeMap.ConvertToEquirect(resultRect);
}
สร้างฟังก์ชันใหม่ขึ้นมาว่า savePhoto() แล้วไปแทรกต่อใน Update() ดังนี้:
if (Input.GetMouseButton(0)){
   MainCamera.RenderToCubemap(cubeMap);
   cubeMap.ConvertToEquirect(resultRect);
   savePhoto(resultRect);
}
ดังนั้นเราต้องไป Implement ส่วนของฟังก์ชัน savePhoto() คือ:
public void savePhoto(RenderTexture rt){
        Texture2D texture2D = new Texture2D(rt.width, rt.height);
        RenderTexture.active = rt;
        texture2D.ReadPixels(new Rect(0,0,rt.width,rt.height),0,0);
        RenderTexture.active = null;
        byte[] bytes = texture2D.EncodeToJPG();
        string pathImage = Application.dataPath + "/Result" + ".jpg";
        File.WriteAllBytes(pathImage, bytes);
}
รับค่า ResultRECT ที่เป็น Render Texture ขนาดความกว้างและยาว ไปทำการเข้ารหัส JPG ผ่าน EncodeToJPG ที่เรียกจาก System.IO แล้วเขียนภาพใหม่วางที่ Path ของ Assets โดยมีชื่อ Result.jpg นั่นเอง ดังนั้นภาพรวมของ PanoramaCapture.cs จะเป็นดังนี้
using System.Collections;
using System.IO;
using System.Collections.Generic;
using UnityEngine;

public class PanoramaCapture : MonoBehaviour
{
    public Camera MainCamera;
    public RenderTexture cubeMap;
    public RenderTexture resultRect;

    void Start()
    {

    }

    // Update is called once per frame
    void Update()
    {
        if (Input.GetMouseButton(0)){
            MainCamera.RenderToCubemap(cubeMap);
            cubeMap.ConvertToEquirect(resultRect);
            savePhoto(resultRect);
        }
    }

    public void savePhoto(RenderTexture rt){
        Texture2D texture2D = new Texture2D(rt.width, rt.height);
        RenderTexture.active = rt;
        texture2D.ReadPixels(new Rect(0,0,rt.width,rt.height),0,0);
        RenderTexture.active = null;
        byte[] bytes = texture2D.EncodeToJPG();
        string pathImage = Application.dataPath + "/Result" + ".jpg";
        File.WriteAllBytes(pathImage, bytes);
    }
}
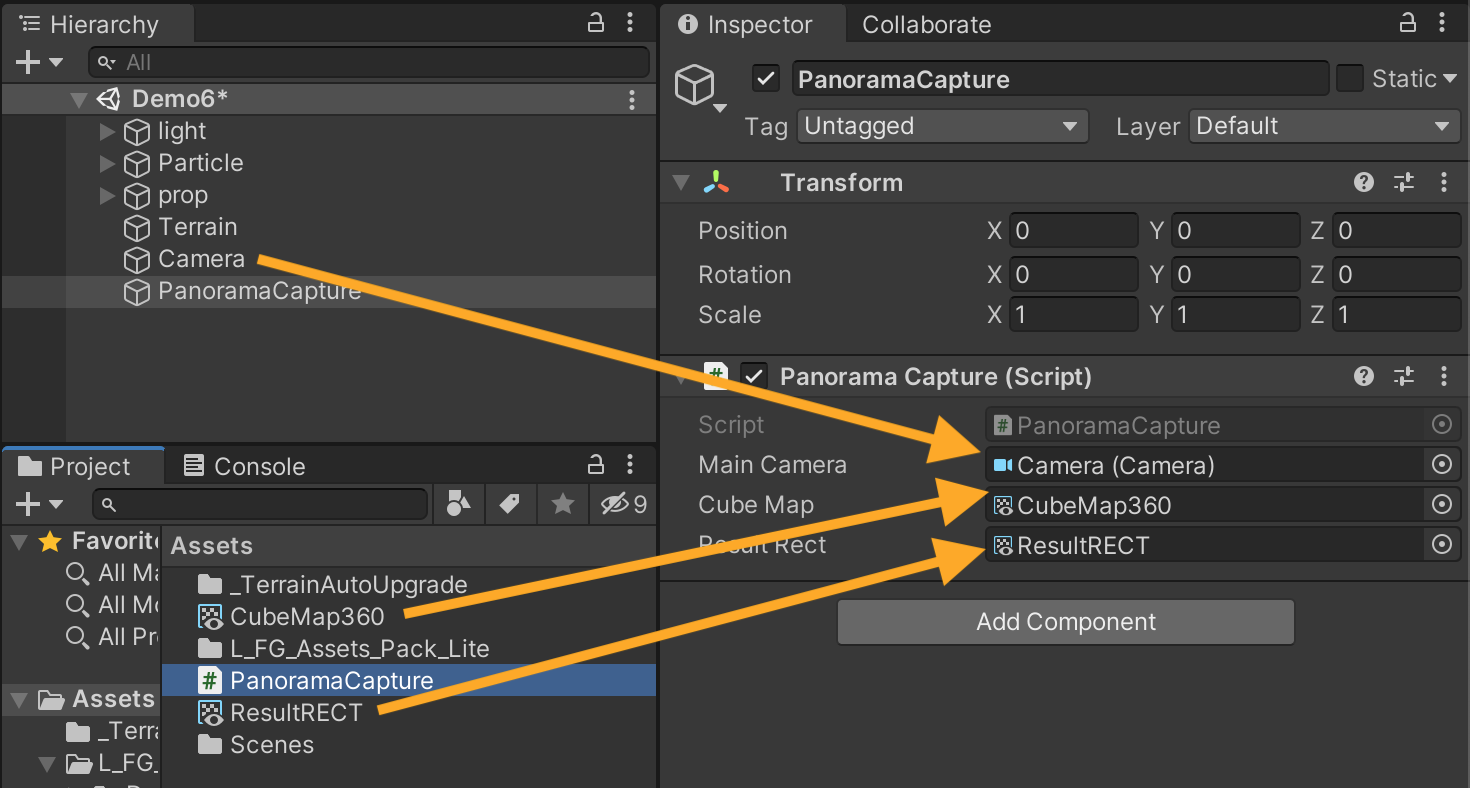
ลาก ทุกสิ่งไปยัง component ที่อยู่ใน C# ตามภาพ
เวลาทดสอบให้ทำผ่าน Editor โดยการกด Play แล้วไปที่ Game Scene หลังจากนั้นคลิกเมาส์แค่นั้นครับ แล้วจึงรอดูผลลัพธ์ (จะมีการประมวลผลนานนิดนึง)

ไฟล์ภาพให้ ไปที่ Path ในเครื่องคอม ใน Folder ของ Project เรานั้นแหละ มันชื่อ Result.jpg ใน Assets
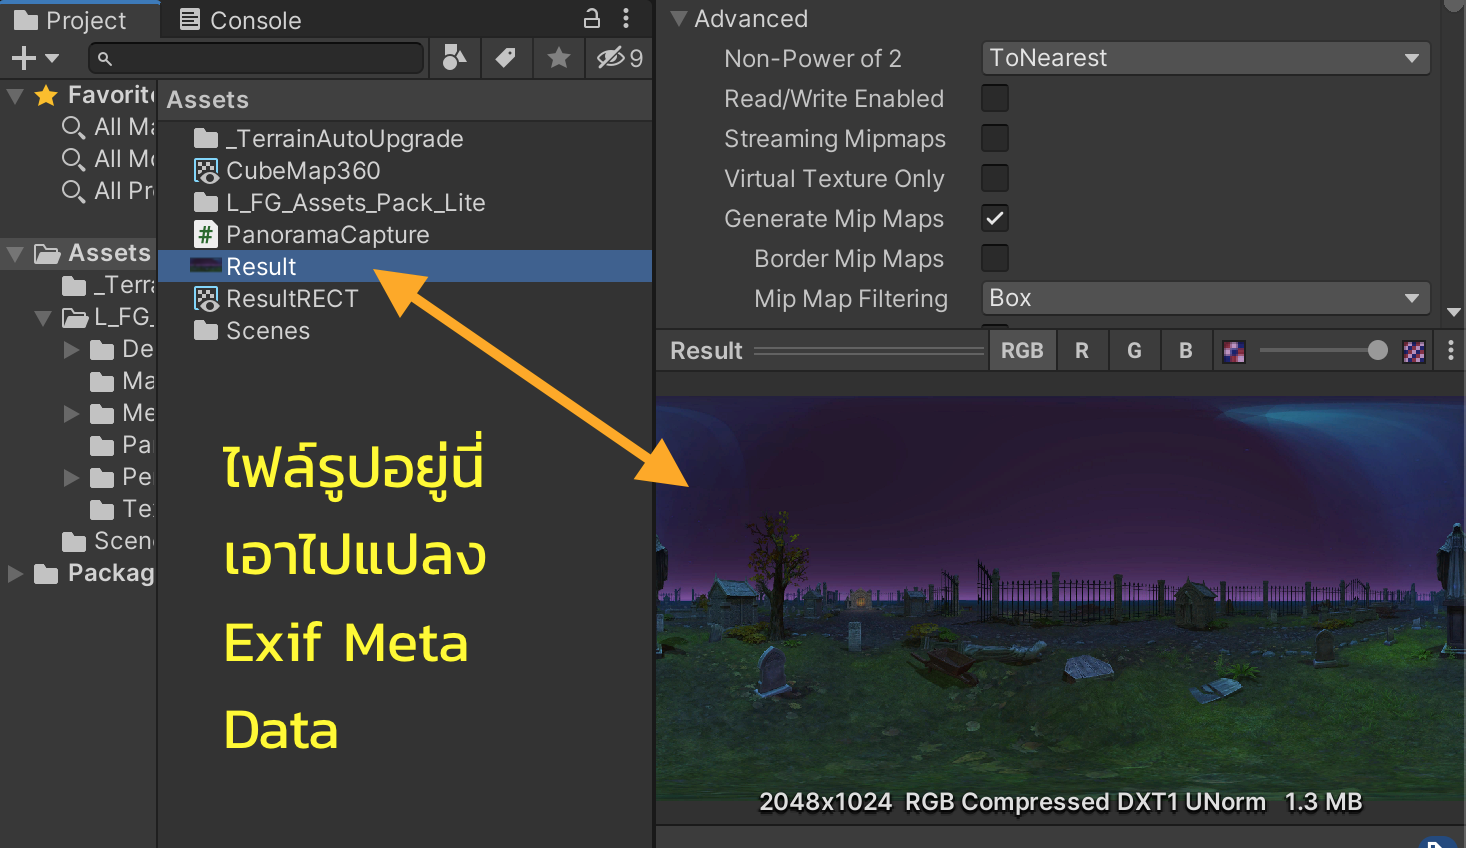
การแปลง Exif ก็ใช้ Python หรือโปรแกรมพวกแก้ไข Meta Data ของ Exif รูปภาพครับ
เช่น: https://pypi.org/project/exif/
แก้ไข Exif ตามค่าแบบนี้:
-xmp:ProjectionType=equirectangular
-xmp:CroppedAreaLeftPixels=0
-xmp:CroppedAreaTopPixels=0
-xmp:CroppedAreaImageWidthPixels=4098
-xmp:CroppedAreaImageHeightPixels=2048
-xmp:FullPanoWidthPixels=4098
-xmp:FullPanoHeightPixels=2049
-xmp:UsePanoramaViewer=true
ลองเอาไปโพสบน Facebook ดูหน่อยละกัน
รบกวนใครที่เอาไปทำ Tutorial บน YouTube ฝากอ้างอิง Link ที่คำอธิบายหรือ Video ให้หน่อยก็ดีนะครับ