บทเรียนต่อไปนี้จะเป็นการสร้างเกม 2 มิติด้วย Unity ประเภท 2D Action Platform-Side Scrolling Game โดยทฤษฏีที่ใช้ทั้งหมดคือ Collision Detection, Physic Engine และภาษา C#
บทเรียนการพัฒนาเกม 2 มิติย้อนหลัง
- Unity2D การนำ Sprite Sheets ไปสร้าง Animation ในเกม
- สร้างเกม 2D วิ่งเก็บของในฉากด้วย Unity
- สร้างเกม 2 มิติด้วย Unity 2D กับการทำเกม Side Scrolling Platform
ตัวอย่างในบทเรียนนี้เราจะใช้ คำสั่ง GameCamera.cs สำหรับติดตามกล้อง และ GameLogic.cs ในการสร้างเงื่อนไขของเกมให้จบเกมหรือได้คะแนนแบบเดิมครับ
เปิด New Project ขึ้นมา สร้างเกม 2D แล้วใช้ Resources ที่ตัวละครคือไฟล์ต่อไปนี้

ไปที่ เมนู Windows -> Asset Store เราจะไปทำการดาวน์โหลด Asset ที่จำเป็นเล็กน้อยของตัวเกมนี้ ประกอบไปด้วย Asset สำหรับการออกแบบฉาก Asset สำหรับ Effect การระเบิด ให้ไปดาวน์โหลด Assets ที่กำหนดไว้ข้างล่างนี้ครับ
https://www.assetstore.unity3d.com/en/#!/content/60458
https://www.assetstore.unity3d.com/en/#!/content/3045
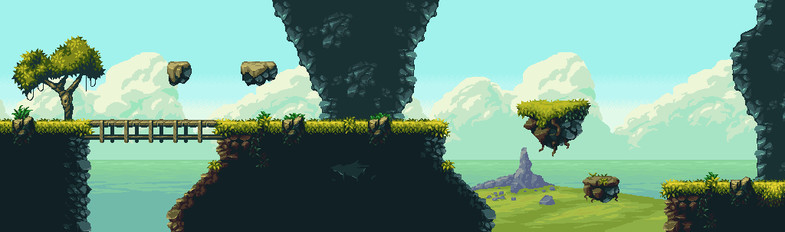
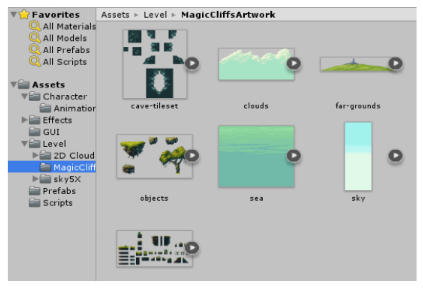
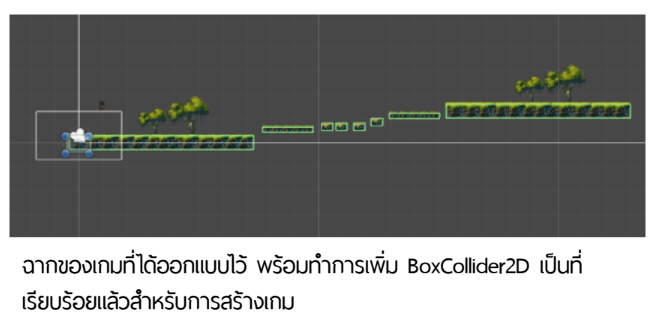
สร้าง Scene ใหม่ขึ้นมาทำการออกแบบฉากให้เรียบร้อยโดยใช้ Asset Magic Cliffs ในการวาง Level Design ครับเบื้องต้นรูปแบบของฉากมีการ Slice ไว้ให้เรียบร้อยแล้ว ทำให้เราลดเวลาในการสร้างเกมลงได้ไปเยอะในตัวอย่างนี้
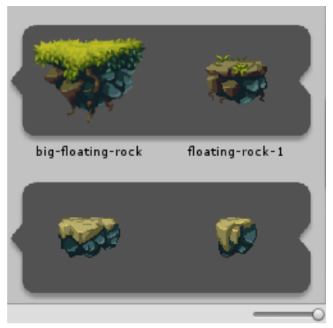
ลากไปวางใน Hierarchy พร้อมกำหนด RigidBody2D (ตั้งค่า Gravity Scale เป็น 0 น้ำหนัก mass ที่ 10,000) พร้อมควบคุม Detect ของ Collision ด้วย Box Collider2D (ไม่ต้องมี is Trigger)
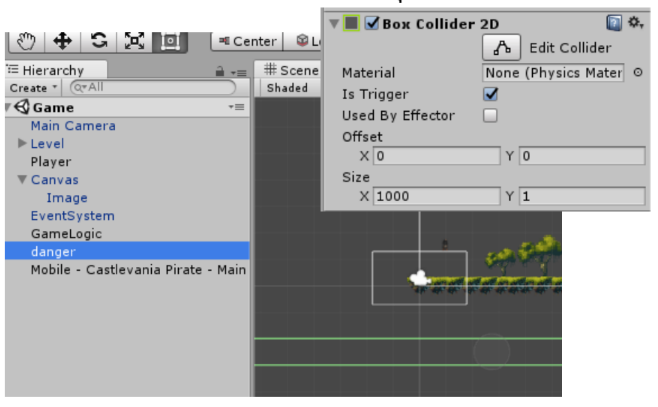
ให้สร้าง Empty GameObject ขึ้นมาตั้งชื่อว่า “danger” ปรับ Scale ให้ยาวทั่วแผนที่ของเรา แล้ววางในตำแหน่งที่อยู่ล่างสุดของเกมเป็นการกำหนดว่า ถ้าตัวละครตกฉากกระทบกับ danger จะเกิดเหตุการ Game Over ทันทีเพราะถ้าไม่มี ตัวละครจะหล่นไปเรื่อยๆ ไม่มีสิ้นสุด ดังนั้น danger ต้องกำหนด is Trigger ด้วยให้ Click ที่ช่องเพื่อเลือกให้มี is Trigger
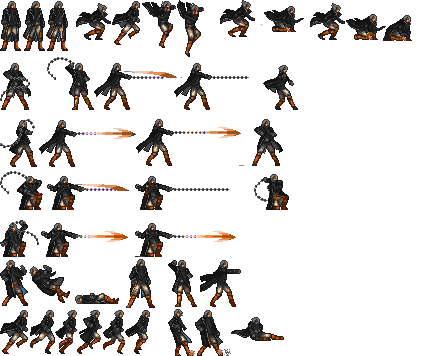
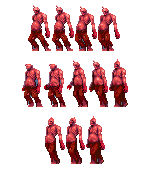
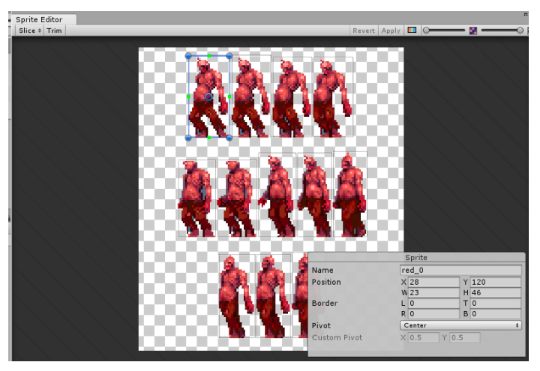
เปิดไฟล์ player.png ขึ้นมาทำการ Slice รูปภาพแบบ Auto เพื่อแยก Frame ของการเคลื่อนไหวตัวละครออกอย่างละเอียด (ให้ศึกษาบทความเก่าก่อนหน้า)
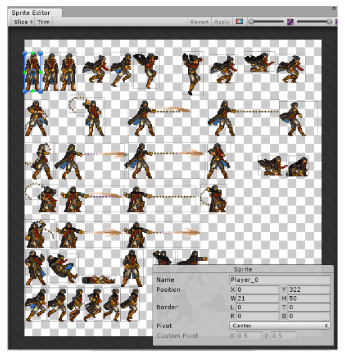
จัดการเซ็ตท่า Animation ที่จำเป็นจากภาพข้างบนให้เป็นชุด โดย Animation ที่ต้องใช้นั้นคือ Idle, Run, Attack, Jump และ Death ทั้งหมด 5 State เมื่อเสร็จแล้วให้สร้าง Animator Controller (ศึกษาจากบทเรียน Unity2D การนำ Sprite Sheets ไปสร้าง Animation ในเกม)
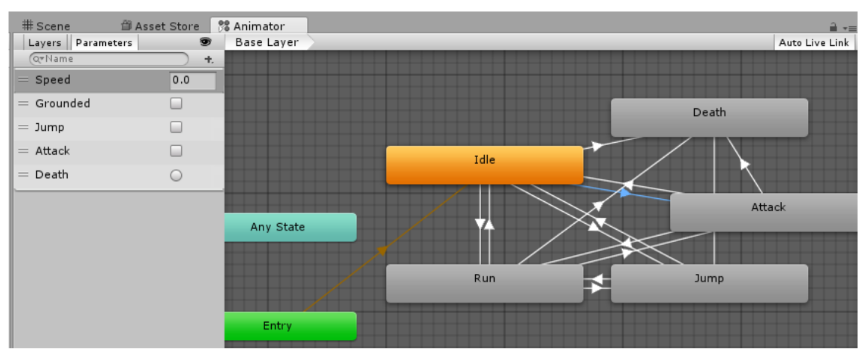 สร้าง Parameters ขึ้นมาประกอบไปด้วย
- Speed เป็น float เพื่อรับค่าปุ่มการเดินไปทางซ้ายหรือขวา
- Grounded เป็น bool เพื่อตรวจสอบว่าการกระทำอยู่บนพื้นหรือเปล่า (ในเกมเป็น True ทุกกรณี)
- Attack เป็น bool เช็คสถานะว่าเกิดการโจมตี
- Jump เป็น bool เช็คสถานะว่าเกิดการกระโดด
- Death เป็น Trigger สั่งให้เกิดการตาย
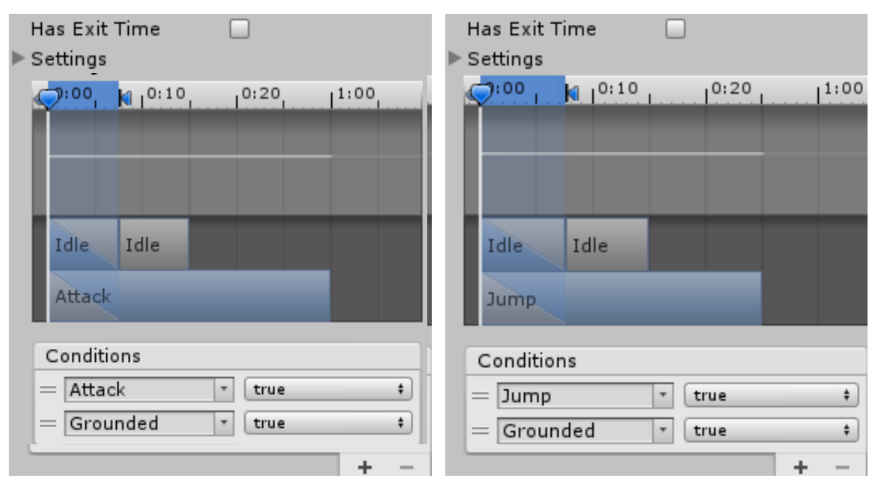
การโยงเส้น Transition ถูกกำหนดดังนี้ Idle ไป Run กำหนด Has Exit Time ออกไป เพิ่ม Condition คือ Speed Great 0.1 และ Grounded เป็น true ส่วนเส้น Run ไป Idle ให้เอา Has Exit Time ออก เพิ่อม condition คือ Speed less 0.1 และ Grounded เป็น true
สำหรับ Jump และ Attack กำหนดค่า Transition ไปและกลับดังนี้ เส้นไป true เส้นกลับเป็น false
ส่วนทุกสถานะโยงไปที่ Death เส้นเดียวแล้วตั้งค่า Trigger เป็น Death ก็จบครับ เมื่อพร้อมก็ลาก Animator Controller ไปใส่ใน Player ของเราครับ
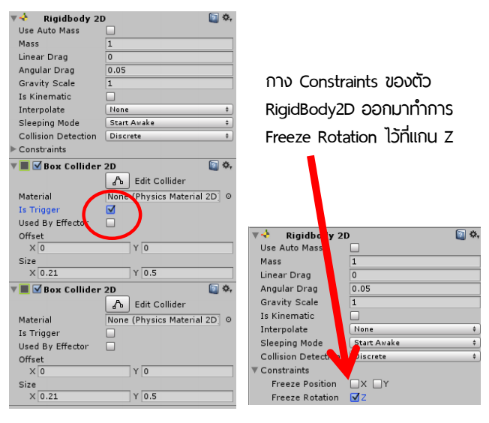
กำหนด RigidBody2D ให้กับ Player กาง Constraints ออกเลือก Freeze Rotation Z และ ใส่ BoxCollider2D ให้กับ Player 2 ตัว โดยใน 1 ตัวกำหนด is Trigger เป็นเครื่องหมายถูกไว้
สร้างไฟล์ Player.cs ขึ้นมาประกาศตัวแปรกำหนดค่าเบื้องต้นไว้บน Header ของ Class Player() ดังนี้
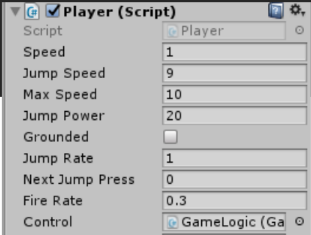
public float speed = 1f;
public float jumpSpeed = 9f;
public float maxSpeed = 10f;
public float jumpPower = 20f;
public bool grounded;
public float jumpRate = 1f;
public float nextJumpPress = 0.0f;
public float fireRate = 0.3f;
private float nextFire = 0.0f;
private Rigidbody2D rigidbody2d;
private Physics2D physics2d;
private Animator anim;
public GameLogic control;
public GameObject HitArea;
public int healthBar = 100;
โดยตัวแปรที่ใช้คือส่วนของการเคลื่อนไหว การกำหนดระยะของการกระโดดไม่ให้กระโดดได้ต่อเนื่อง และเพิ่มคำสั่งของการรับค่า GameLogic.cs ไฟล์เกมแบบ OOP มาเก็บในตัวแปร control ต่อมาคำสั่งที่เหมือนจำลองปากกระบอกปืนไว้ที่ตัวละครสำหรับยิงกระสุน คือ HitArea ให้ประกาศเป็น GameObject ส่วนสุดท้ายคือ heathBar คือแถบพลังของตัวละครเริ่มต้นที่ 100
void Start () {
  rigidbody2d = gameObject.GetComponent<Rigidbody2D>();
  anim = gameObject.GetComponent<Animator>();
}
รับค่า Component ของ RigidBody2D และ AnimatorController ของ Player เรามาเก็บไว้ในตัวแปรสำหรับเรียกใช้ให้สั้นลงผ่าน anim, rigidbody2d
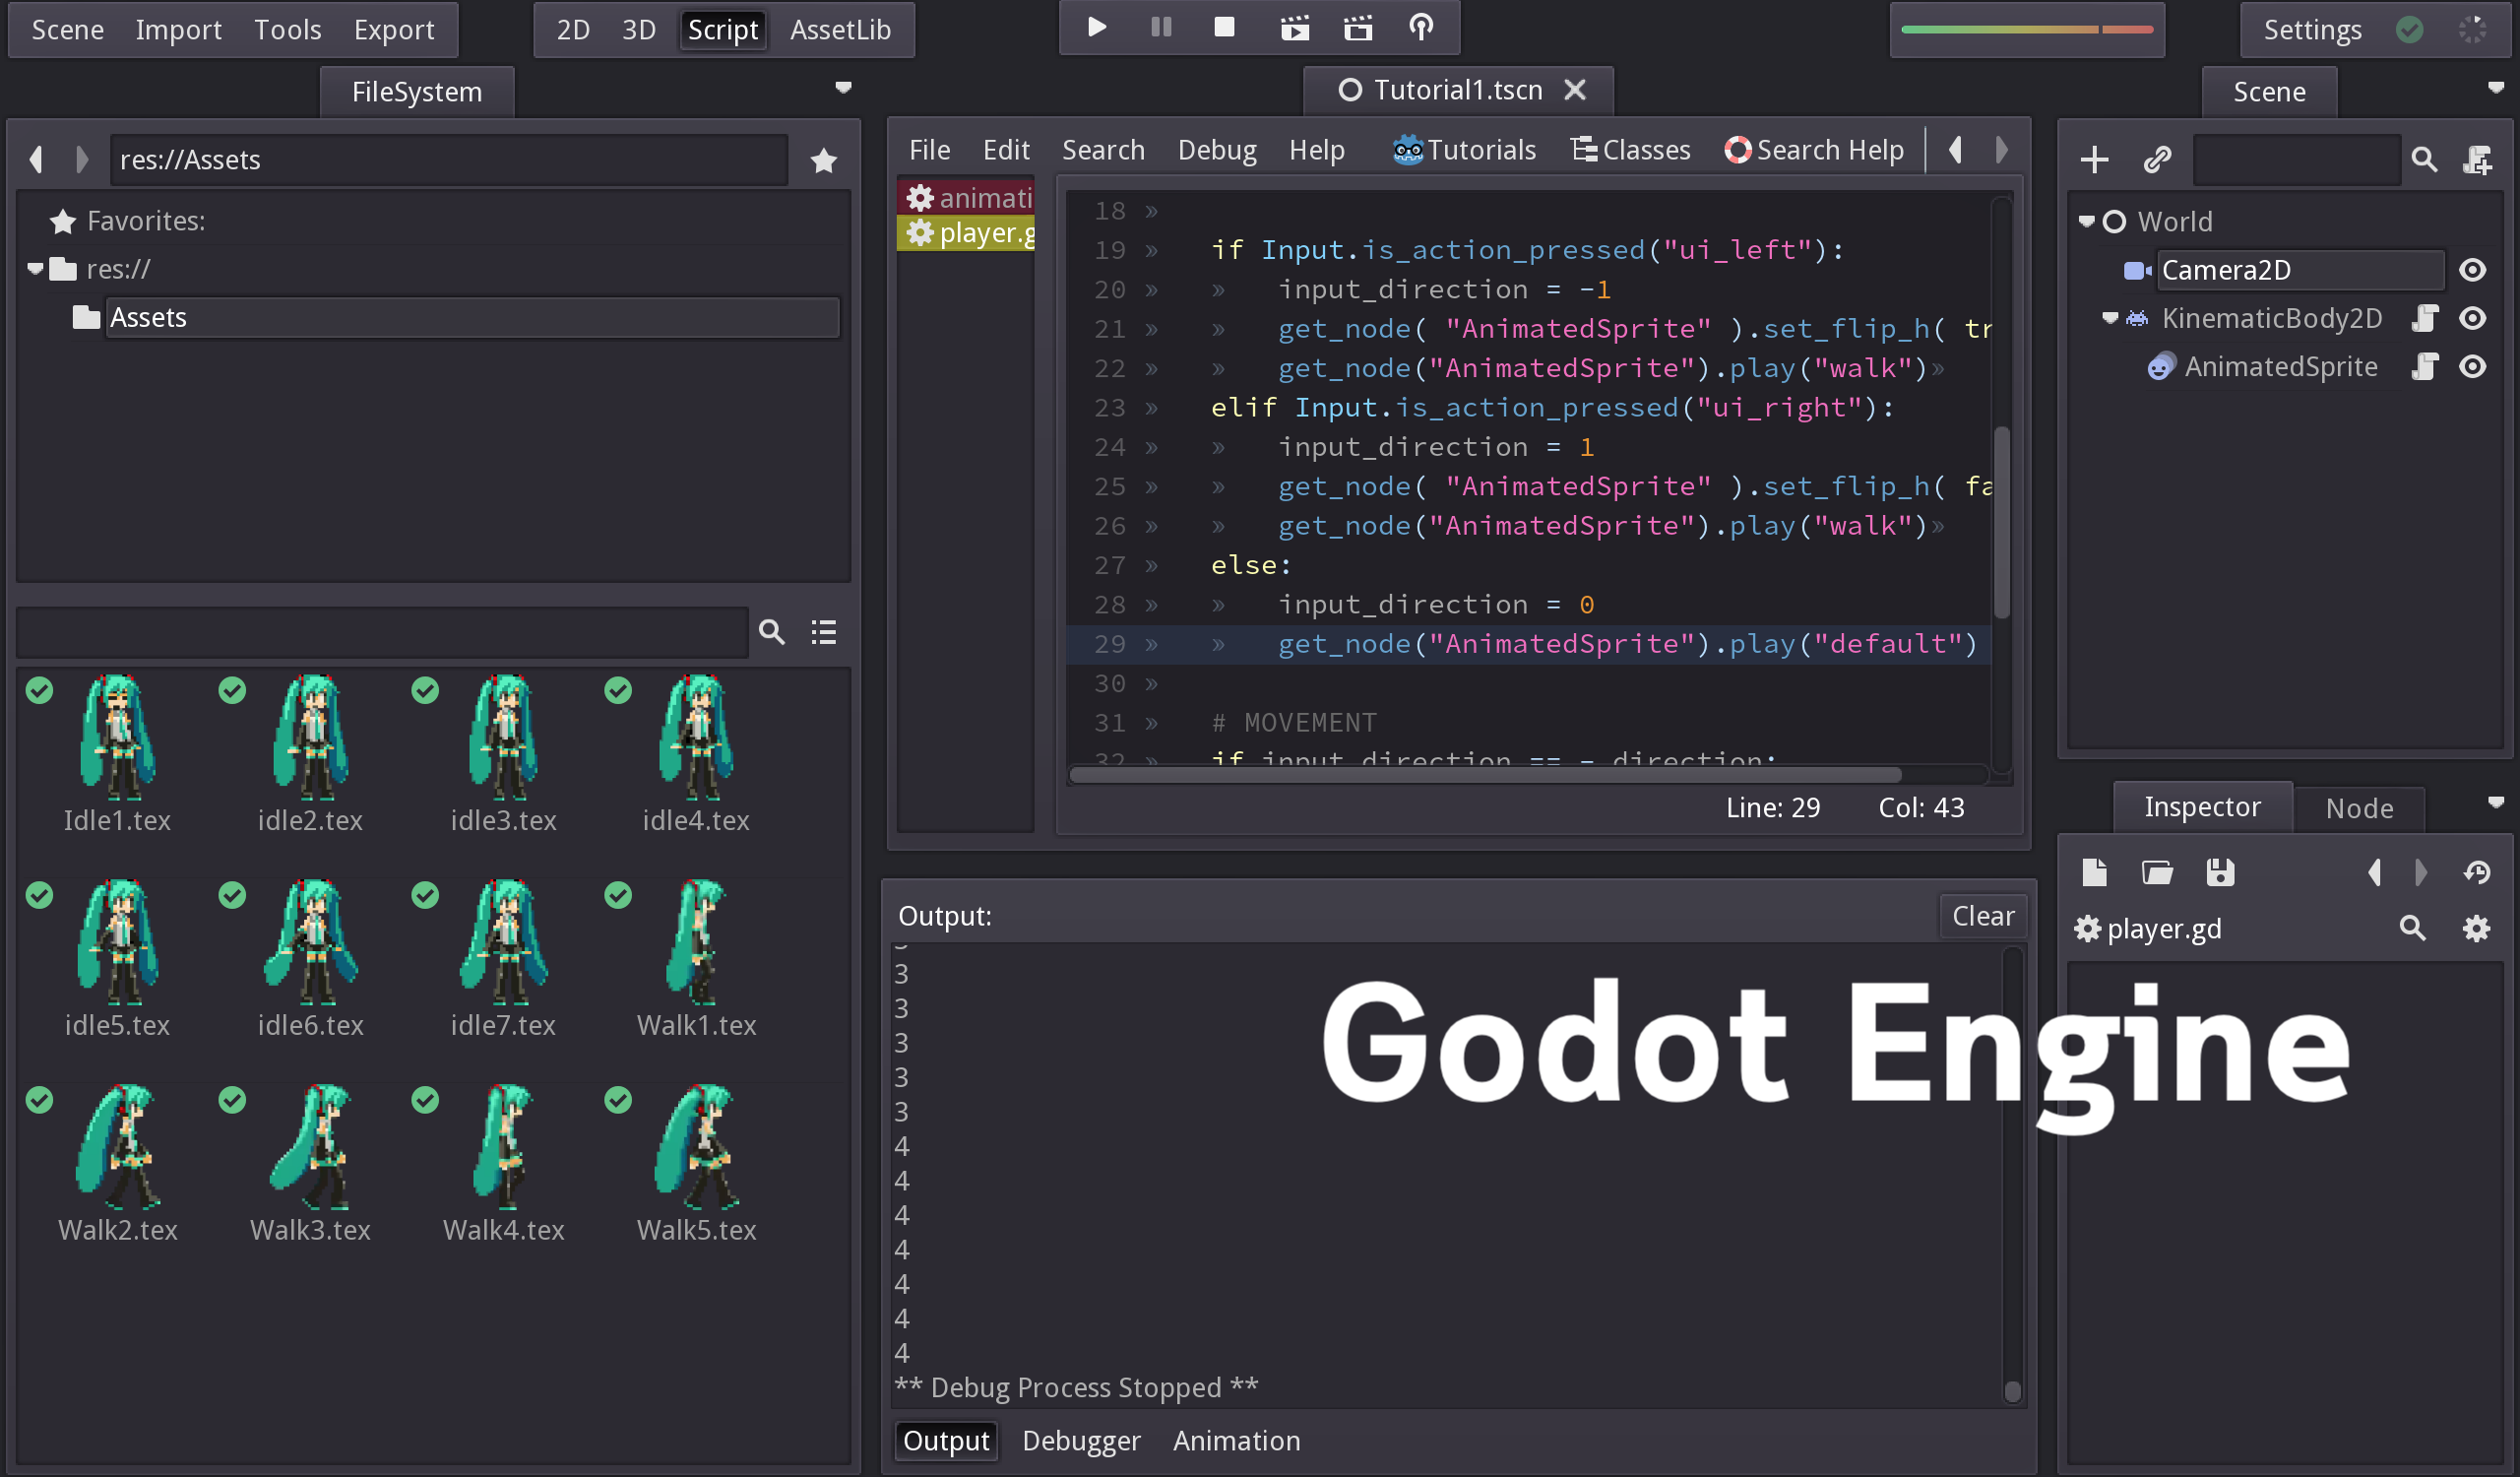
ไปที่เมธอด Update() เขียนคำสั่งในการควบคุมตัวละคร เพิ่มเข้ามา
void Update () {
  anim.SetBool("Grounded",true);
  anim.SetBool("Jump",false);
  anim.SetBool("Attack",false);
  anim.SetFloat("Speed",Mathf.Abs(Input.GetAxis("Horizontal")));

  if(Input.GetAxis("Horizontal") < -0.1f){
   transform.Translate(Vector2.right * speed * Time.deltaTime);
   transform.eulerAngles = new Vector2(0,180);
  }else if(Input.GetAxis("Horizontal") > 0.1f){
   transform.Translate(Vector2.right * speed * Time.deltaTime);
   transform.eulerAngles = new Vector2(0,0);
  }

  if(Input.GetButtonDown("Jump") && Time.time > nextJumpPress){
   anim.SetBool("Jump",true);
   nextJumpPress = Time.time + jumpRate;
   rigidbody2d.AddForce((Vector2.up * jumpPower)*jumpSpeed);
  }
  if (Input.GetKey(KeyCode.P) && Time.time > nextFire) {
   nextFire = Time.time + fireRate;
   anim.SetBool("Attack",true);
   Fire();
  }
}
เมื่อมีการรับค่าปุ่ม Keyboard แนวระนาบไปทางซ้าย หรือปุ่ม “A” ระบบ Unity จะส่ง Default floating system เป็น -0.1f มาให้
if(Input.GetAxis("Horizontal") < -0.1f){
สอดคล้องกับ Speed ใน animator ของเรา และเราก็เพียงแค่ เลื่อนตัวละครของเราไปทางซ้าย พร้อม Rotate ภาพ Player เราให้หันซ้ายไป 180 องศาทันที
  transform.Translate(Vector2.right * speed * Time.deltaTime);
   transform.eulerAngles = new Vector2(0,180);
ถ้าหันไปทางขวาก็จะเป็น
if(Input.GetAxis("Horizontal") > 0.1f){
   transform.Translate(Vector2.right * speed * Time.deltaTime);
   transform.eulerAngles = new Vector2(0,0);
  }
กระโดด และโจมตีจะมีเงื่อนไขการควบคุมด้วยระยะเวลารับค่าปุ่มเมื่อไม่ให้เกิดการยิงรัวๆ แบบ Flood หรือกระโดดรัวๆ จนเหาะได้
if(Input.GetButtonDown("Jump") && Time.time > nextJumpPress){
   anim.SetBool("Jump",true);
   nextJumpPress = Time.time + jumpRate;
   rigidbody2d.AddForce((Vector2.up * jumpPower)*jumpSpeed);
  }
  if (Input.GetKey(KeyCode.P) && Time.time > nextFire) {
   nextFire = Time.time + fireRate;
   anim.SetBool("Attack",true);
   Fire();
  }
กดปุ่ม P จะมีการไปเรียกเมธอดที่ชื่อว่า Fire(); ให้เราเขียนเมธอดใหม่เข้าไปว่า Fire() ครับก่อนปิดปีกกาสุดท้ายหรือ ก่อนจบ Class Player()
void Fire () {
 Instantiate(HitArea, transform.position, transform.rotation);
}
เราได้ประกาศ HitArea นั่นคือกระสุนที่จะไปเรียก GameObject มาเก็บไว้สำหรับดีดมันออกไปข้างหน้า Fire() คือเมธอดที่ใช้ในการดีดเจ้า GameObject ที่ชื่อ HitArea นี้พุ่งออกไปครับ
สุเดท้ายก็เงื่อนไขการวิ่งชนอะไรเกิดเหตุการอะไรหน่อยแล้วกัน ส่วนใหญ่จะทำงาร่วมกับไฟล์ GameLogic ให้เราเพิ่มใน Player.cs ก่อนปิด Class Player() อีกเช่นเคย
void OnTriggerEnter2D(Collider2D other){
  if(other.gameObject.name == "coin(Clone)"){
    Debug.Log("coin");
    control.GetItems();
    Destroy(other.gameObject);
   }else if(other.gameObject.name == "Enemy(Clone)"){
    control.CrashFire();
    healthBar-=20;
     if(healthBar <=0){
       healthBar = 0;
       StartCoroutine(WaitDeath());
     }
   } else if(other.gameObject.name == "danger"){
    StartCoroutine(WaitDeath());
   }
}

IEnumerator WaitDeath() {
   yield return new WaitForSeconds(2);
   anim.SetTrigger("Death");
   RectTransform rectTransform = GetComponent<RectTransform>();
   rectTransform.Rotate( new Vector3( 0, 0, 90 ) );
   control.isGameOver = true;
}

void OnGUI (){
  GUI.backgroundColor = Color.red;
  GUI.Button(new Rect(Screen.width-(Screen.width-65),12,(healthBar/2),20),"");
}
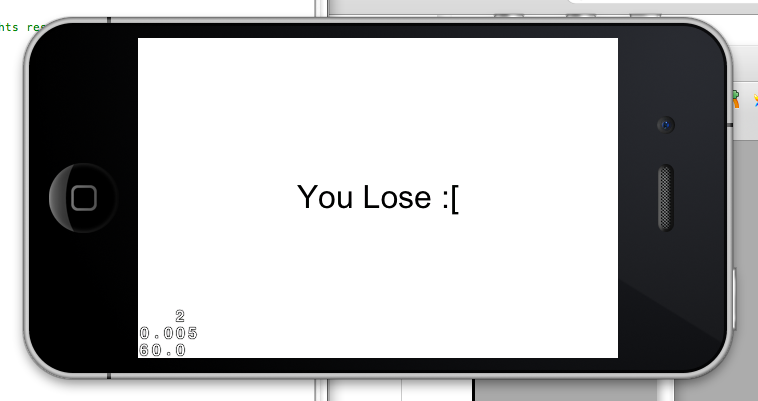
พอพลังหมด หรือชน พื้น danger จะเรียก
StartCoroutine(WaitDeath());
ซึ่งจะวิ่งไปที่
IEnumerator WaitDeath() {
   yield return new WaitForSeconds(2);
   anim.SetTrigger("Death");
   RectTransform rectTransform = GetComponent<RectTransform>();
   rectTransform.Rotate( new Vector3( 0, 0, 90 ) );
   control.isGameOver = true;
}
นั่นคือการหน่วงเวลาแสดง Animation ตอน Death 2 วินาที ส่วนของ แถบพลัง นั้นผมใช้ onGUI()
void OnGUI (){
  GUI.backgroundColor = Color.red;
  GUI.Button(new Rect(Screen.width-(Screen.width-65),12,(healthBar/2),20),"");
}
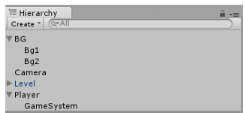
ไที่ Hierarchy ของ Unity สร้าง Empty GameObject ขึ้นมาตั้งชื่อว่า GameSystem แล้วใส่ GameLogic.cs ลงไป
ไฟล์ GameLogic.cs นั้นเป็นการกำหนด เงื่อนไขของเกมเช่น GameOver หน้าจอ Windows เงื่อนไขของพลังหมดไปจนถึงชนะเกม
using UnityEngine;
using System.Collections;
public class GameLogic : MonoBehaviour {
    float timeRemaining = 45f;
    float timeExtension = 3f;
    float timeDeduction = 2f;
    float totalTimeElapsed = 0;
    float score=0f;
    public bool isGameOver = false;

    void Start () {
        Time.timeScale = 1;
    }
    void Update () {
        if(isGameOver)
            return;
                //move out of the function
        totalTimeElapsed += Time.deltaTime;
        timeRemaining -= Time.deltaTime;
        if(timeRemaining <= 0){
            isGameOver = true;
        }
    }
    public void GetItems()
    {
        timeRemaining += timeExtension;
        score = score+1;
    }

    public void CrashFire()
    {
        timeRemaining -= timeDeduction;
    }
    void OnGUI()
    {
        if(!isGameOver)
        {
            GUI.Label(new Rect(10, 50, Screen.width/5,
                Screen.height/6),
                "เวลา: "+((int)timeRemaining).ToString());
            GUI.Label(new Rect(Screen.width-(Screen.width/6), 10,
                Screen.width/6, Screen.height/6),
                "คะแนน: "+((int)score).ToString());
        }

        else
        {
            Time.timeScale = 0;
            //Show Total Score
            GUI.Box(new Rect(Screen.width/4,
                Screen.height/4,
                Screen.width/2,
                Screen.height/2),
                "GAME OVER\nYOUR SCORE: "+(int)score);

            //Restart Game
            if (GUI.Button(new Rect(Screen.width/4+10,
                Screen.height/4+Screen.height/10+10,
                Screen.width/2-20, Screen.height/10),
                "RESTART")){
                Application.LoadLevel("Game");
            }

        }
    }

}
ลาก GameObject ชื่อ GameSystem ไปวางใน control ของ Player บน Inspector
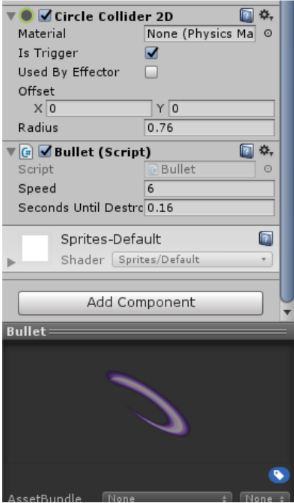
สร้าง Bullet กันสำหรับนำไปวางใน HitArea เราจะใช้ กราฟิก Bullet มาเป็นตัวกระสุน กำหนด Circle Collider2D ใส่ is Trigger ให้พร้อมสำหรับยิงออกไป เพิ่ม C# ขึ้นมาว่า Bullet.cs
using UnityEngine;
using System.Collections;

public class Bullet : MonoBehaviour {
public float speed = 6f;
public float SecondsUntilDestroy = 0.16f;
float startTime;

 void Start () {
   startTime = Time.time;
 }

 void Update () {
   transform.Translate(Vector2.right * speed * Time.deltaTime);
   if (Time.time - startTime >= SecondsUntilDestroy) {
     Destroy(this.gameObject);
   }
 }
}
เก็บการเขียนคำสั่งให้กระสุนพุ่งไปทิศข้างหน้าของจุดปล่อยไม่ว่าจะซ้ายหรือขวา ด้วยความเร็ว 6f และจะอยู่ในฉากแค่ 0.16f นั่นคือสักพักก็จะทำลายตัวเอง ตามคำสั่งข้างล่าง
transform.Translate(Vector2.right * speed * Time.deltaTime);
   if (Time.time - startTime >= SecondsUntilDestroy) {
     Destroy(this.gameObject);
   }
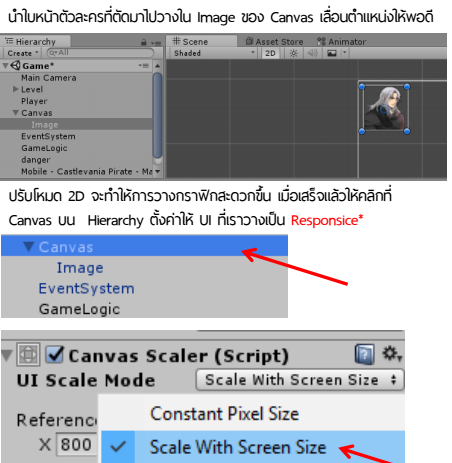
ไปที่ Hierarchy คลิกขวา เลือก UI->Image
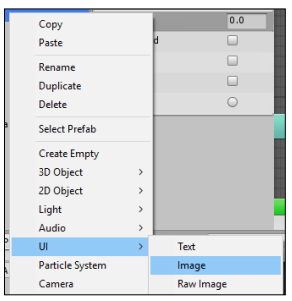
นำภาพใบหน้าตัวละครไปวางไว้แล้ว กดที่ Canvas ใน Hierarchy เลือกการปรับหน้าจอให้เป็น Responsive
ต่อมาให้เราสร้าง Enemy(Clone) สำหรับเป็น AI ตัวศัตรูเดินไปมาในฉาก และจะระเบิดไปเมื่อโดนกระสุนหรือ Bullet(Clone) ของเรา และถ้าเราวิ่งไปชนก็จะลดค่า healthBar จาก 100 ออกไป 20
 ทำการตั้งค่า Enemy(Clone) ตัวนี้โดยการ Slice เป็น Automatic นำ frame ทั้งหมดไปสร้างไฟล์ Animation และ Animator ให้เรียบร้อย ใส่ component ส่วนของ RigidBody2D สร้าง Constraint เป็น Freeze Rotation Z ให้เรียบร้อย เพิ่ม BoxCollider2D 2ค่า โดตัวใดตัวหนึ่งมี is Trigger เช่นเดียวกับ Player
สร้างไฟล์ C# ขึ้นมาชื่อว่า walker.cs ใส่ใน Enemy(Clone) ของเรา มีคำสั่งดังนี้
using UnityEngine;
using System.Collections;

public class Walker : MonoBehaviour {
        public float walkSpeed = 1.0f;
    public float wallLeft = 0.5f;
    public float wallRight = 0.5f;
    public float walkingDirection = 0.5f;
    public ParticleEmitter Explode;
    Vector3 walkAmount;
    void Update () {
        walkAmount.x = walkingDirection * walkSpeed * Time.deltaTime;
         if (walkingDirection > 0.0f && transform.position.x >= wallRight)
             walkingDirection = -1.0f;
         else if (walkingDirection < 0.0f && transform.position.x <= wallLeft)
             walkingDirection = 1.0f;
        transform.Translate(walkAmount);
    }
    void OnTriggerEnter2D(Collider2D other)
    {
        if(other.gameObject.name == "Bullet(Clone)")
        {
            Destroy(other.gameObject);
            Instantiate(Explode, transform.position, transform.rotation);
            Destroy(this.gameObject);
        }
    }
}
โดยกำหนดการเดินไปมาในฉากคือ ซ้ายขวาคำนวณตามระยะที่กำหนด
public float walkSpeed = 1.0f;
public float wallLeft = 0.5f;
public float wallRight = 0.5f;
public float walkingDirection = 0.5f;
หากโดนกระสุนจะมีการเรียก Effect มาใช้โดยประกาศที่ Header
public ParticleEmitter Explode;
และเรียกใช้ใน OnTriggerEnter2D() ดังนี้
if(other.gameObject.name == "Bullet(Clone)")
{
   Destroy(other.gameObject);
   Instantiate(Explode, transform.position, transform.rotation);
   Destroy(this.gameObject);
}
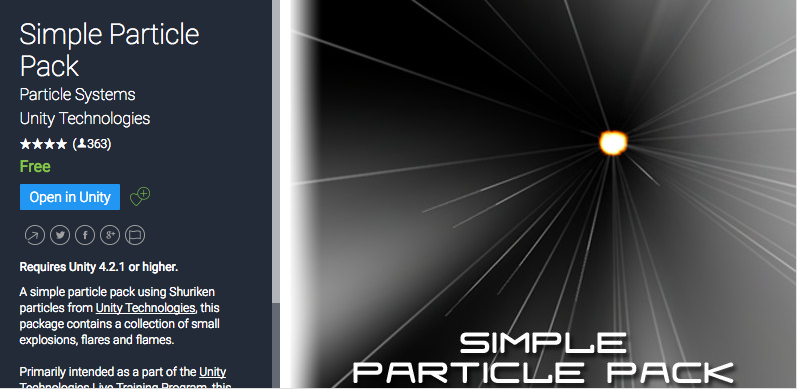
ในตัวอย่างนี้เราจะใช้ Assets ที่ชื่อว่า Simple Particle Pack ที่ดาวนฺโหลดมาใช้เป็น Effect สำหรับการระเบิดเมื่อศัตรูเราโดน Bullet
https://www.assetstore.unity3d.com/en/#!/content/3045
ให้เราเลือก Effect ที่ชอบใน Folder Assets->SimpleParticlePack->Resources->Explosions แล้วลาก Prefabs ของระเบิดที่ต้องการไปวางใน Hierarchy เพื่อทดสอบ
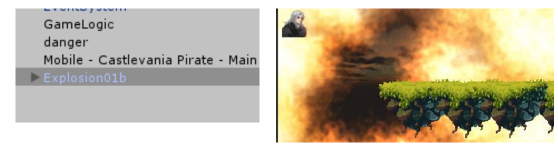
ตั้งค่า Add Component > Effects > Legacy Partic >Ellipsoid Particle Emitter ให้กับระเบิดทำการ Clone ไว้เป็น Prefabs ลบต้นแบบทิ้ง แล้วลากไปไว้ใน Explode ของ Enemy(Clone)

ทำการ Clone ตัว Enemy(Clone) เป็น Prefabs สำหรับลากไปวางบนฉาก เมื่อต้องการใช้ซ้ำ บ่อยๆ อย่าลืมเปลี่ยนชื่อเป็น Enemy(Clone) เพราะเงื่อนไขของ Player เรานั้นวิ่งชนส่วนนั้นได้อย่างเดียวครับ
ก็เป็นอันว่าเกมของเราเสร็จเรียบร้อยแล้ว หากไม่เข้าใจก็มีคลิปที่ผมได้ทำการสอนย้อนหลังไว้ให้นักศึกษาสาขาการออกแบบเชิงโต้ตอบและการพัฒนาเกม วิทยาลัยนวัตกรรมด้านเทคโนโลยี และวิศวกรรมศาสตร์ (CITE) มหาวิทยาลัยธุรกิจบัณฑิตย์ให้ดูประกอบ พร้อม Assets ครับ ที่วีดีโอข้างล่างเลย